BRP-Rotax
REPAIR MANUAL
ATTENTION
The reed petal mounted on the reed valve must be fixed in precisely the correct
installation position. Incorrect positioning of this valve leads to disturbed run-
ning of the engine due to incomplete combustion.
ATTENTION
The reed petal is bent, not flat. It must be fixed with the concave facing the valve
guide. If the valve guide with the correctly fitted reed valve is held up to the light,
it must not be possible to see through it.
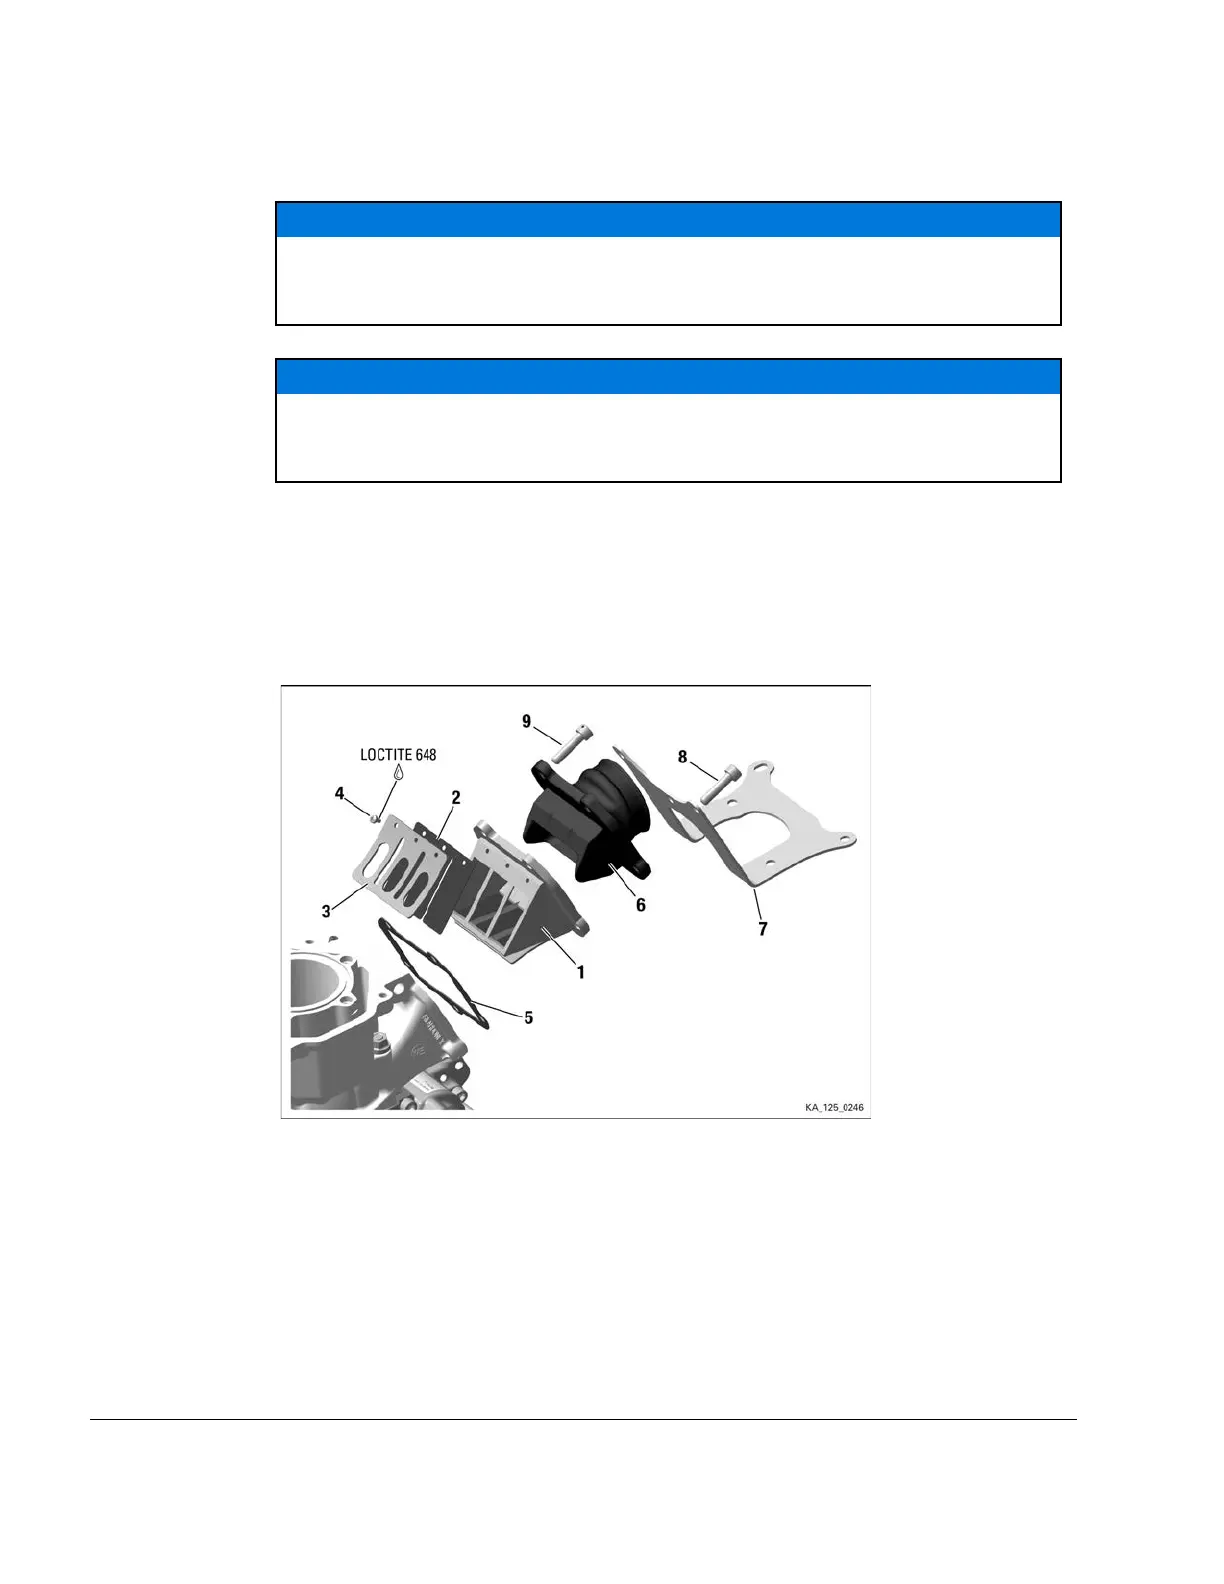
1. Attach the reed petal (2) and the valve detent (3) to the valve guide using recessed head
screws (4). Use LOCTITE 648 to lock the screws.
2. Position the gasket (5) on the cylinder.
3. Position the reed valve (1) and intake socket (6) and fasten together with the support bracket
(7) using 5 head screws M6x25 (8)(9). Tightening torque 7 Nm (62 in.lb).
Figure 4.26: Carburetor flange and reed valve
1 Reed valve 2
Reed petal
3 Valve detent 4 Recessed head screw M3x6
5 Gasket 6
Carburetor flange
7
Support bracket
8
Allen screw M6x25, with hole for sealing
the engine
9
Allen screw M6x25,
Chapter 4
Page 28
Effectivity: 125 MAX evo, Junior MAX
evo, Mini MAX evo, Micro MAX evo
Edition - February 01 2018 /Rev. 0

 Loading...


