72
Installation
Note
It is important to let the detection process finish running and then to click on OK at the
end.
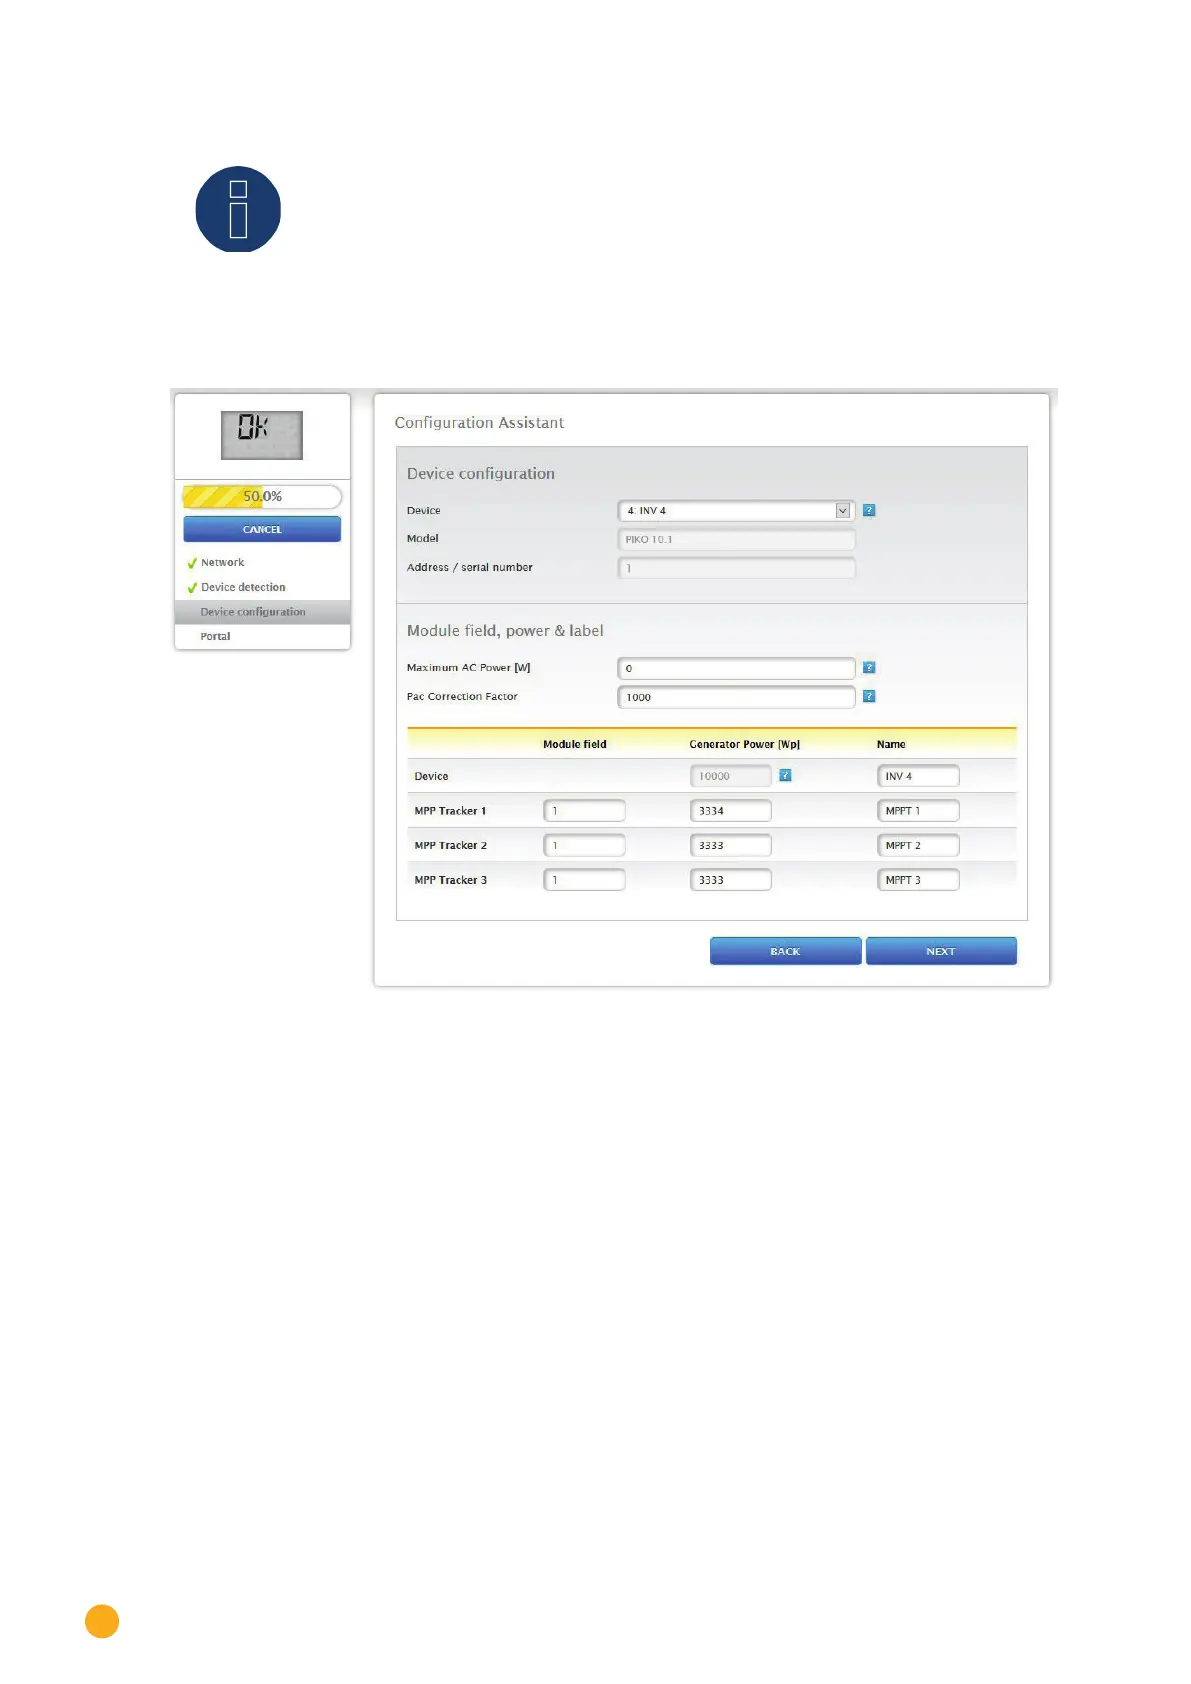
Click on „OK“ after a successful detection. Then click on „Next.“ The device configuration menu ap-
pears. In the device configuration, one can, for example, define the generator output, the module
fields and the names of the individual components. (Also refer to Chapter „
Device Configuration“)
Fig.: Example - Con guration Wizard - Device Con guration
The „Portal“ menu appears after clicking on the „Next“ button. The data transfer to the Solar-Log WEB
Enerest™ portal and local monitoring can be activated from this menu.
The box „Portal Server“ appears once the data transfer to the Solar-Log WEB Enerest™ portal is activated.
There are two options for entering the portal server:
•
Option when the Solar-Log™ has already been registered on the portal:
The portal server can be manually entered if it is known. Otherwise, it is possible to enter it auto-
matically with the obtain portal server function (by clicking on the globe symbol).
•
Option when the Solar-Log™ has not been registered on the portal:
If the Solar-Log™ has not been registered on the portal, the function to obtain portal server auto-
matically can be triggered with the globe symbol. Then the box „Portal Server“ is grayed out and
the Solar-Log™ enters a waiting state. The Solar-Log™ remains in this waiting state until it has been
registered in the Enerest portal (see the Solar-Log WEB Enerest™ User Manual, available to down-
load from https://www.solar-log.com). After that the Solar-Log™ obtains the portal server auto-
matically.
After activating local monitoring, the process can be completed by clicking on the „Next“ button. The
E-mail Settings menu then appears.