Wipers / Washers: 9D-10
Rear Wiper Relay Removal and Installation
S7RS0B9406012
Removal
1) Disconnect negative (–) cable at battery.
2) Remove junction block assembly referring to “BCM
(Included in Junction Block Assembly) Removal and
Installation in Section 10B”.
3) Remove rear wiper relay.
Installation
Reverse removal procedure for installation.
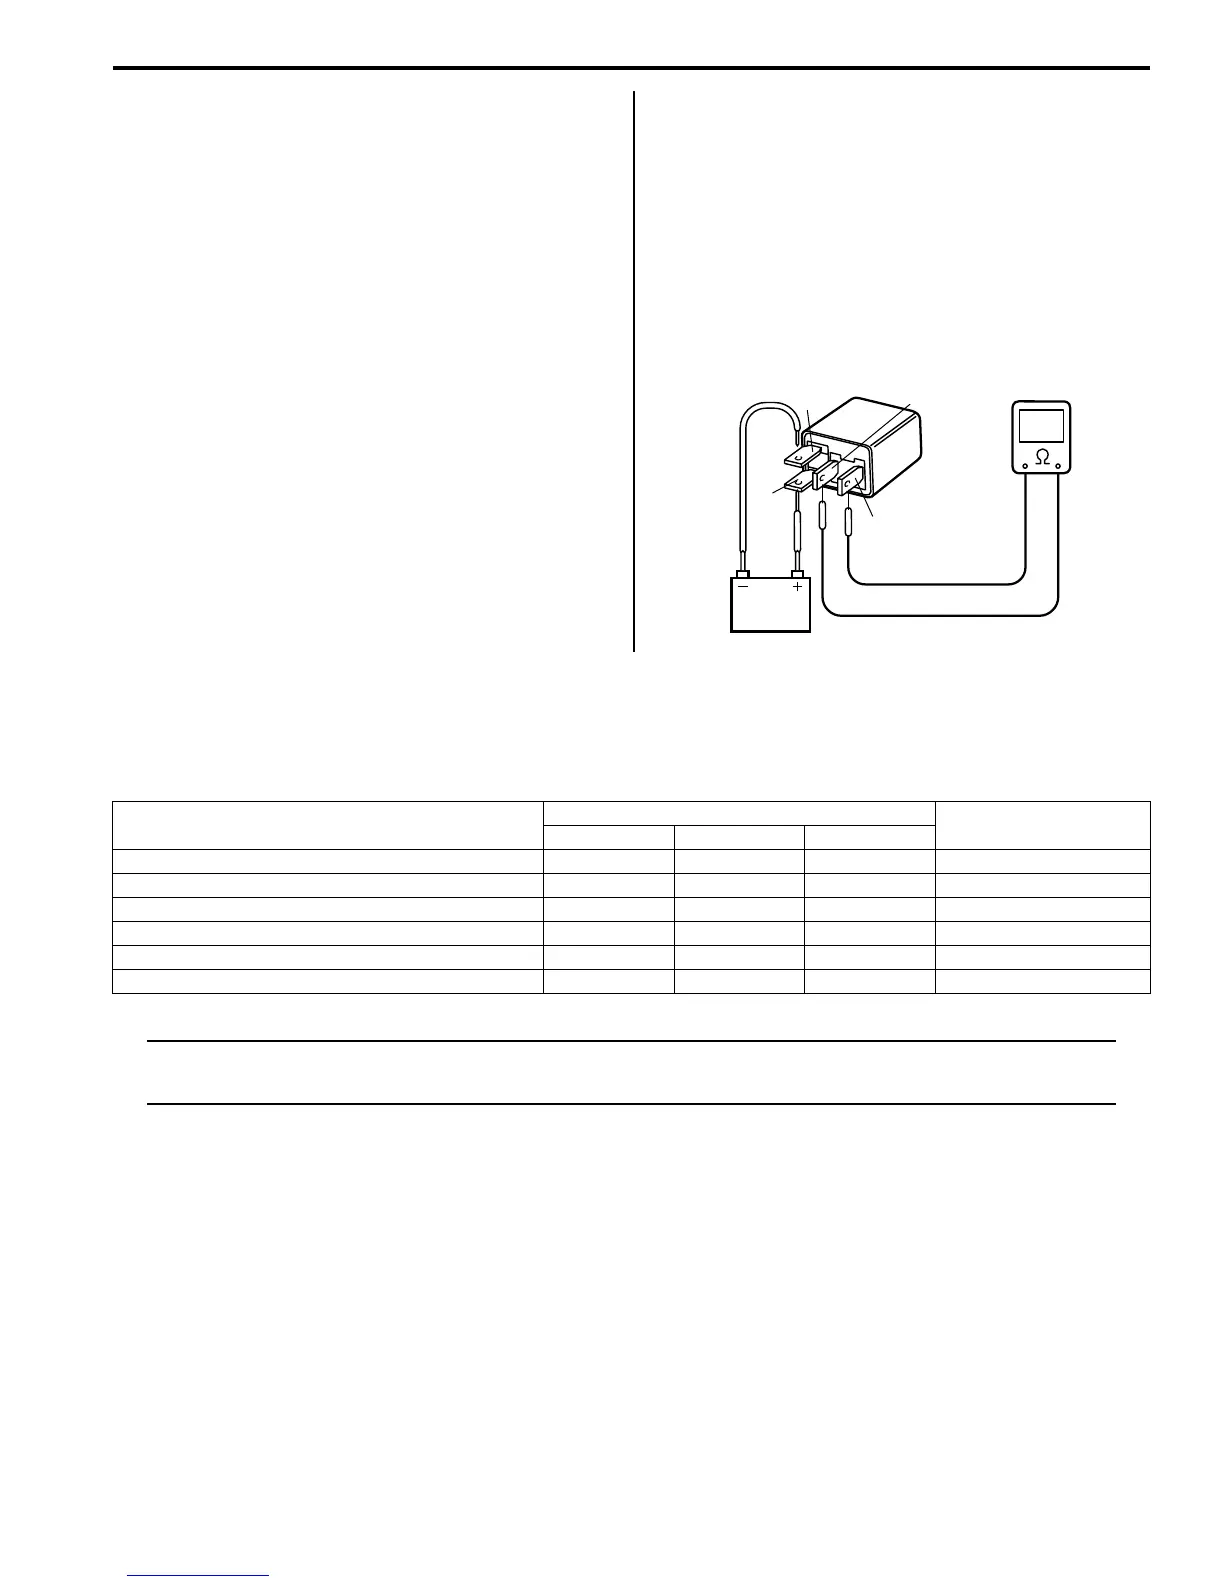
Rear Wiper Relay Inspection
S7RS0B9406013
1) Check that there is no continuity between terminal
“3” and “4”. If there is continuity, replace relay.
2) Connect battery positive (+) terminal to terminal “2”
of relay.
3) Connect battery negative (–) terminal to terminal “1”
of relay.
4) Check continuity between terminal “3” and “4”. If
there is no continuity when relay is connected to the
battery, replace relay.
Specifications
Tightening Torque Specifications
S7RS0B9407001
NOTE
The specified tightening torque is also described in the following.
“Wipers and Washers Components”
Reference:
For the tightening torque of fastener not specified in this section, refer to “Fasteners Information in Section 0A”.
“4”
“2”
“1”
“3”
I4RS0A940028-01
Fastening part
Tightening torque
Note
N⋅mkgf-mlb-ft
Washer tank bolt 4 0.4 3.0 )
Windshield wiper bolt 8 0.8 6.0 )
Windshield wiper arm nut 16 1.6 11.5 )
Rear wiper motor mounting bolt 8 0.8 6.0 )
Rear wiper nut 5 0.5 4.0 )
Rear wiper arm nut 8 0.8 6.0 )
 Loading...