2
www.teejet.com
MATRIX
®
Pro 570GS
•
MATRIX
®
Pro 840GS
HOME SETUP GUIDANCEFULL SCREEN IMPLEMENTGNSS RATE CONTROL APPENDIXINTRODUCTION
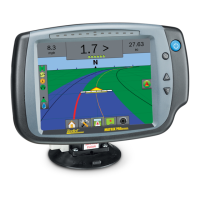
Matrix Pro 840GS console
The Matrix Pro 840GS is designed to provide years of service under typical agricultural operating conditions. A tight tting enclosure,
combined with rubber covers for all connectors mean that typical dusty environments will not cause operational problems. While
occasional splashing of water will not damage the unit, the Matrix Pro 840GS is not designed for direct exposure to rain. Take care not to
operate the Matrix Pro GS in wet conditions.
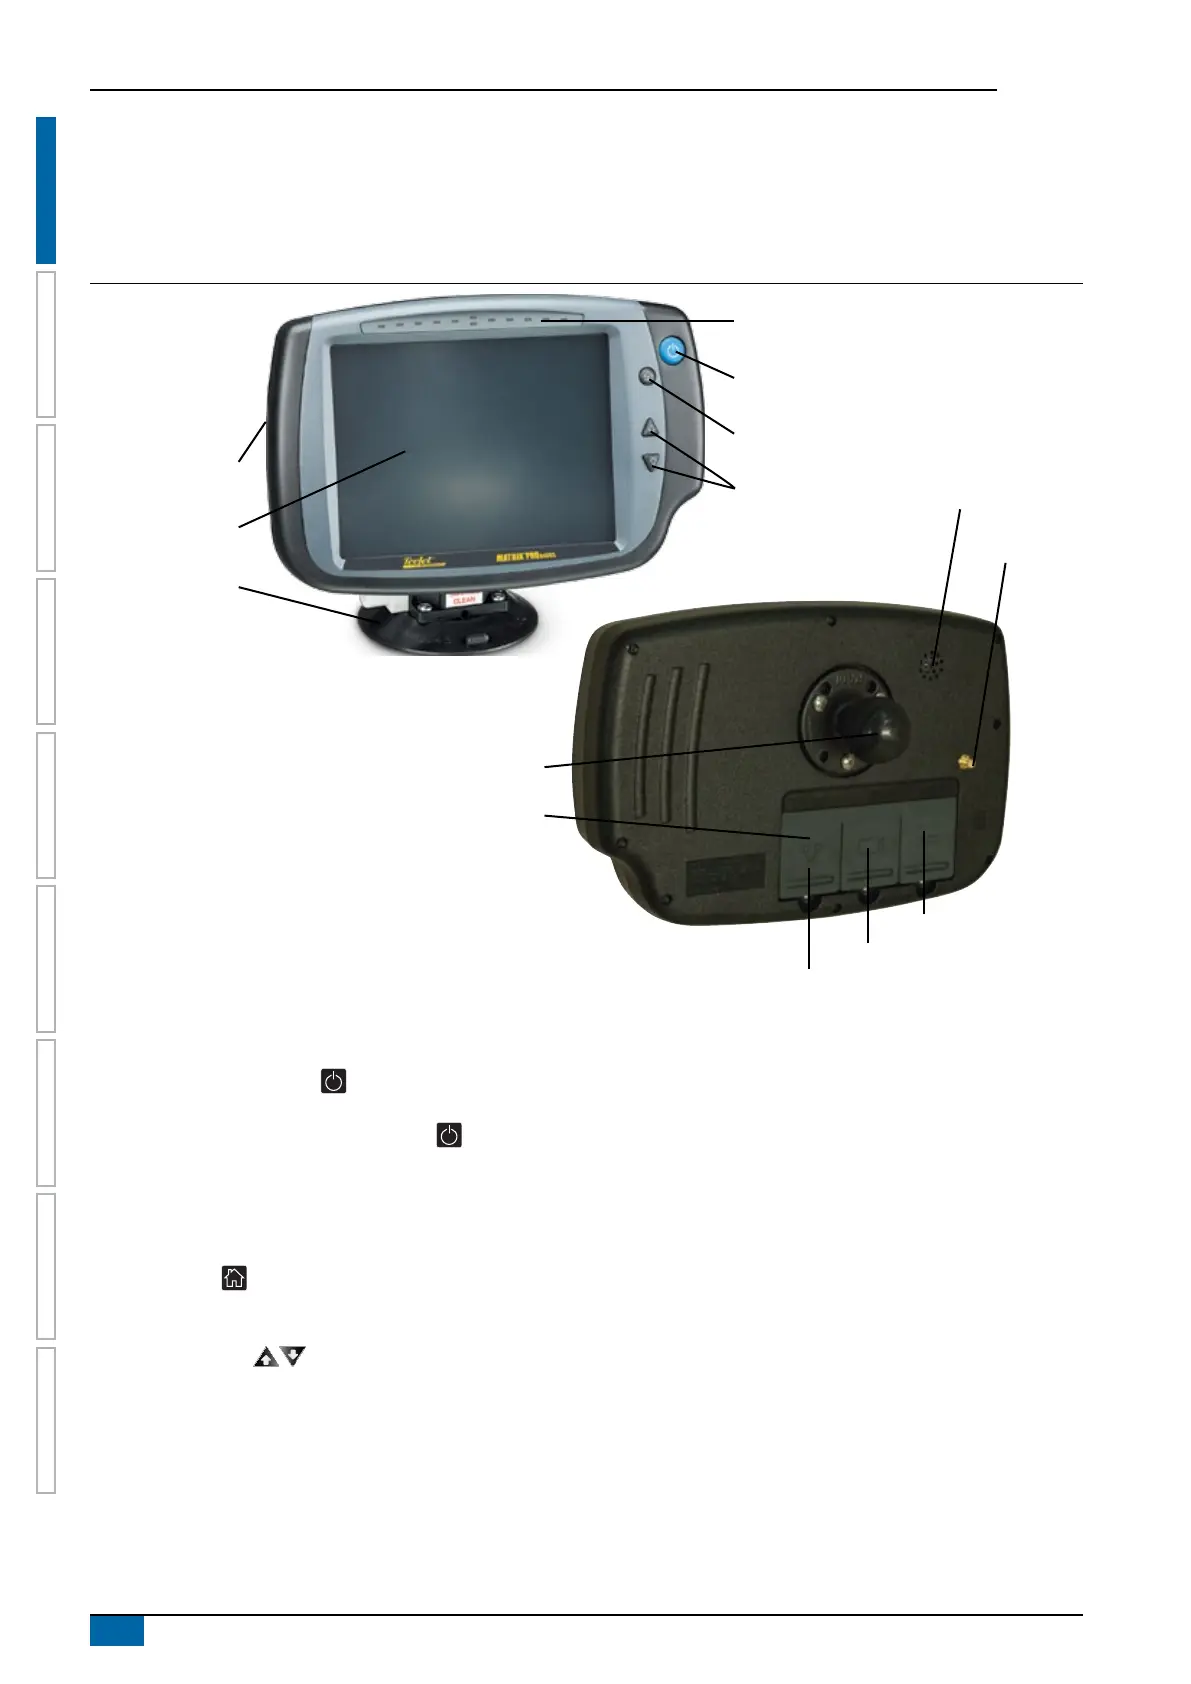
Figure 1-2: Matrix Pro 840GS console front and back
Built in lightbar
Power button
USB port
with rubber cover
Standard RAM bracket
(assembly required)
Bright touch screen
Home button
Zoom in/out buttons
Rubber connector
covers
GPS antenna
connection
Integrated RAM mount
(assembly required)
Speaker
Speed signal connection
Camera connection
Power connection
Buttons
Power on/off
On – Press the POWER button to power on the console. Upon
power up, the Matrix Pro GS will begin its start up sequence.
Off – Press and briey hold the POWER button until a
conrmation screen acknowledges shut down mode.
WARNING! Wait 10 seconds before restarting the console.
Home (Matrix Pro 840GS only)
The Home button provides a shortcut to the Home screen.
Up/Down (Matrix Pro 840GS only)
The Up/Down buttons adjust the vehicle’s view or
perspective to the horizon from vehicle view to bird’s eye view in
Vehicle View and Field View Guidance.
Additional information
All changes are saved automatically.
The console needs to be cycled off and back on when changing or
attaching equipment to the Matrix Pro GS system.
Start up sequence
The console takes approximately two minutes to power up. During
this time a series of screens will be displayed, LEDs will power on
and off, and brightness levels will uctuate. Once the power up
sequence has completed, the Home screen will appear.
Recommended antenna installation
The GNSS antenna should be mounted as far forward as possible
on top of the cab on a metal surface of at least 4 in / 10 cm
square.