GETTING STARTED
#1 Turn power on
Press the POWER button to power on the console.
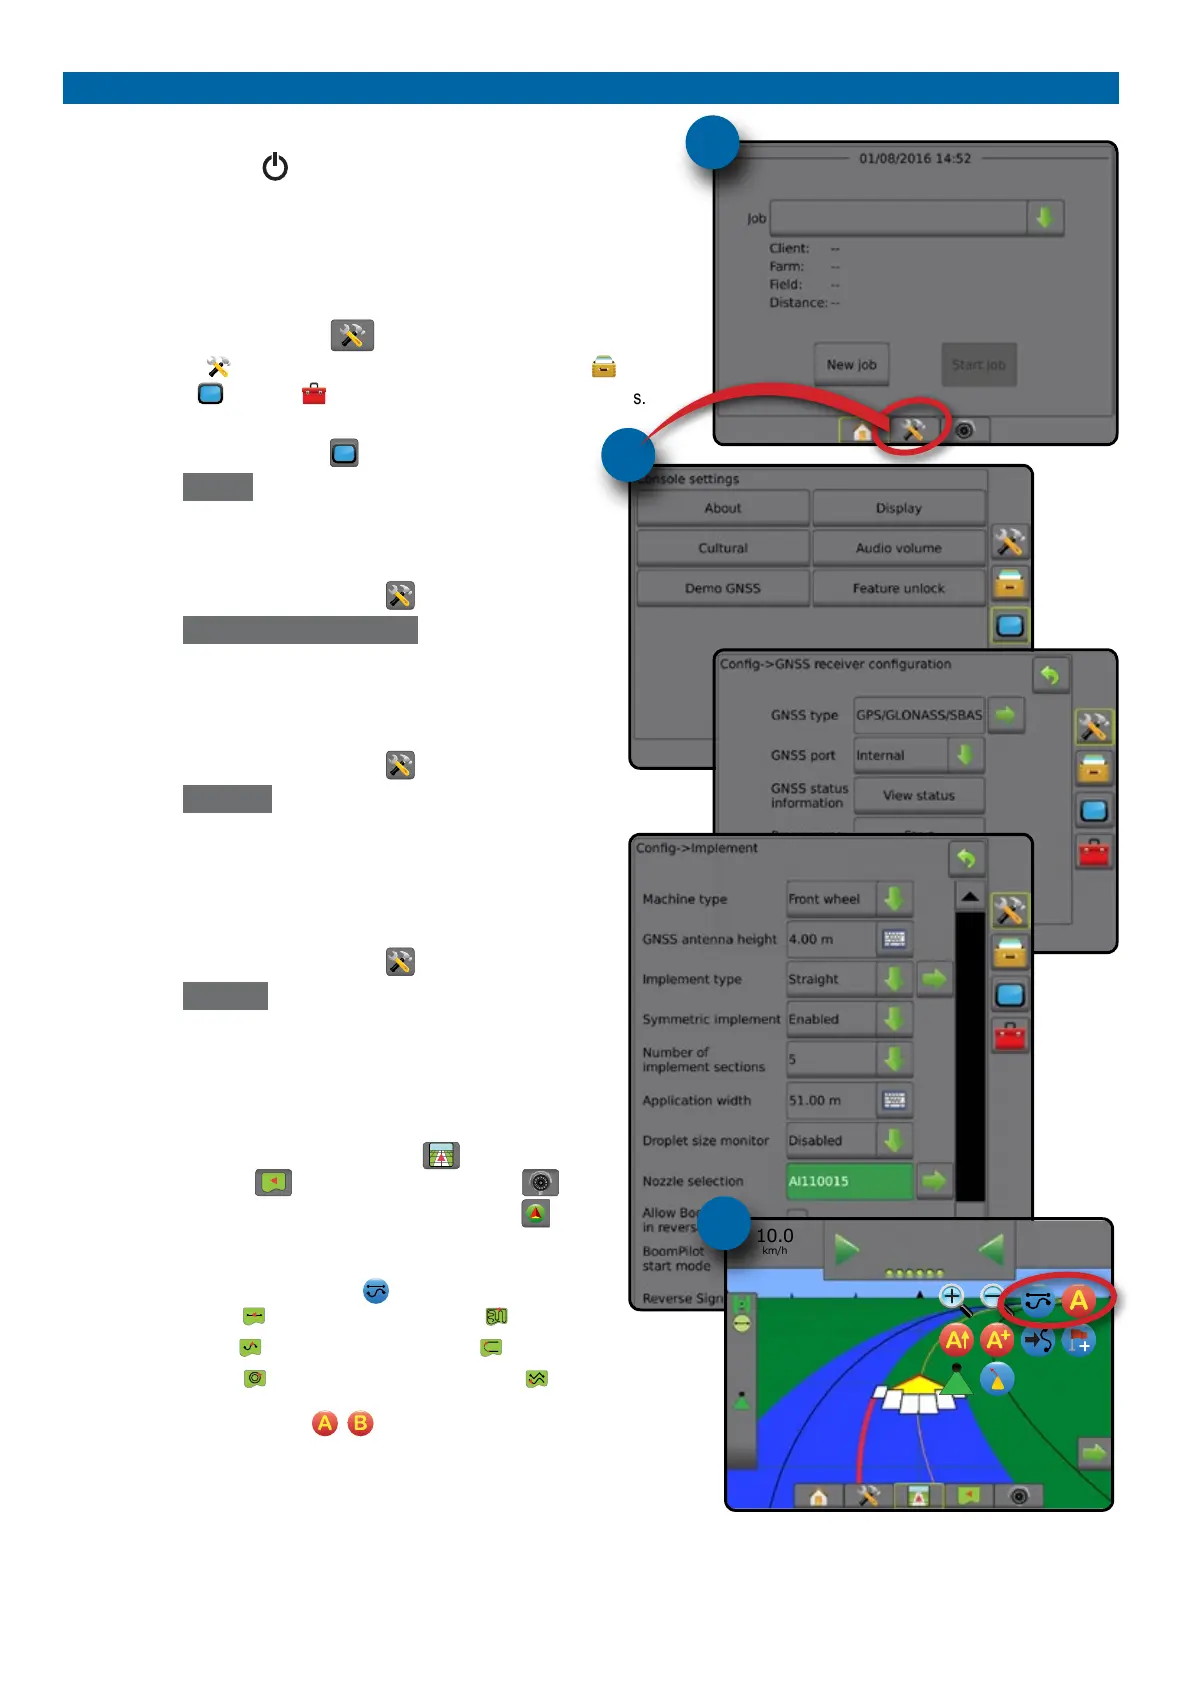
#2 Home screen
Once the power up sequence has completed, the Home screen will appear
with the option to start a new job or continue an existing job.
#3 Go to Unit setup
1. Press UNIT SETUP bottom tab .
The Conguration
options will be displayed rst. Data management ,
Console settings and Tools can be accessed through the side tab keys.
Cultural setup
1. Press CONSOLE side tab .
2. Press
Cultural .
Culture is used to congure units, language and time zone settings.
GNSS setup
1. Press CONFIGURATION side tab .
2. Press
GNSS Receiver Conguration .
GNSS is used to congure GNSS type, GNSS port and PRN as well
as to view GNSS status information.
Implement setup
1. Press CONFIGURATION side tab .
2. Press
Implement .
Implement setup is used to establish the various settings associated
with straight mode, spreader mode or staggered mode. Settings will
vary depending on if an AutoSteer or BoomPilot system is present.
AutoSteer setup
1. Press CONFIGURATION side tab .
2. Press
AutoSteer .
When a Steering Control Module (SCM or SCM Pro) is present,
assisted/auto steering options will be available. For detailed setup
instructions, refer to your specic AutoSteer installation manual.
#4 Go to Guidance screen
1. Press VEHICLE VIEW GUIDANCE tab , FIELD VIEW
GUIDANCE tab or REALVIEW GUIDANCE tab .
2. Press NAVIGATION AND GUIDANCE OPTIONS tab to
display navigation options.
Choose a guidance mode
►Straight AB
►Curved AB
►Circle Pivot
►Last Pass
►NextRow
►Adaptive Curve
Mark A and B points
To establish a AB guideline.
#3
#2
10.0
km/h
27.00
ha
0.0
#4