70
www.teejet.com
MATRIX
®
Pro 570GS
•
MATRIX
®
Pro 840GS
HOME SETUPFULL SCREEN IMPLEMENTINTRODUCTION GNSS RATE CONTROL APPENDIXGUIDANCE
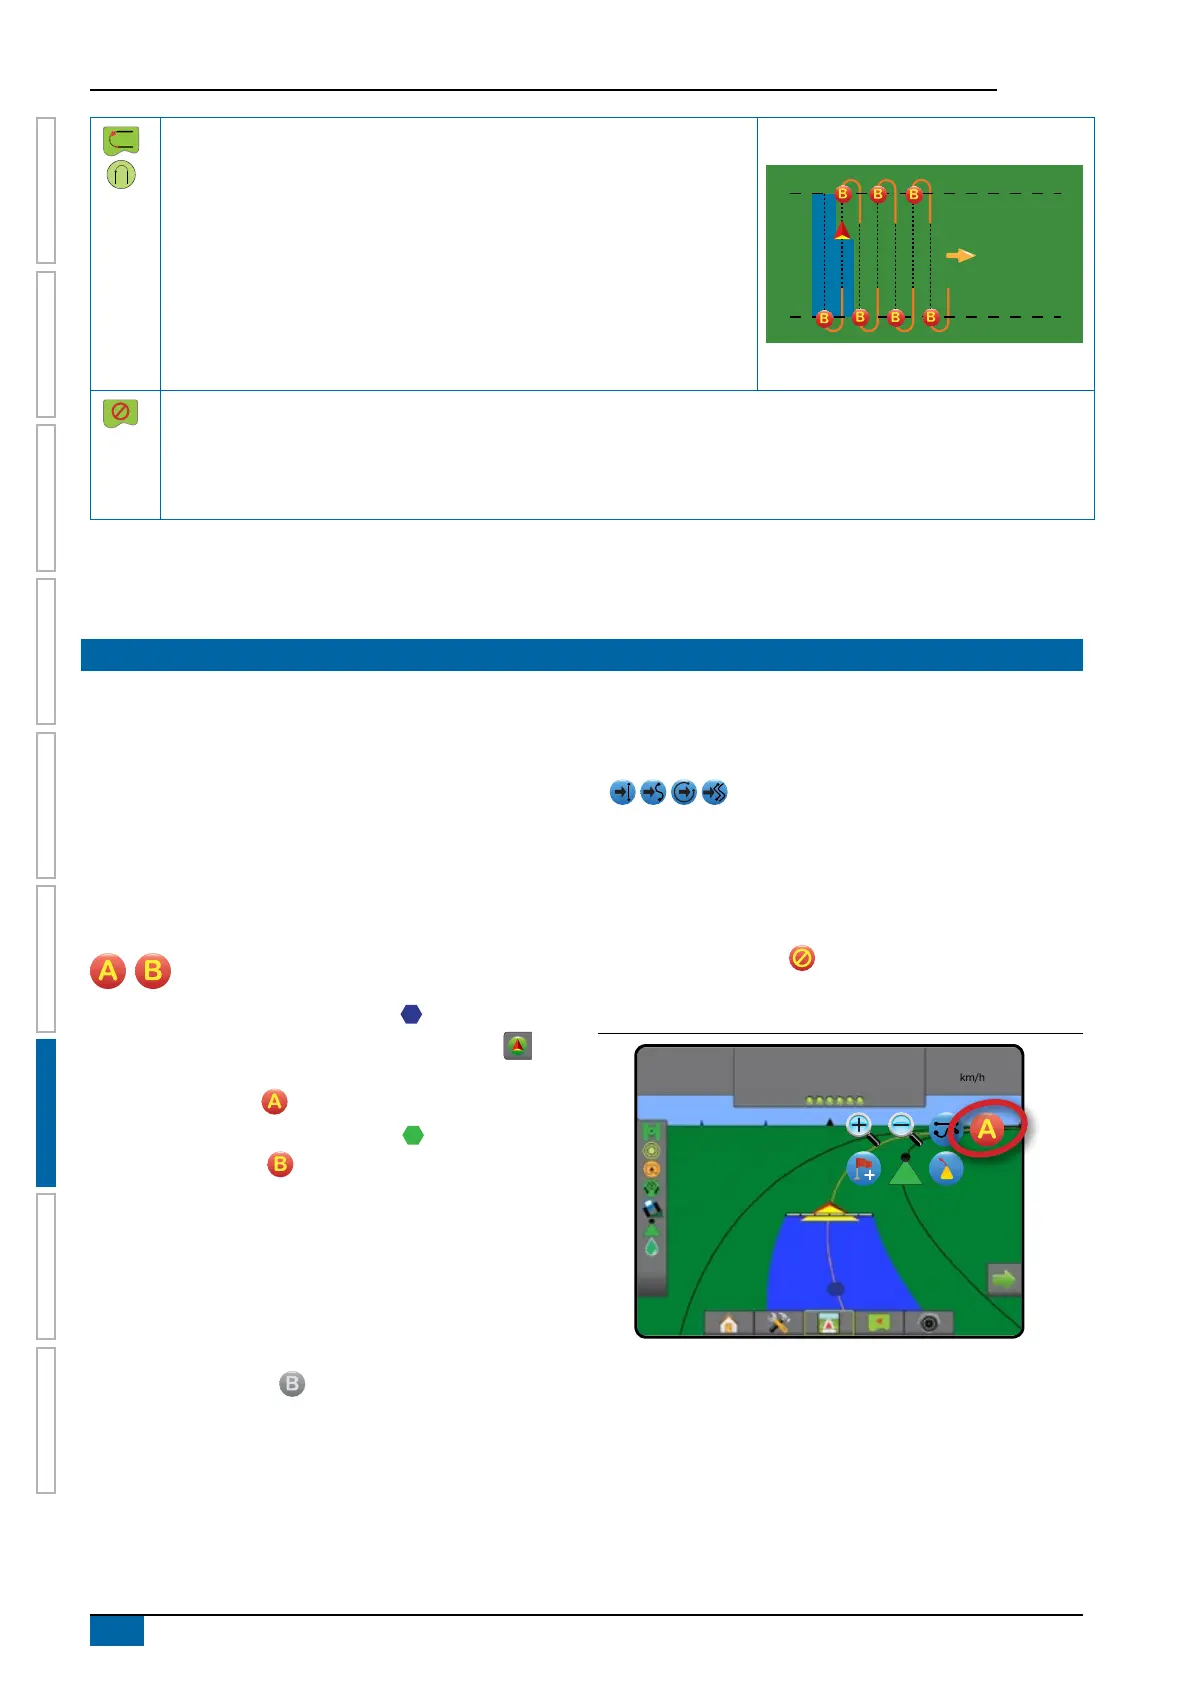
NextRow guidance
NextRow guidance* indicates where the NextRow is located, and provides
guidance at row ends to the next adjacent row. When the operator marks the
end of the row and begins turning to the next row, a Straight AB guidance line
is provided in the next row. When the vehicle is in the NextRow, guidance is
turned off.
NOTE: Offset to NextRow will be calculated using the guidance width: see
“Configuration-> Mapping and guidance” in the System setup chapter.
The NextRow Guidance does not support skipping rows.
No guidance
No guidance* turns off guidance.
NOTE: No guidance mode does not delete established guide lines or points from the console. To delete established/saved
data from the console, see “Data management” in the System setup chapter.
*Guidance options may not be available depending on assisted/automatic steering system installed.
Adjacent rows may be skipped in Straight AB guidance, Curved AB guidance, Adaptive curve guidance and Circle pivot guidance. Last
pass guidance and NextRow guidance do not support skipping adjacent rows.
GUIDELINES
AB guidelines, Azimuth guidelines, next pass guidelines, and NextRow guidelines are each available depending on the current guidance
mode. Switching from one guidance mode to another will change the current available guidelines.
Multiple guidelines can be created in each guidance mode. If more than one guideline is saved in a single guidance mode, the Next
Guideline feature will become available. By pressing the Next guideline option, the vehicle will be directed to the next
guideline saved in the console.
A user can duplicate and edit jobs for reuse of guidelines, boundaries, applied data, prescription map and/or polygons for different
applications over the same eld using Fieldware Link or the Data -
>
Job data -
>
Manage option.
Marking A and B points
To establish an AB guideline:
1. Drive to the desired location of Point A .
2. Press NAVIGATION AND GUIDANCE OPTIONS tab to
display navigation options.
3. Press MARK A icon .
4. Drive to the desired location of Point B .
5. Press MARK B icon to establish the AB line.
6. “Would you like to name this guideline?”
Press:
►Yes – to enter a name and save the guideline in the console
►No – to automatically generate a name and save the
guideline in the console
The console will begin providing navigation information.
NOTE: The MARK B icon is not available for selection (greyed
out) until the minimum distance is travelled (3.0 metres in
Straight,Curved or Adaptive curve guidance; 50.0 metres
in Circle pivot guidance).
NOTE: It is not necessary to drive the entire circumference of the
centre pivot in order to initiate Circle pivot guidance.
Use CANCEL MARK icon to cancel the Mark A command and
revert to the previous guideline (when established).
Figure 7-9: Mark A point
13:12
7.2
km/h
Mark A