79
98-05273-EN R7
MATRIX
®
Pro 570GS
•
MATRIX
®
Pro840GS
HOMESETUP FULL SCREENIMPLEMENT INTRODUCTIONGNSSRATE CONTROLAPPENDIX GUIDANCE
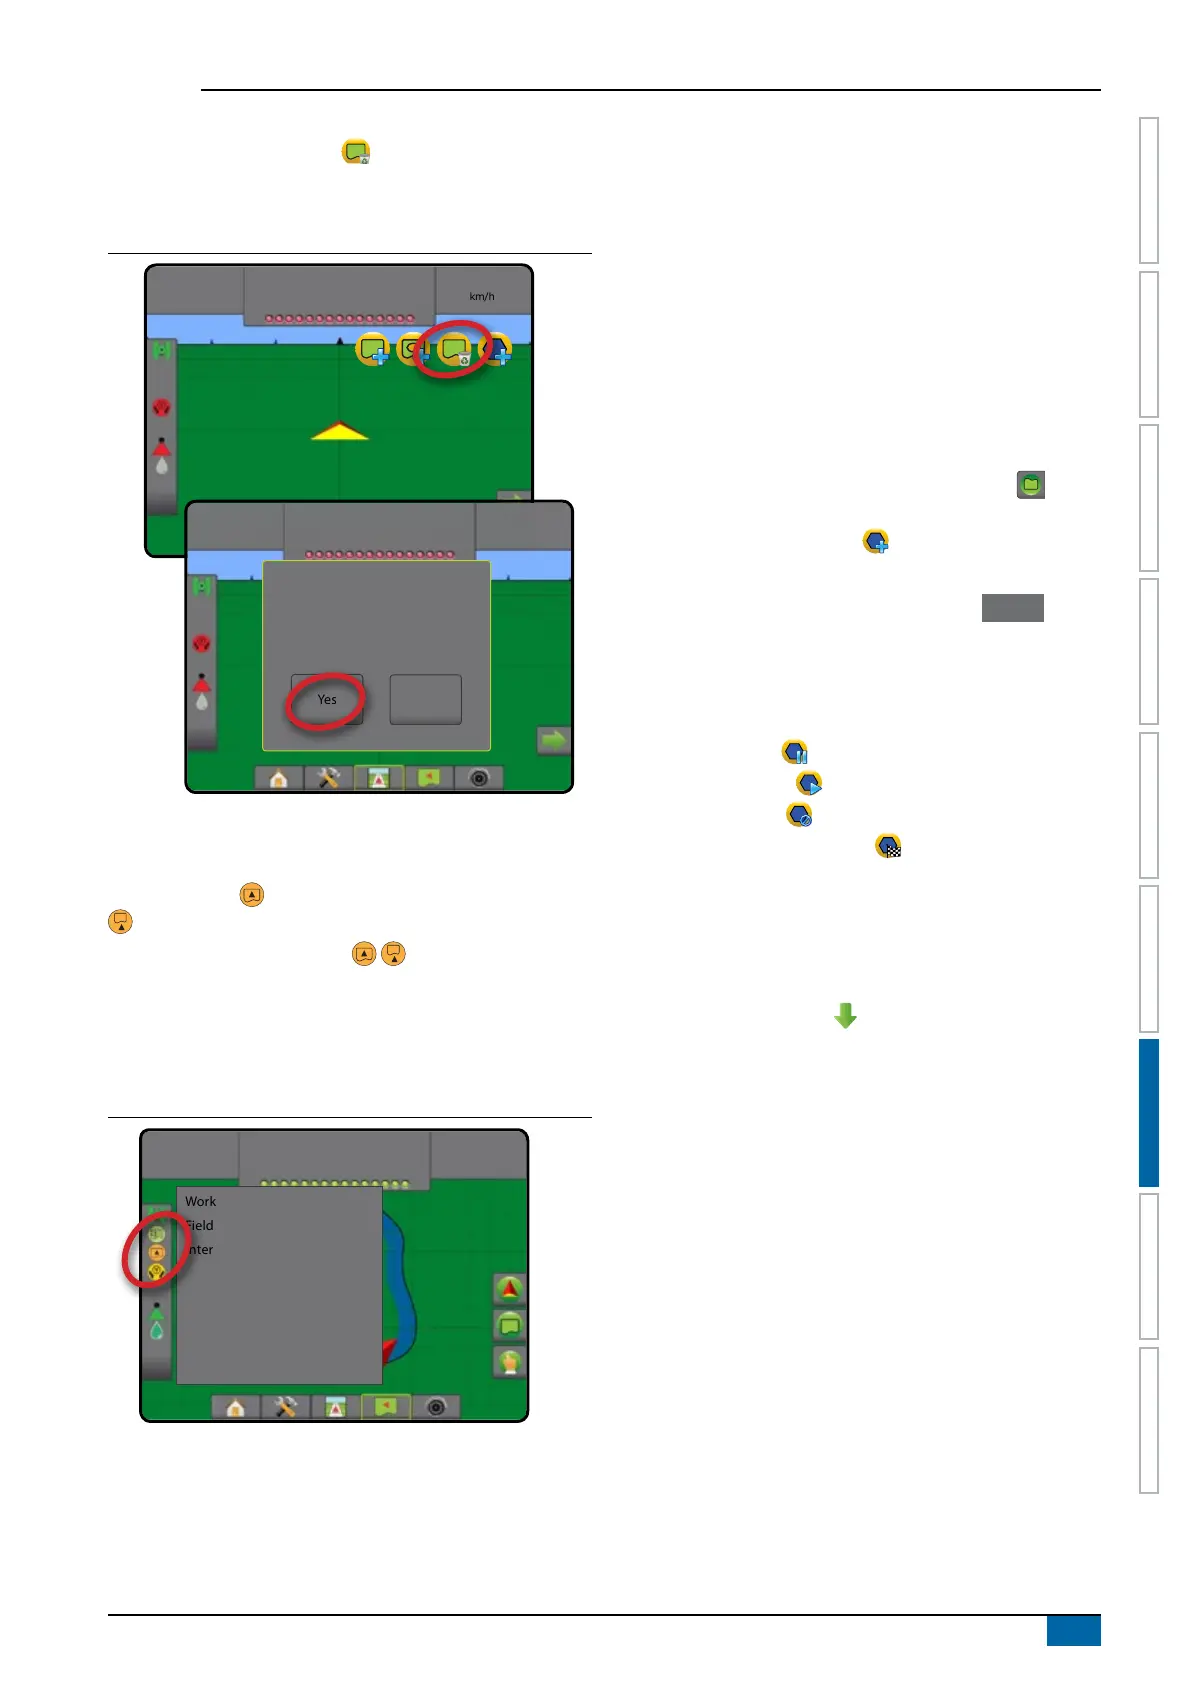
Delete last marked boundary
Use DELETE BOUNDARY icon to delete the last marked
boundary (interior or exterior) from the current job. Press again to
remove additional boundaries in order from last to rst created.
Figure 7-28: Delete last marked boundary
0.00
ha
0.0
km/h
4.68
ha
7.2
km/h
This will permanently delete the last
boundary you created. Do you want
to proceed?
Yes No
Boundary on status bar
In reference to your current location, the IN EXTERIOR
BOUNDARY icon or OUT OF EXTERIOR BOUNDARY icon
is displayed on the Status Bar once a boundary is established.
1. Press BOUNDED AREA icon .
◄Working area – total are of all exterior boundaries
◄Field area – total area of all exterior boundaries minus the
area of all interior boundaries
◄Internal area – total area of all interior boundaries
Figure 7-29: Exterior boundary on status bar
5.48
ha
7.2
km/h
Working area: 10.49 ha
Field area: 12.54 ha
Internal area: 2.05 ha
Polygons
Polygons establish mapping areas. Polygons can be established
in all guidance modes. Up to 100 polygons can be stored within a
single job. Application is not required to map a polygon.
Using Data -> Job data -> Manage or with Fieldware Link, a user
can duplicate and edit jobs for reuse of polygons for different
applications over the same eld.
To establish a polygon:
1. Drive to a desired location at the perimeter of the area
and orientate the vehicle in association to the established
mapping location. See “Configuration-> Mapping and
guidance-> Mapping location” for details.
2. Press BOUNDARY AND POLYGON OPTIONS tab
to
display boundary and polygon options.
3. Press MARK POLYGON icon
.
4. Verify that the Mapping location is correct.
◄If the Mapping location is not correct, press Cancel then
go to Configuration-> Mapping and guidance-> Mapping
location.
5. Travel the perimeter of the area.
While travelling, use as needed:
►Pause polygon – pauses the mark polygon process.
►Resume polygon – resumes the mark polygon process.
►Cancel polygon – cancels mark polygon process.
6. Press FINISH POLYGON icon to nalize current mark
polygon process. A straight line will complete the polygon
between your current location and the starting point.
7. Press:
►Save and name – to save the polygon with a customized
name. Names previously established will be available
from a drop down list .
►Save without naming – to save the polygon without
naming
►Discard – to delete the polygon