7.9 Trans Pin To Fixture
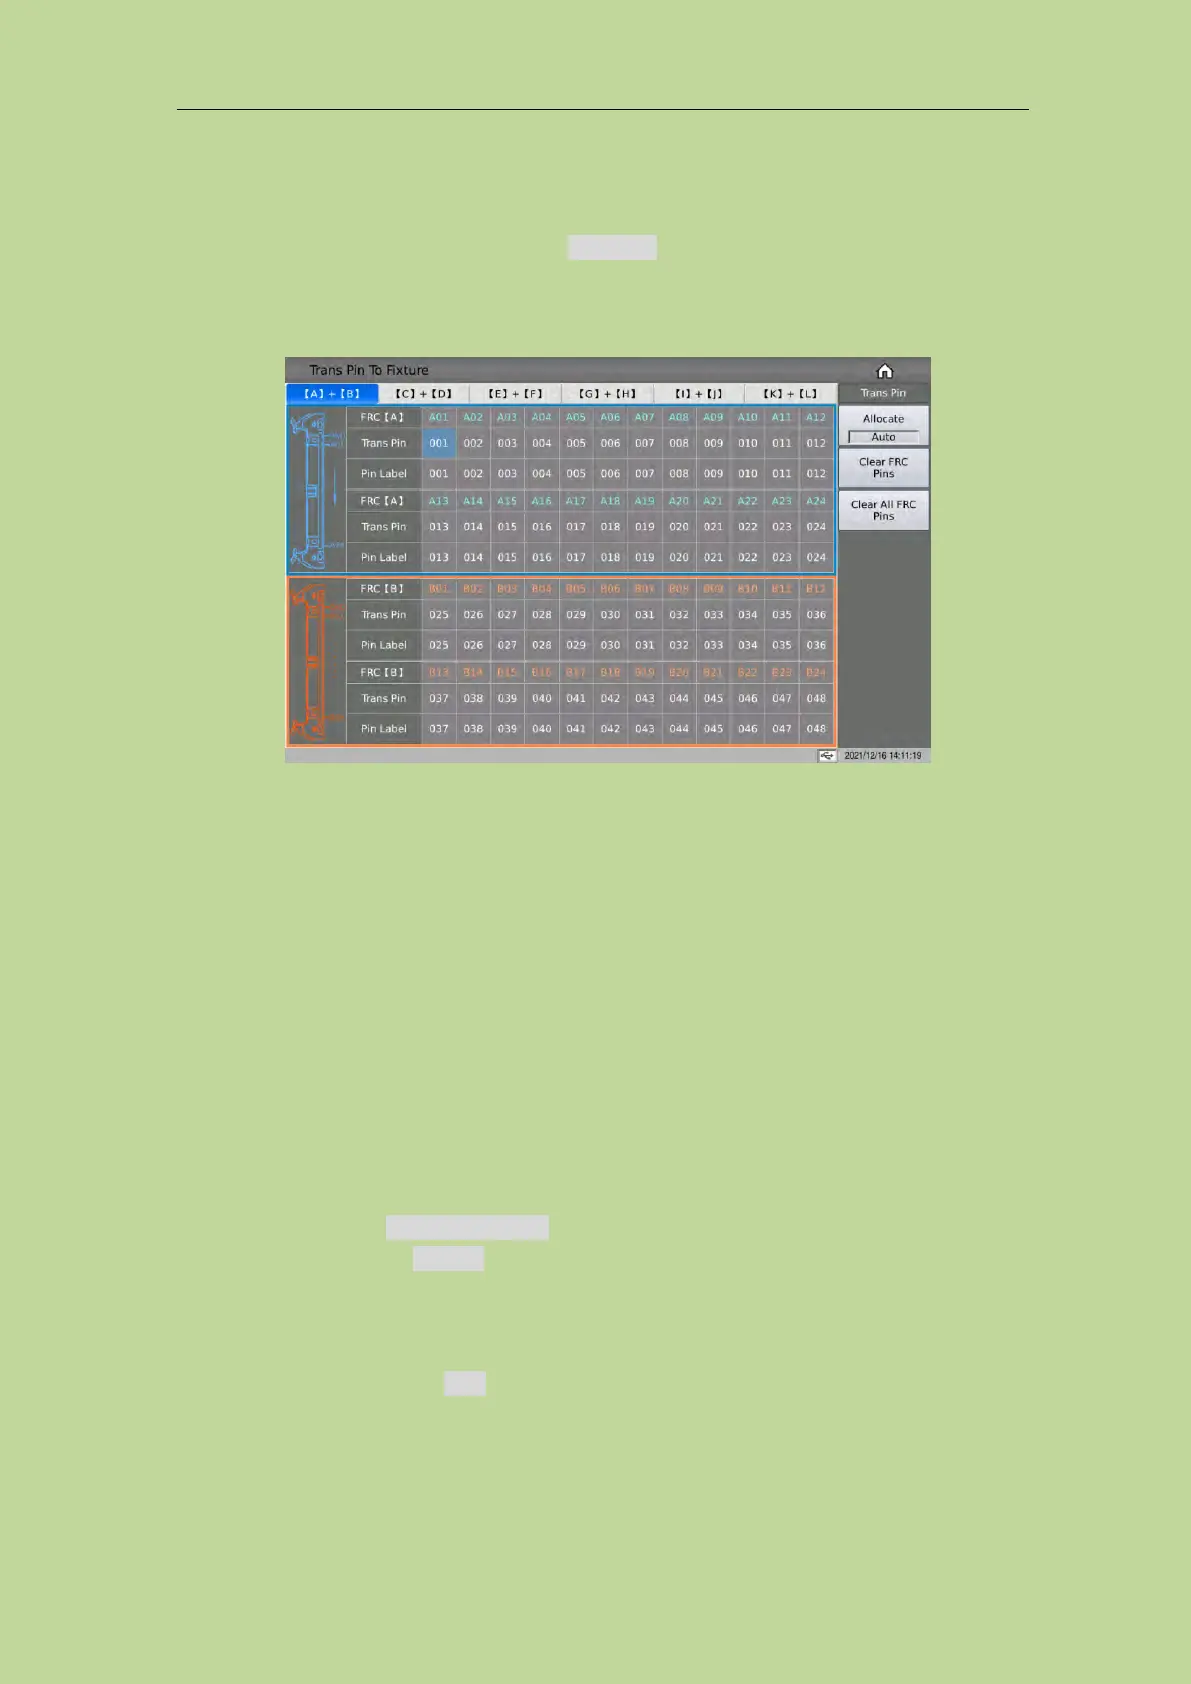
On the <Trans ID> page, press the menu key Trans Pin, it will jump to the <Trans Pin To Fixture>
page.
This page is used to connect the pin of the transformer to the pin of the test fixture, and to convert
the pin number into a custom pin label.
7.9.1 Pin To Fixture Setup
The default state of the instrument when the instrument is turned on: the transformer pins
correspond to the fixture pins one-to-one. Normally, when using the internal scanning board of the
instrument, you only need to connect the transformer pins to the fixture pins on the rear panel of the
instrument one-to-one and it can be tested; the external scanning test box (TH1831, TH1806, etc.)
can be connected according to 1~20/24 marked on the front of the test box. If you use the above
setting method, you can skip the pin to fixture setup here.
Here is the manual setting method:
The setting method is as follows: (The figure below is the corresponding relationship between the
sample transformer pin 1and the fixture pin 2)
1. Click any cell of the transformer pin in the table, the menu bar will display related menu
functions;
2. Select the function to Clear All FRC Pins to clear the default settings;
3. Press the function key to Allocate and change the allocate function option from Auto to manual.
4. When manually associating, move the cursor to the corresponding fixture pin position and input
the corresponding transformer pin.
Note: Input 0 to clear the corresponding pin input.
When the Allocate function is Auto, it will automatically +1 the number of pins at the transformer
pin where the first number is entered, until the input box of the last transformer pin.