Using Mapping/Recording in the Field 6
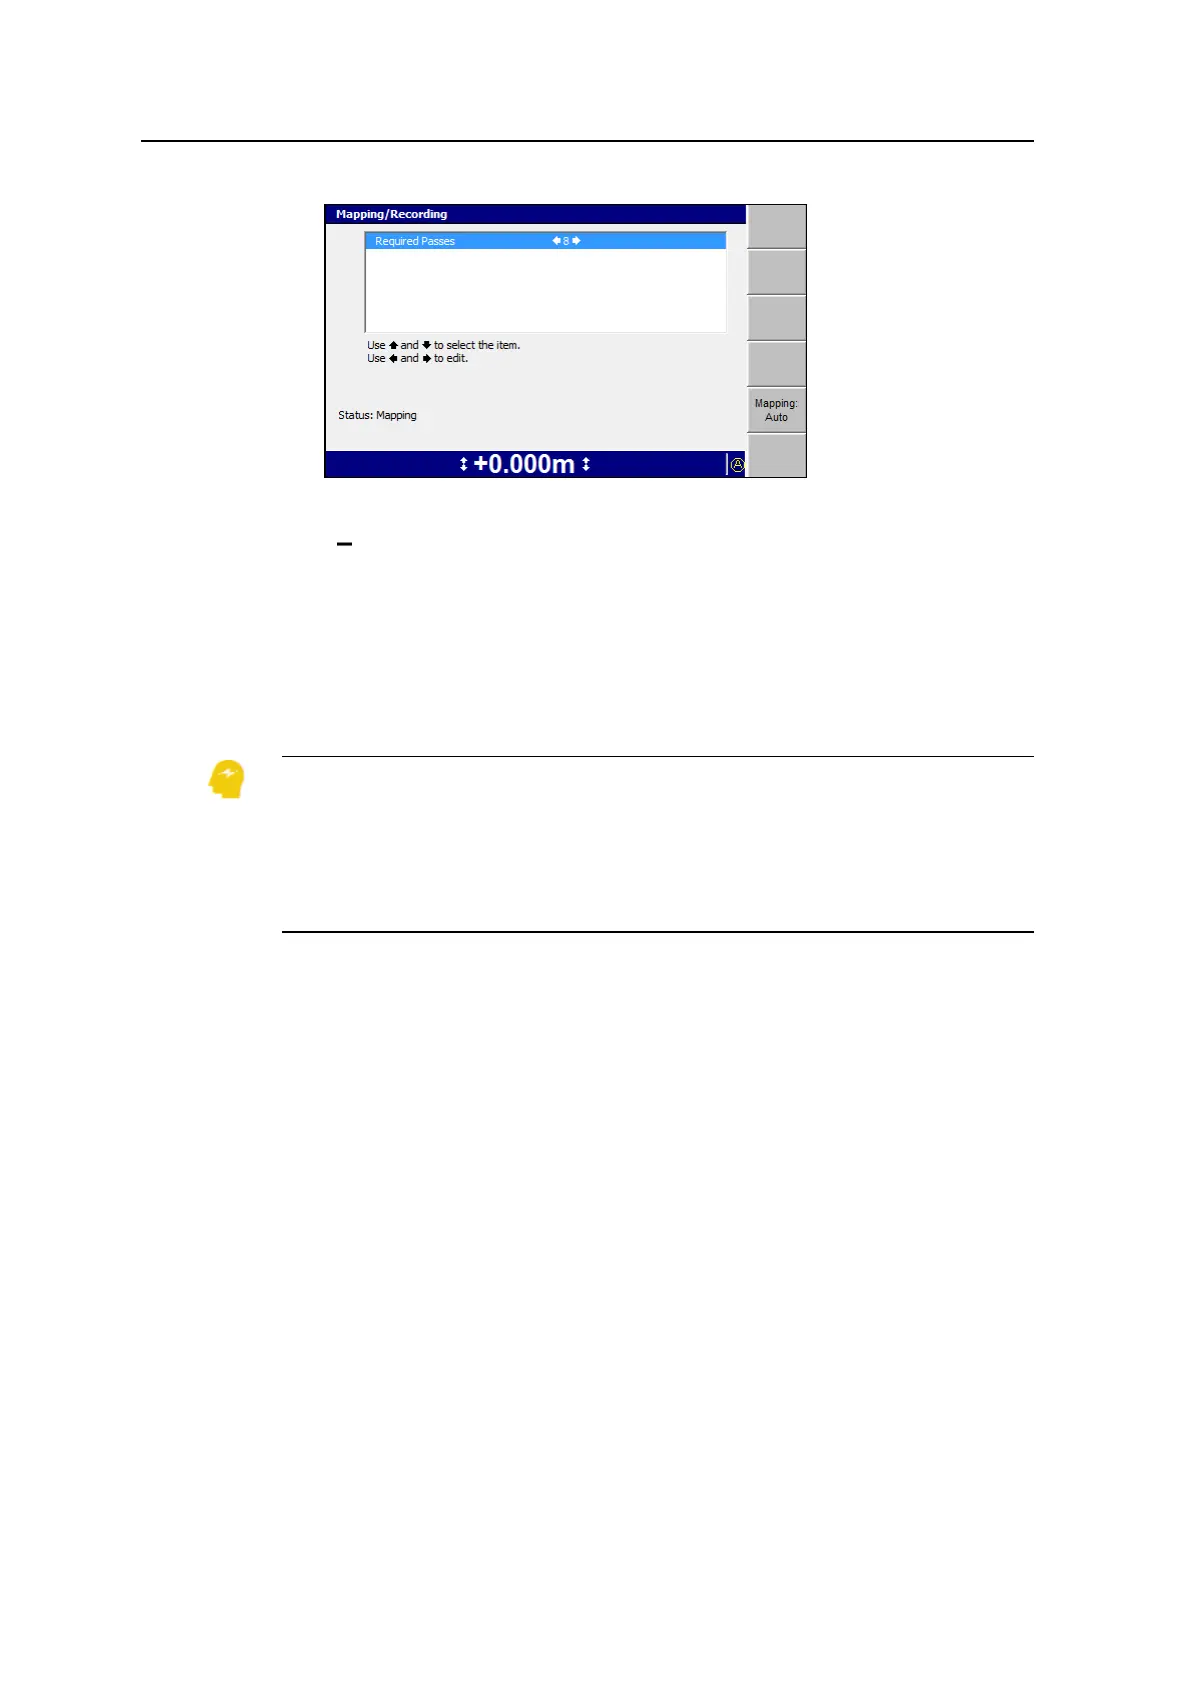
3. The available options in the Mapping/Recording dialog are described below:
Required passes – The number of passes that must be made over the
surface. The maximum number of passes that can be set is 50.
4. Press the left or right arrows on the control box to change the settings.
5. To change the mapping status, press Mapping:<value>. With each key press,
the value cycles between Auto, On and Off.
6.
Press \ to confirm the settings, or = to exit without saving.
ATTENTION — Map recording is intended to provide guidance to the operator, not record
detailed terrain and attribute information. A map recording (*.map) file stores a “snapshot” of
the map on the control box, that is, it stores the location of a cell and a numerical value for
the color fill. To record detailed terrain (Northing, Easting, and Elevation) and attribute data,
make sure production reporting is turned on. If you need production reporting data, but the
Map Recording dialog displays the message “WARNING: Production Reporting is off.”, ask
your site supervisor to turn on production reporting.
6.4 Using Mapping/Recording
Mapping/Recording provides an on-screen map and log file of the job being
currently worked.
6.4.1 Mapping/Recording states
To view a list of the mapping/recording softkey icons, see Softkeys, page 27.
The Mapping/Recording symbol on the status bar shows the current
mapping/recording state, as one of the following options:
l Auto
l On
GCS900 Grade Control System for Excavators Operator's Manual 145