4 Using 2D Guidance in theField
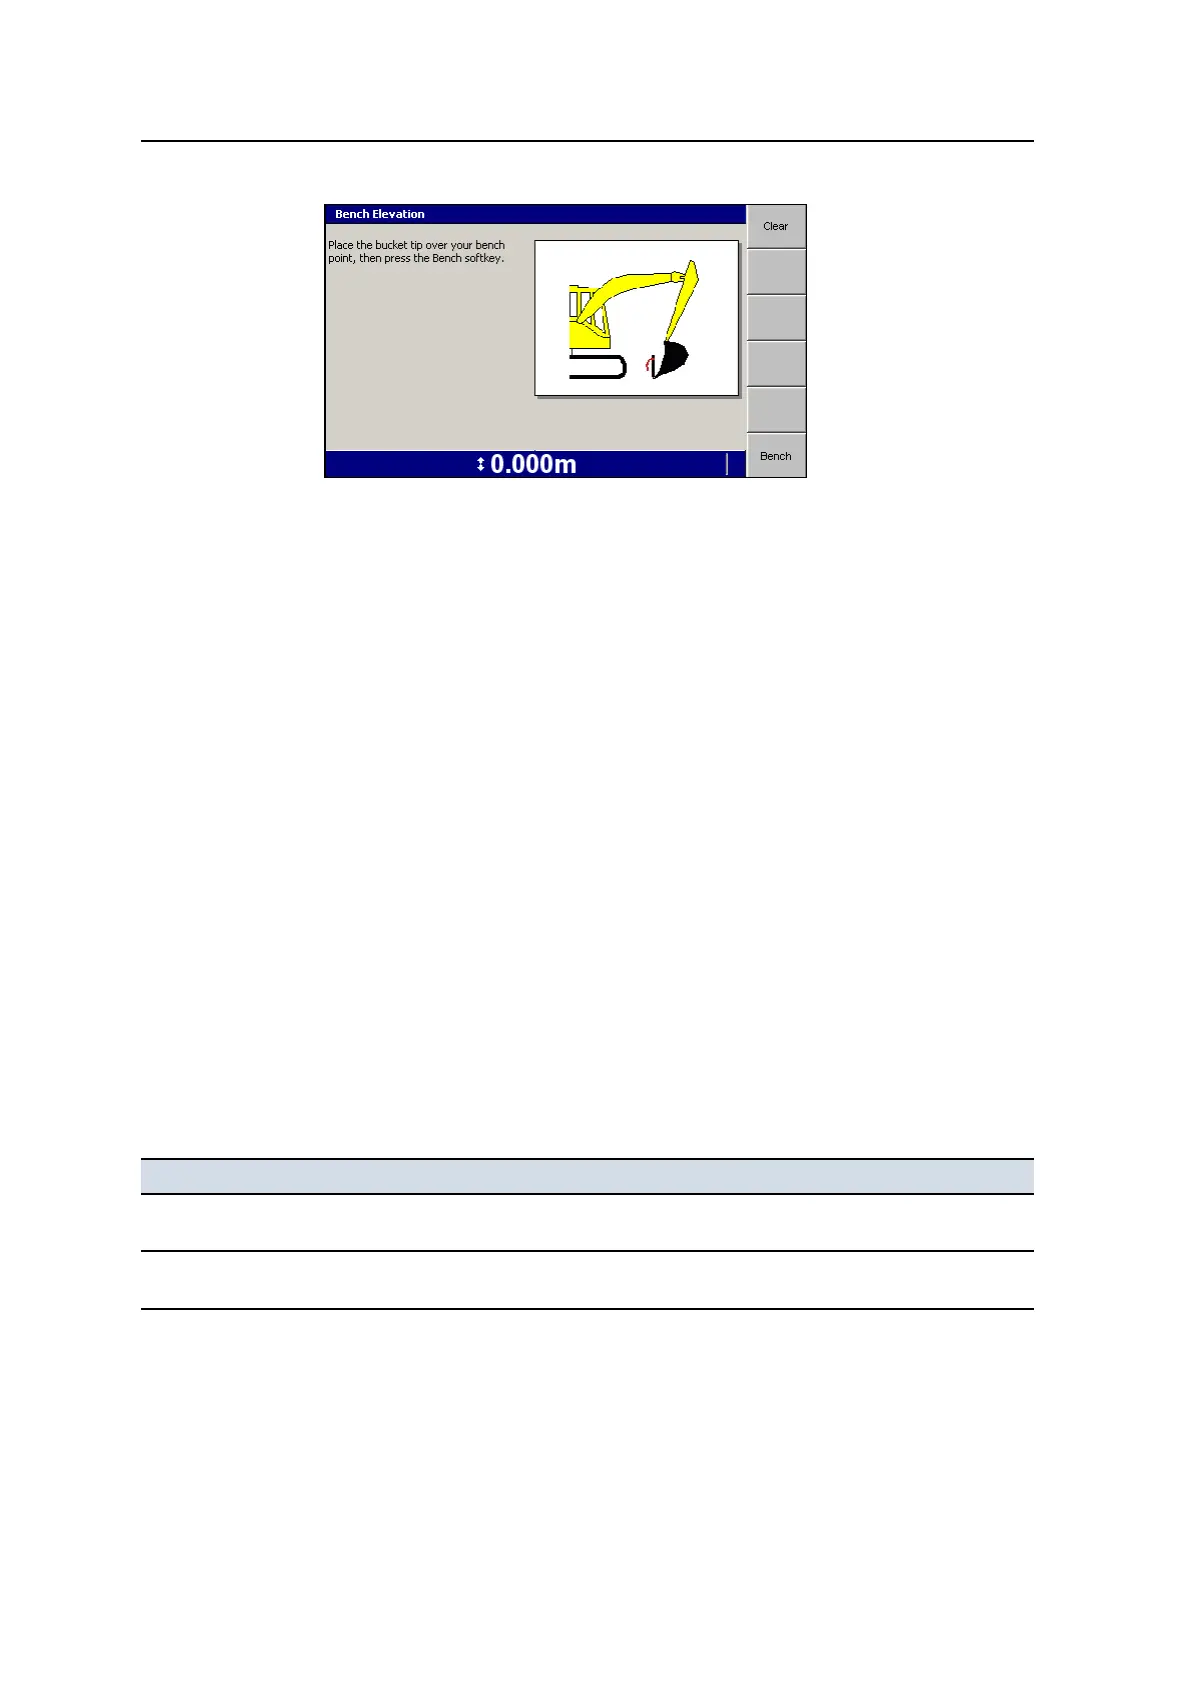
To clear the existing bench, press Clear.
Note – If you do not clear the benching information, then the system will
continue to use the bench elevation as the reference elevation, rather than the
elevation of the laser plane.
3. Raise the boom so that the laser lightbar indicates that the laser catcher is
receiving laser strikes. The laser catcher must be reasonably steady in the laser
plane. Once the system has detected valid strikes, the Laser softkey appears.
Note – The Laser softkey is displayed while the laser catcher is receiving laser
strikes. The system stores the position of the arm at the time valid strikes were
detected, and if strikes are lost, the arm position is retained for three seconds
(3s.). During this period the Laser softkey continues to be displayed, and can
be pressed to accept the valid strike elevation.
4. Press Laser. The laser strike elevation is accepted as the reference elevation,
and all depths will be relative to the laser plane.
4.7 Working with 2D guidance
Note – This section does NOT apply to systems with GNSS Receiver Support
enabled.
Common tasks that you must perform when working with 2D guidance are shown
below:
Task When To learn how, see ...
Carry bench data as you
move around the site
Whenever you need to change the position of the
machine after benching.
4.7.1 Transferring a
benchmark reference elevation
Measure site features Whenever you need to measure site features or
store the slope of a site feature in a Slope Memory.
4.7.2 Using the bucket position
to measure site features
102 GCS900 GradeControl System for Excavators Operator's Manual