April 2010
2-22
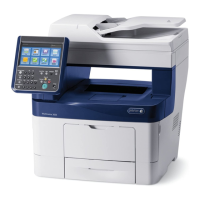
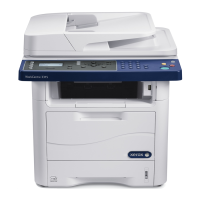
Phaser 3635MFP/WorkCentre 3550
07-130, 07-210
Status Indicator RAPs
3550 Checkout
Refer to Wiring Diagram 16 (3550) and Wiring Diagram 8. Perform the following:
1. Pull out tray 1. Remove all jammed paper.
2. Check the paper path for damage or obstructions.
3. Remove the tray 1 pickup roll, PL 10.22 Item 14. Check that the pickup roll is clean. If
necessary, install a new pickup roll, PL 10.22 Item 14.
4. Check the retard pad on tray 1. If necessary, install a new retard pad assembly, PL 8.10
Item 20.
5. Check that the following components are clean and rotate freely:
• Registration roll, PL 8.25 Item 3.
• Registration roll idler, PL 8.25 Item 17.
6. Check that the registration sensor actuator, PL 8.25 Item 14 moves freely and is not dam-
aged. If necessary, install a new registration sensor actuator, PL 8.25 Item 14.
7. Enter dC330 Component Control code 08-500. Check the registration sensor (Q08-500).
If necessary, install a new HVPS, PL 1.10 Item 3.
NOTE: The registration sensor is mounted on the HVPS.
8. Enter dC330 Component Control code 04-100 to run the main BLDC motor.
9. Check the wiring between the main BLDC motor and CN22 on the Main PWB.
10. Enter dC330 Component Control code 08-810 to energize the tray 1 pickup solenoid
(SOL8-810), PL 8.25 Item 19. To confirm that the solenoid is functional, listen for a click
from the solenoid as it is switched on. Install a new solenoid if necessary.
11. Check the wiring between the tray 1 pickup solenoid and CN29 on the Main PWB.
12. Check the tray 1 pickup roll, PL 10.22 Item 14. If necessary install new roll.
13. Enter dC330 Component Control code 08-850 to energize the registration solenoid
(SOL8-850), PL 8.25 Item 3. To confirm that the solenoid is functional, listen for a click
from the solenoid as it is switched on. Install a new solenoid if necessary.
14. Check the wiring between the registration solenoid and CN29 on the Main PWB.
15. Check that the registration roll, PL 8.25 Item 3, If necessary install a new roll.
16. If necessary:
• Install a new front duplex guide assembly, PL 10.22 Item 15.
•Perform OF7 Main PWB Check RAP.
07-210 Paper Empty at Tray 2 RAP
07-210 The machine has detected that tray 2 is empty.
Procedure
WARNING
Switch off the electricity to the machine. Disconnect the power cord from the customer
supply while performing tasks that do not need electricity. Electricity can cause death or
injury. Moving parts can cause injury.
Go to the relevant procedure:
• 3635 Checkout
• 3550 Checkout
3635 Checkout
Refer to Wiring Diagram 7 (3635), Wiring Diagram 11. Perform the following:
1. Pull out tray 2. Check that the paper empty actuator, PL 8.17 Item 2 moves freely and is
not damaged.
2. Enter dC330 Component Control code 07-210. Check the tray 2 paper empty sensor
(S07-210), PL 8.17 Item 1.
3. Check the wiring between the paper empty sensor and CN1 on the Tray 2 PWB. If neces-
sary, install a new paper empty sensor, PL 8.17 Item 1.
4. Check the wiring between CN7 on the Tray 2 PWB and CN33 and CN34 on the Main
PWB.
5. If necessary:
a. Install a new tray 2 PWB, PL 8.17 Item 25.
b. Perform OF7 Main PWB Check RAP.
3550 Checkout
Refer to Wiring Diagram 16 (3550), Wiring Diagram 11. Perform the following:
1. Pull out tray 2. Check that the paper empty actuator, PL 8.17 Item 2 moves freely and is
not damaged.
2. Enter dC330 Component Control code 07-210. Check the tray 2 paper empty sensor
(S07-210), PL 8.17 Item 1.
3. Check the wiring between the paper empty sensor and CN1 on the Tray 2 PWB. If neces-
sary, install a new paper empty sensor, PL 8.17 Item 1.
4. Check the wiring between CN7 on the Tray 2 PWB and CN35 and CN36 on the Main
PWB.
5. If necessary:
a. Install a new tray 2 PWB, PL 8.17 Item 25.
b. Perform OF7 Main PWB Check RAP.

 Loading...


