Chapter 6: Shutdown and Maintenance 201
Perform the following steps to replace the tubing. The same procedure can be
used to replace either the primary or secondary sample line.
1 Turn off the stream and lasers (if needed). Make sure the loading port is in
the unload position.
2 Unscrew the connecting nuts on each end of the tubing, and pull out the
sample line.
3 Ensure that a cone-shaped ferrule is attached to each end of the sample line.
Figure 6-5 on page 202 shows an example of a ferrule. If the ferrule was
left behind in the injection chamber fitting, HPLC valve, or flow cell fitting,
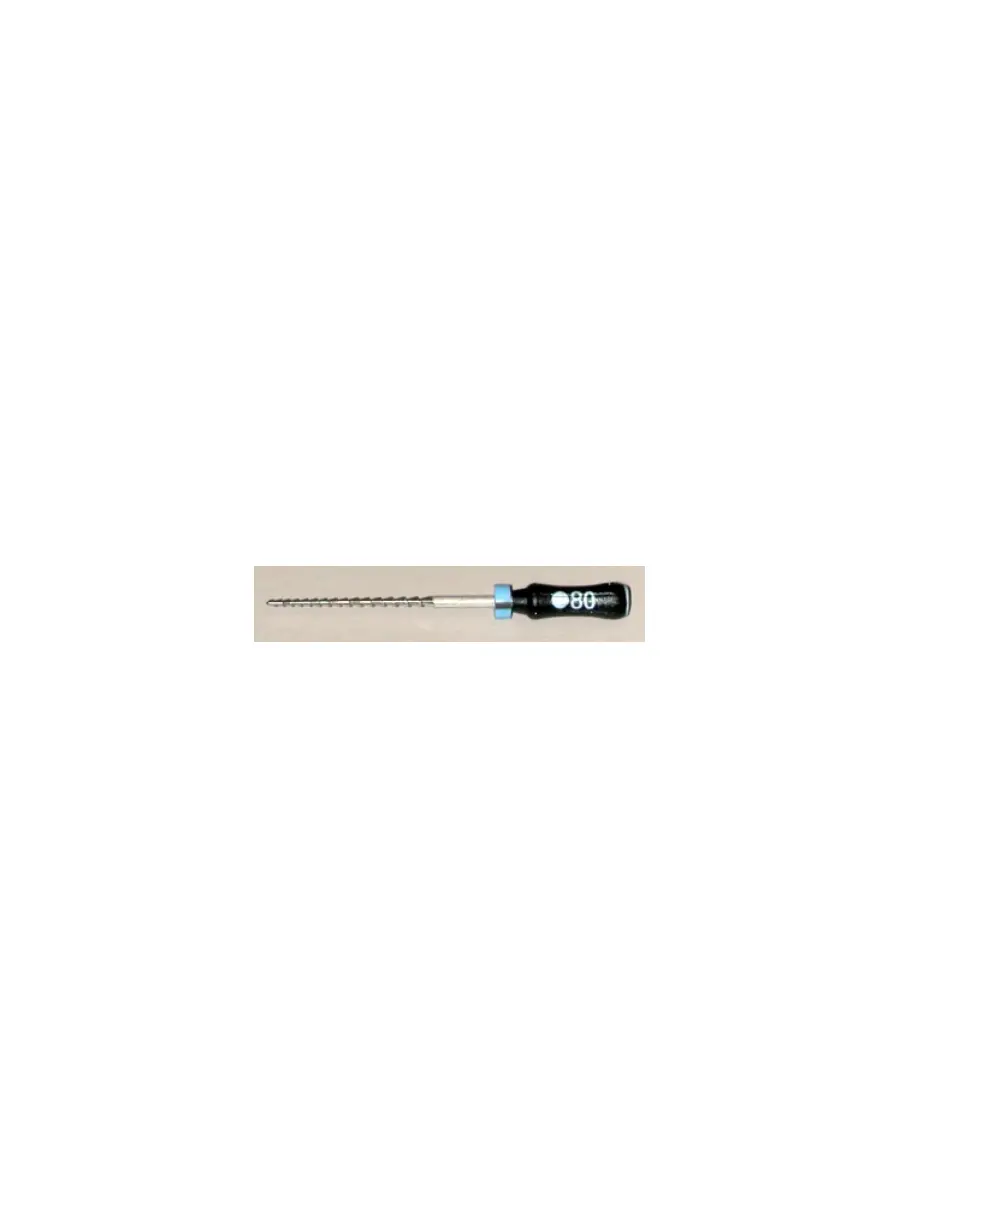
screw the tip of the ferrule-removal tool (included in the accessory kit) into
the top of the ferrule and pull the ferrule straight out.
After using the tool, you might need to replace the ferrule. If the ferrule is
damaged, replace it with a spare (included in the accessory kit).
4 Slide the ferrule and nut off each end of the sample line.
Tip Handle the ferrule with care. It is small and easily lost.
5 Slide the nut and then the ferrule onto each end of the new sample tubing.
• If you are replacing the primary sample line, leave approximately
0.1 inch (0.25 cm) of tubing extending out of the ferrule on the HPLC
end, and approximately 5 inches (12.7 cm) of tubing extending out of
the sample injection chamber end. (This length can be adjusted
depending on the depth of your sample tube.)
• If you are replacing the secondary sample line, leave approximately
0.1 inch (0.25 cm) of tubing extending out of the ferrule on both ends.
This length is referred to as the pilot, as shown in Figure 6-5 on page 202.
ferrule-removal tool