202 BD FACSAria User’s Guide
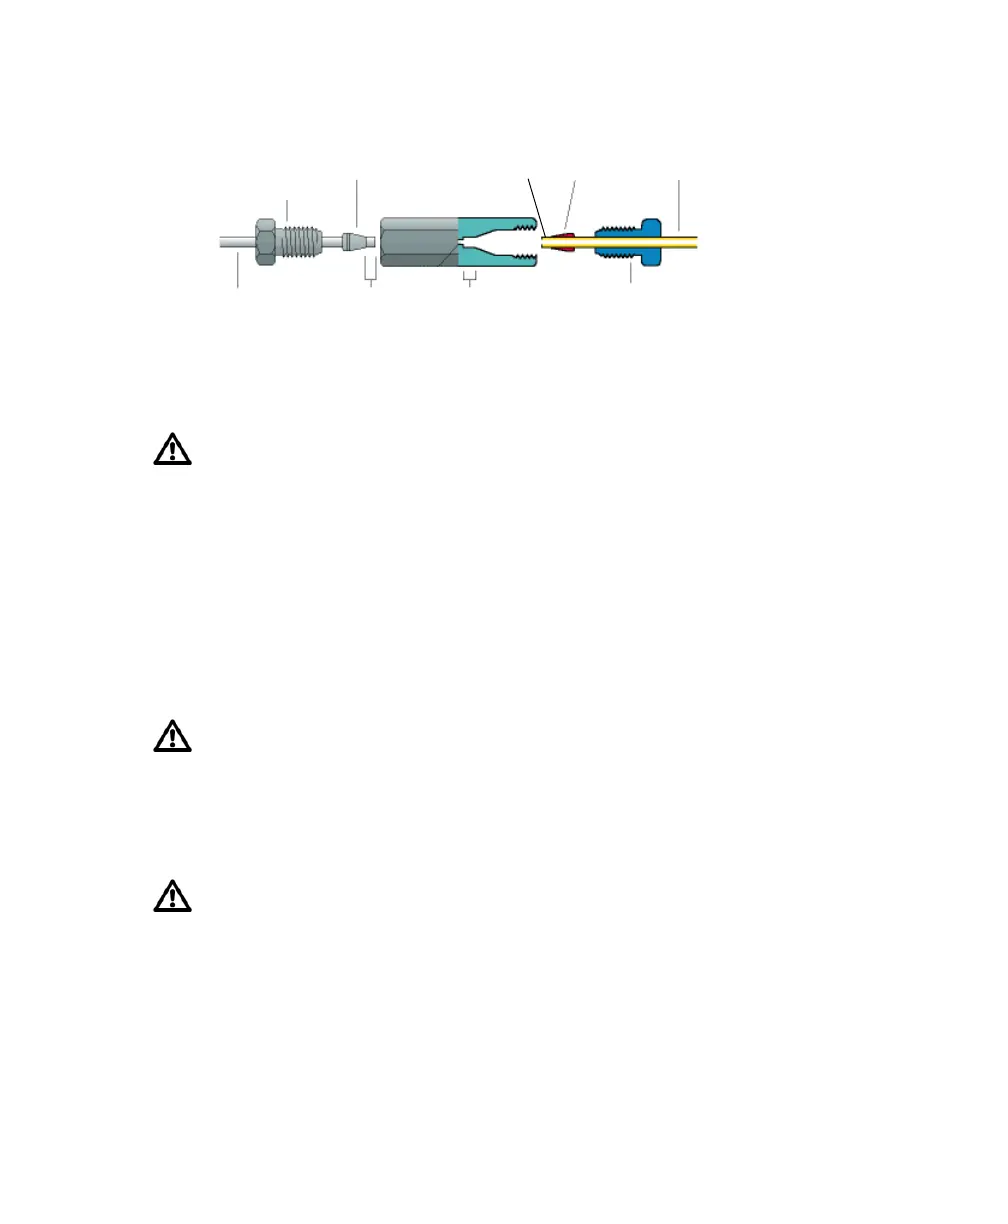
Figure 6-5 Components of a compression fitting (diagram courtesy of Valco Instruments Co. Inc.)
6 Insert the pilot tubing into its fittings, ensuring that the tubing reaches the
intended pilot depths.
• For the primary sample line, insert the long end into the sample
injection chamber fitting. Push the tubing from the top until it is
slightly above the bottom of the chamber viewing window. Hand-
tighten the nut on top of the chamber, and then insert the short end
into the HPLC valve.
• For the secondary sample line, insert one end into the HPLC valve, and
the other end into the cuvette flow cell fitting.
7 While pushing the tubing in, hand-tighten each nut firmly.
8 Check the fitting connections to make sure they are not leaking.
Turn on the stream, load a tube of water, and make sure none of the fittings
are leaking. If needed, unload the tube, turn off the stream, and tighten the
fittings. After tightening, if leaking still occurs, replace the ferrule.
Try not to bend the primary sample line during insertion.
Within the HPLC valve and the cuvette flow cell fitting, make sure the pilot
is seated flush against the pilot depth. Dead volume between the pilot and
the pilot depth can lead to sample carryover or leaking.
Do not overtighten the nut and do not use tools. Over-tightening the nut
can kink or damage the tubing.
male nut
(internal)
ferrule
ferrule
tubing
tubing pilot
length
male nut
(internal)
pilot
depth
pilot
length