144
Tutorial 7: Print and Stitch
After the design is finished, save the
embroidery data onto media so it can be
transferred to the embroidery machine.
c
For details on saving embroidery
patterns, refer to “Saving” on page 81. For
details on transferring designs to an
embroidery machine, refer to
“Transferring Embroidery Designs to
Machines” on page 174.
Step 2 Printing the background
image
Print the background image on an iron-on transfer
sheet or printable fabric.
Click 1, then 2, then 3.
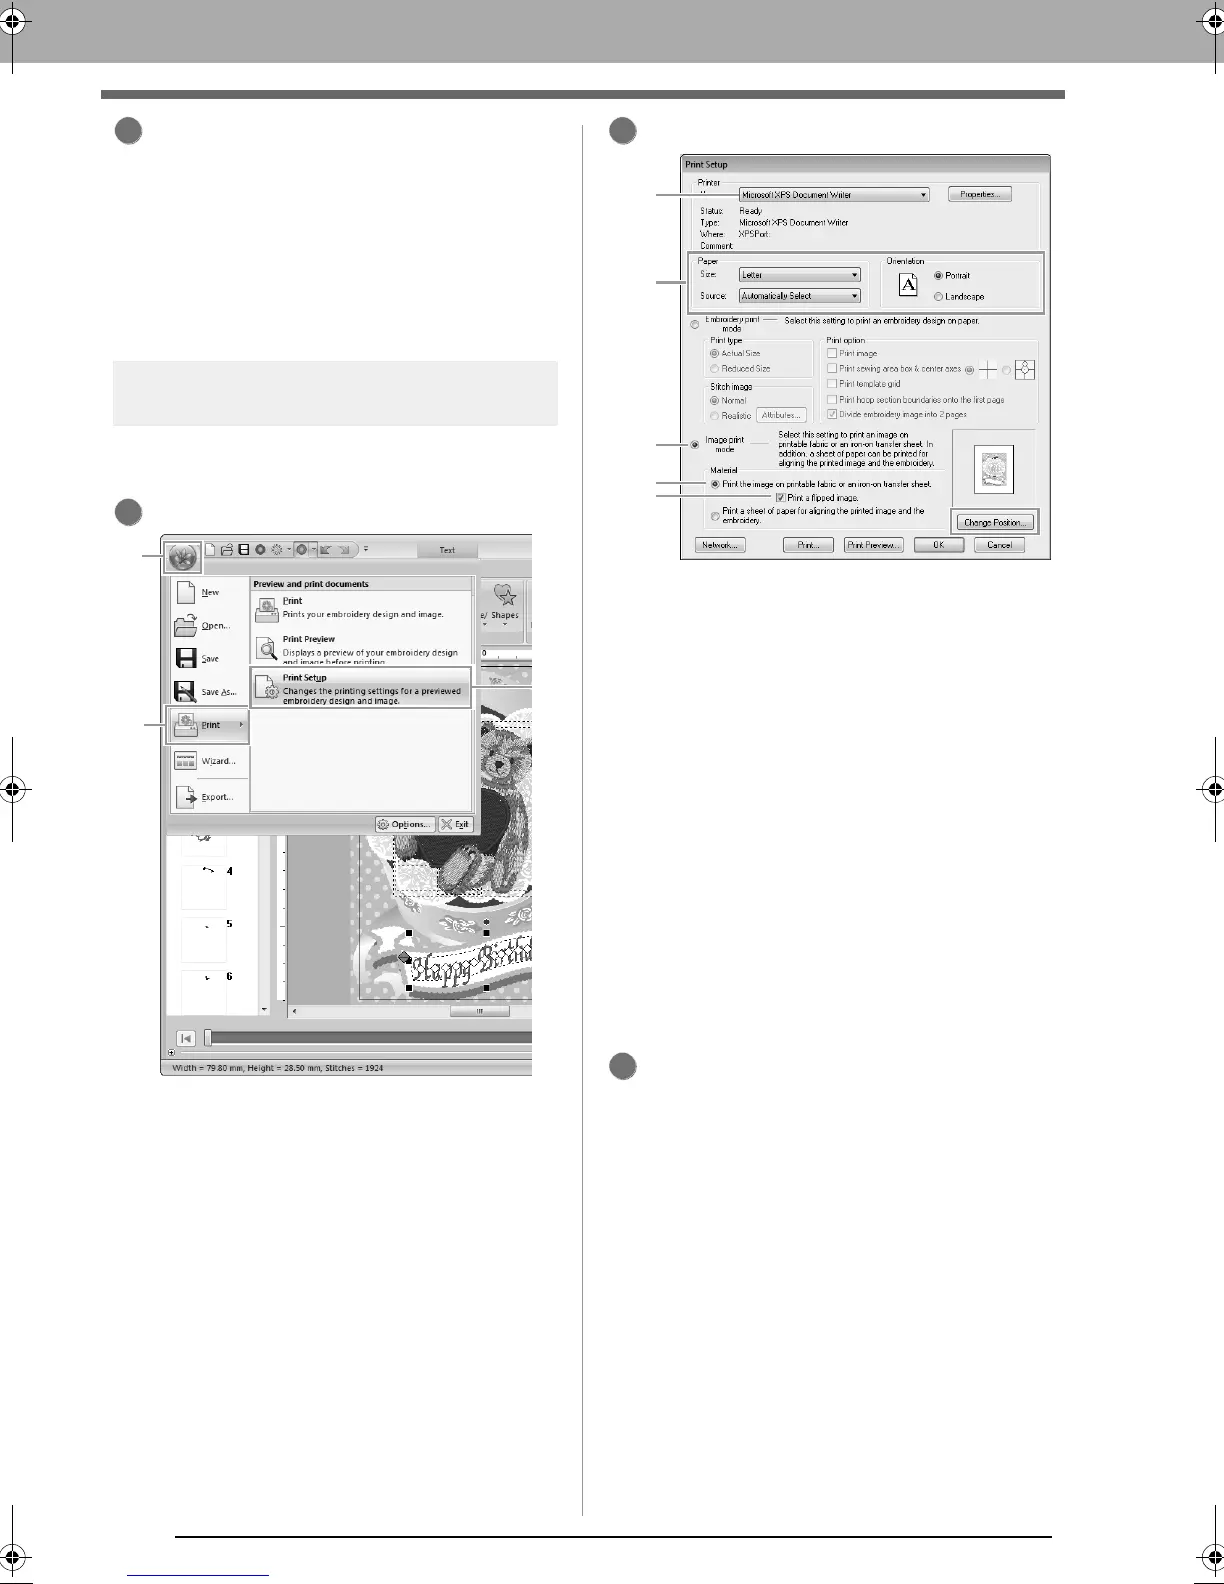
Specify the print settings.
(1) Select the printer to be used.
(2) Under Paper and Orientation, select the
appropriate settings for the iron-on
transfer sheet or printable fabric to be
printed on.
(3) Select Image print mode.
(4) Select Print the image on printable
fabric or an iron-on transfer sheet.
(5) To print a flipped image on an iron-on
transfer sheet, select the Print a flipped
image check box.
Some printers will automatically print an
image flipped if an iron-on transfer sheet
is selected as the paper. If this type of
printer is being used, clear the Print a
flipped image check box.
For details, refer to the instructions for the
printer being used.
Click Change Position.
2
3
XE8656-001.book Page 144 Monday, May 24, 2010 5:44 PM
 Loading...


