000 299 119 5 - BA ROLLANT 240 - 250 - 254 - 255 8.2.11
Setting up the baler
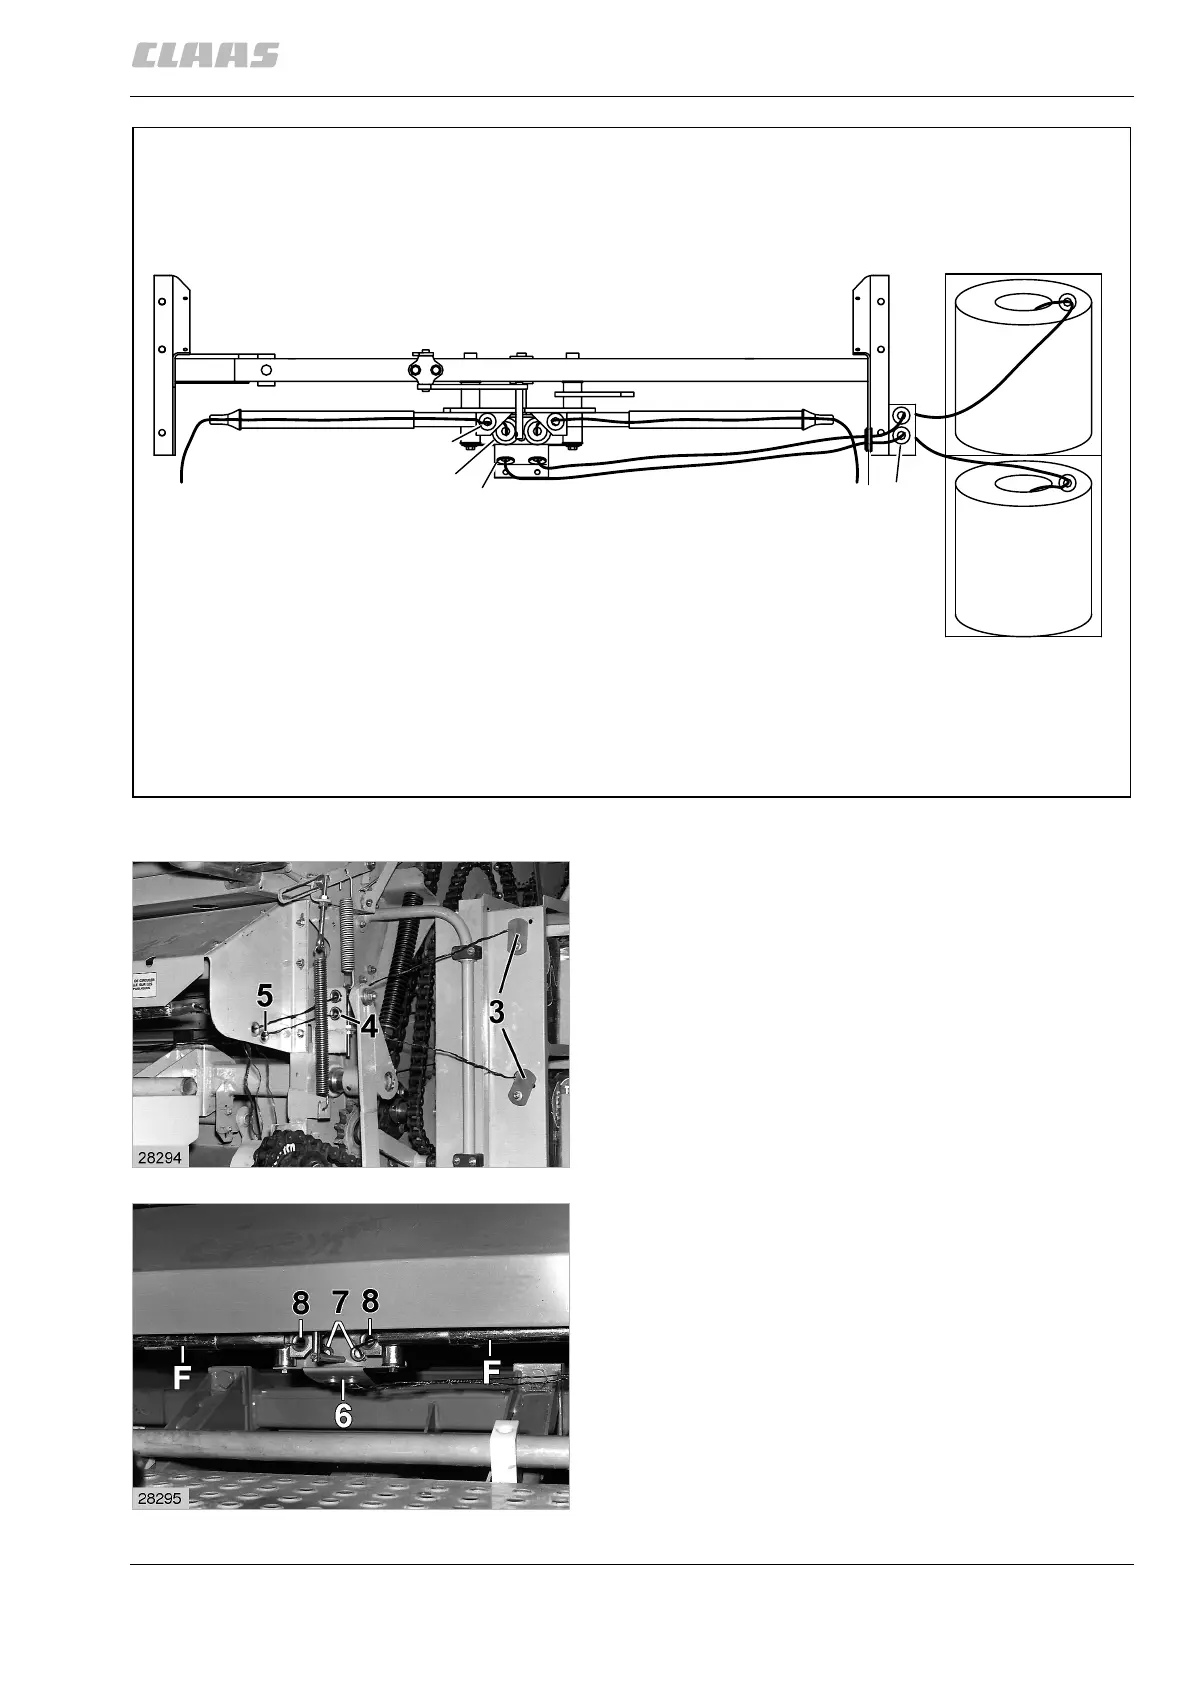
Threading the twine ROLLANT 240/250/254/255
with standard controls
Thread the twine as indicated through positions 1 to 8,
making sure that each is threaded through the
separate eyelets.
3 = Twine eyelets on twine box
4 = Twine eyelets
5 = Twine eyelets
6 = Twine eyelets
7 = Twine eyelets on twine tightener
8 = Twine eyelets
Now thread the twine through the twine tubes (F).
This can be done with the aid of a length of wire.
The ends of the twine must protrude from the twine
tubes by about 500 mm (19.7 in) so that they can be
entrained by the rotating bale.
(Fig.21,22,23)
21
28292
4
5
6
7
8
F
22
23

 Loading...