000 299 119 5 - BA ROLLANT 240 - 250 - 254 - 255 7.6.1
Prior to operation
BALE DISCHARGE RAMP
Installing the bale discharge
Open the twine box. Remove the bag with the small
items and the spring guide with pressure spring.
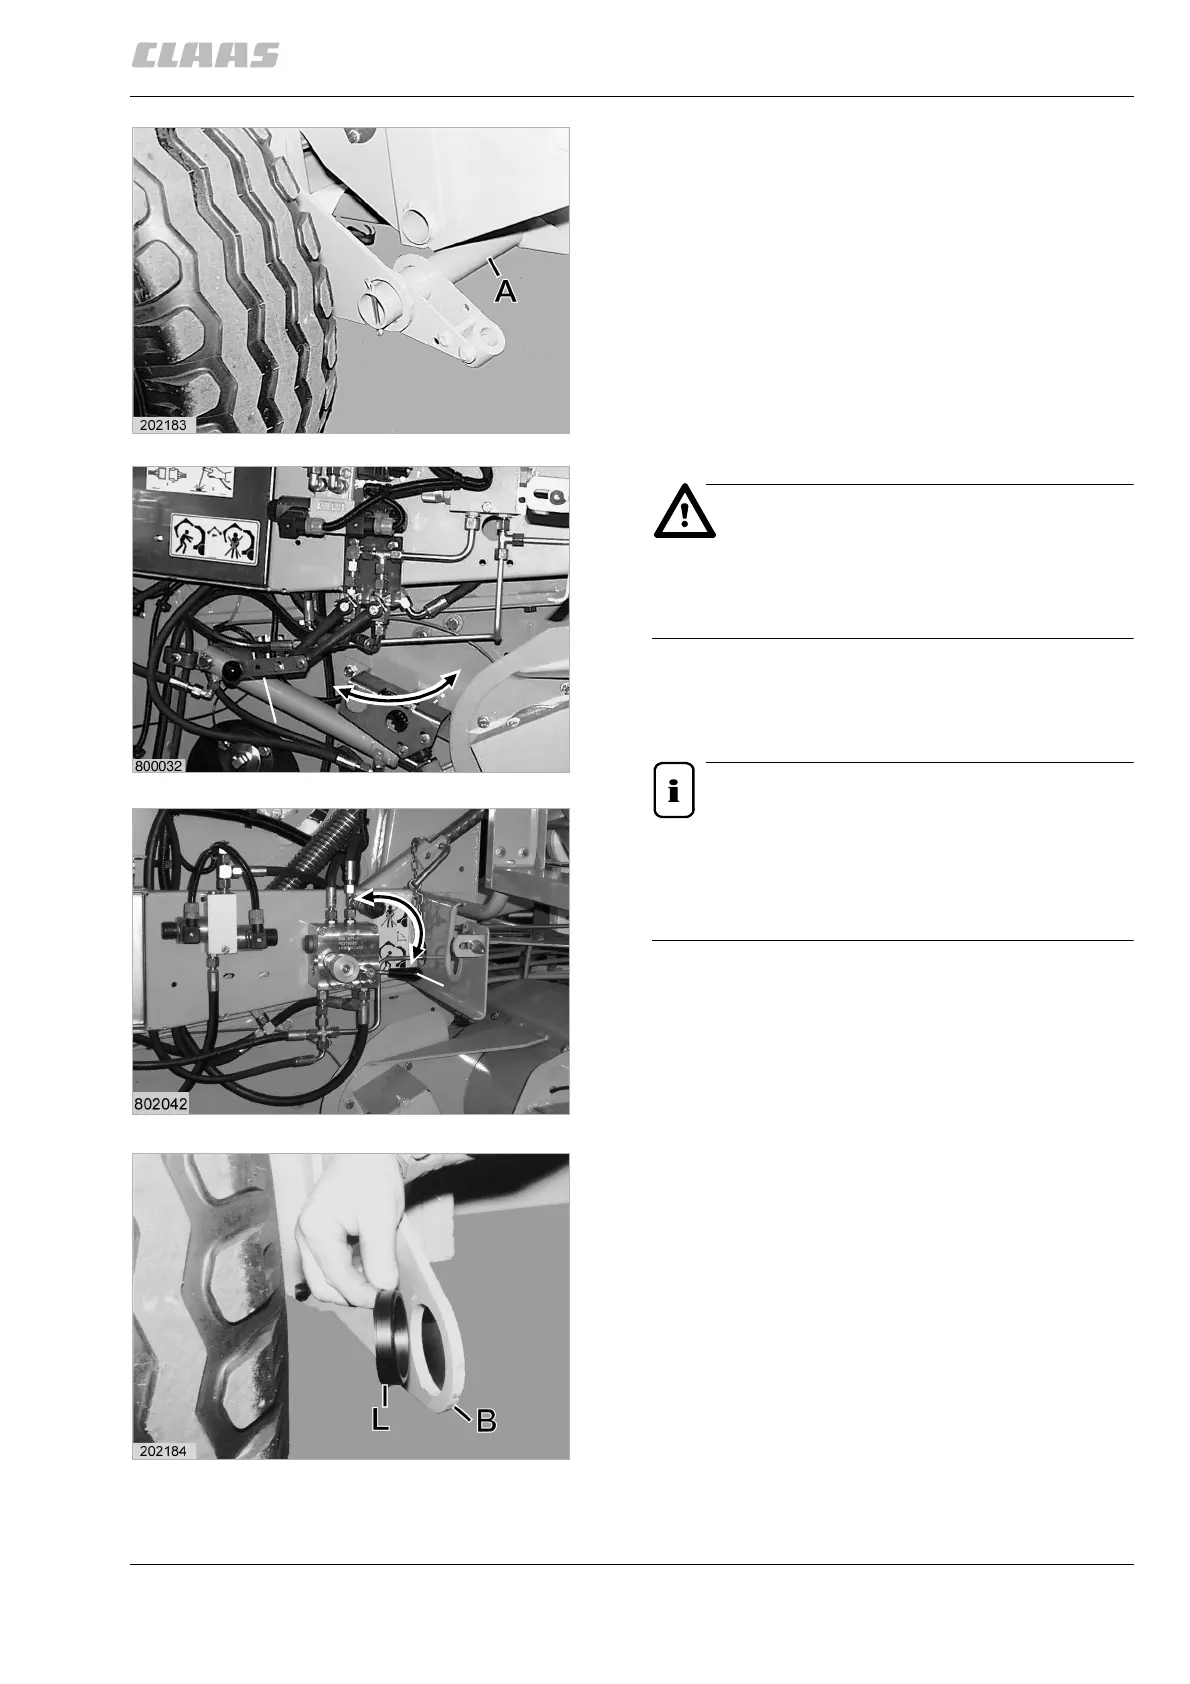
Cut the locking wires and pull the cotter pins out of the
left side of unwinding bow (A).
Take the unwinding bow out of the receptacles in the
chassis.
(Fig. 1)
Danger!
Always set lever (H) of the safety lock to end
position (Z) when working on the open
tailgate or inside the baling chamber.
Before closing the tailgate, set lever (H) to end
position (O).
Open the tailgate.
Note!
Illustration (2) shows the safety barrier on
ROLLANT 240 and ROLLANT 250.
Illustration (3) shows the safety barrier on
ROLLANT 254/255.
(Fig. 2, 3)
Insert bearing (L) from outside into the left and right
hand receptacles (B) on the chassis.
(Fig. 4)
1
H
Z
O
2
H
Z
O
3
4
Prior to operation