000 299 119 5 - BA ROLLANT 240 - 250 - 254 - 255 8.3.1
Setting up the baler
REEL
Note!
To set the retainer (F) higher for large amounts
of feed, the side plates (A) 836163.0 (in the
accessory pack) must be fitted.
For machines with a feed rake drive, delivery also
includes the stops 845 037.0 (net wrapping) and the
stops 838 789.0 (twine- and net wrapping). The
assembly of the stops depends on the type of
wrapping. The assembly is only necessary if there are
problems with the bale start.
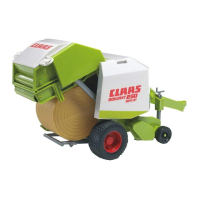
Rotate lock (B) to the right and left, remove the
retainer (F) and dismantle both locks.
Screw off the nut and remove the saucer-head screw
(D) with support.
Dismantle pipe (E).
Screw off the nuts and remove the saucer-head
screws (C).
(Fig. 1)
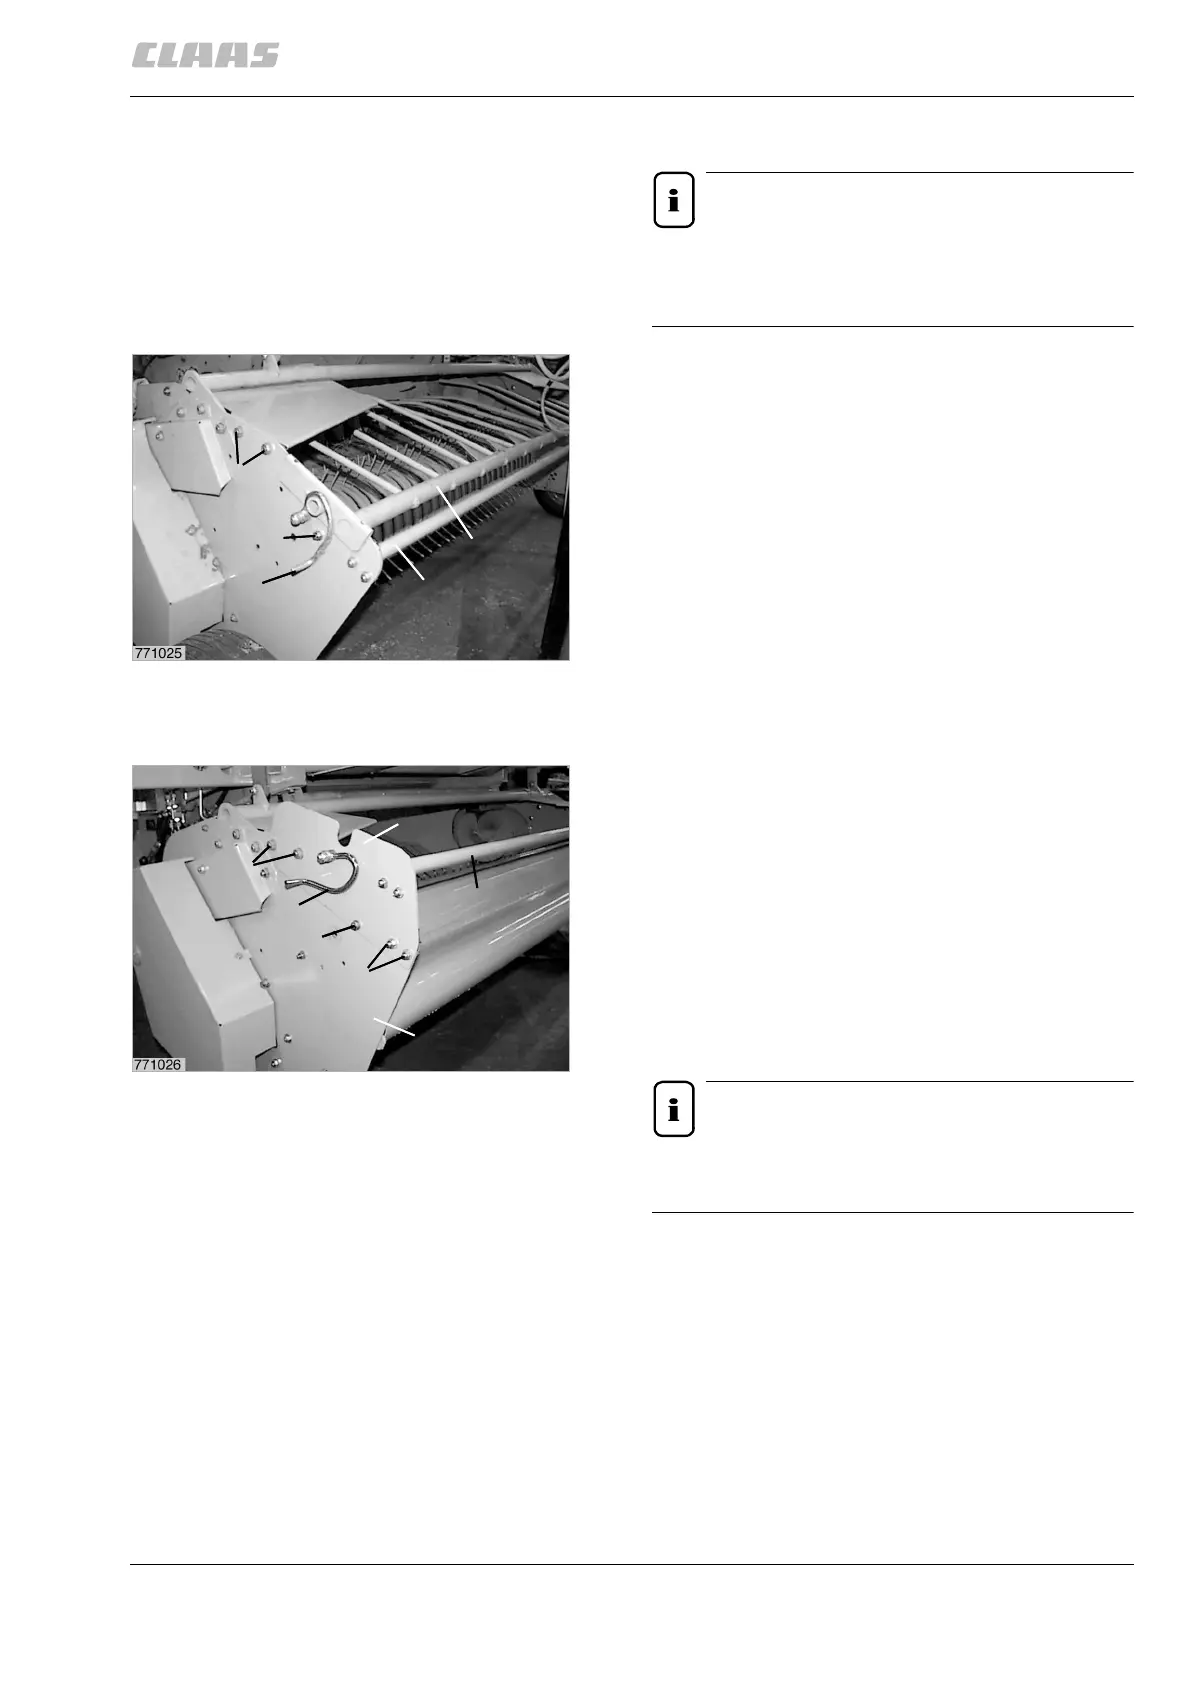
Fasten the side panel (A) with saucer-head screws (C)
M 10 x 16, contact washers, nuts and saucer-head
screws (H) M 8 x 20 x 13, contact washers and nuts to
the pickup frame (G).
Attach pipe (E) with saucer-head screws
M 8 x 20 x 13, contact washers and nuts to the side
panels.
Attach the support with the saucer-head screw (D)
M 8 x 25, contact washer and nut.
Attach the lock (B) with hex-head screw M 10 x 40,
compression spring and safety nut to the side panel.
Note!
Only tighten the lock nut to the point that the
lock can still be twisted.
Attach the retainer.
(Fig. 2)
C
D
B
E
F
1
C
B
D
H
A
G
E
2
Setting up the baler

 Loading...