000 299 119 5 - BA ROLLANT 240 - 250 - 254 - 255 8.2.13
Setting up the baler
The ends of the twine must protrude from the twine
tubes by about 500 mm (19.7 in) so that they can be
entrained by the rotating bale.
(Fig.24,25,26)
Adjusting the twine wrap on the outer edges of the
bale
When baling extremely dry material, the lateral twine
stops may be set more towards the center. This can be
done by loosening the screws (S).
This prevents the twines from slipping off the outer
edges of the bale.
Tighten the screws again after adjustment.
The basic setting is 130 mm (5.2 inch) between the
side panel and the stop (center hole).
(Fig. 27)
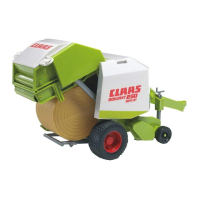
Turn in the twine deflector
On round balers equipped with twine wrapping only,
the lever (H) is always in the lower setting, the
deflector (A) is always tilted.
The deflector connects the roller wrapping with twine.
(Fig. 28)
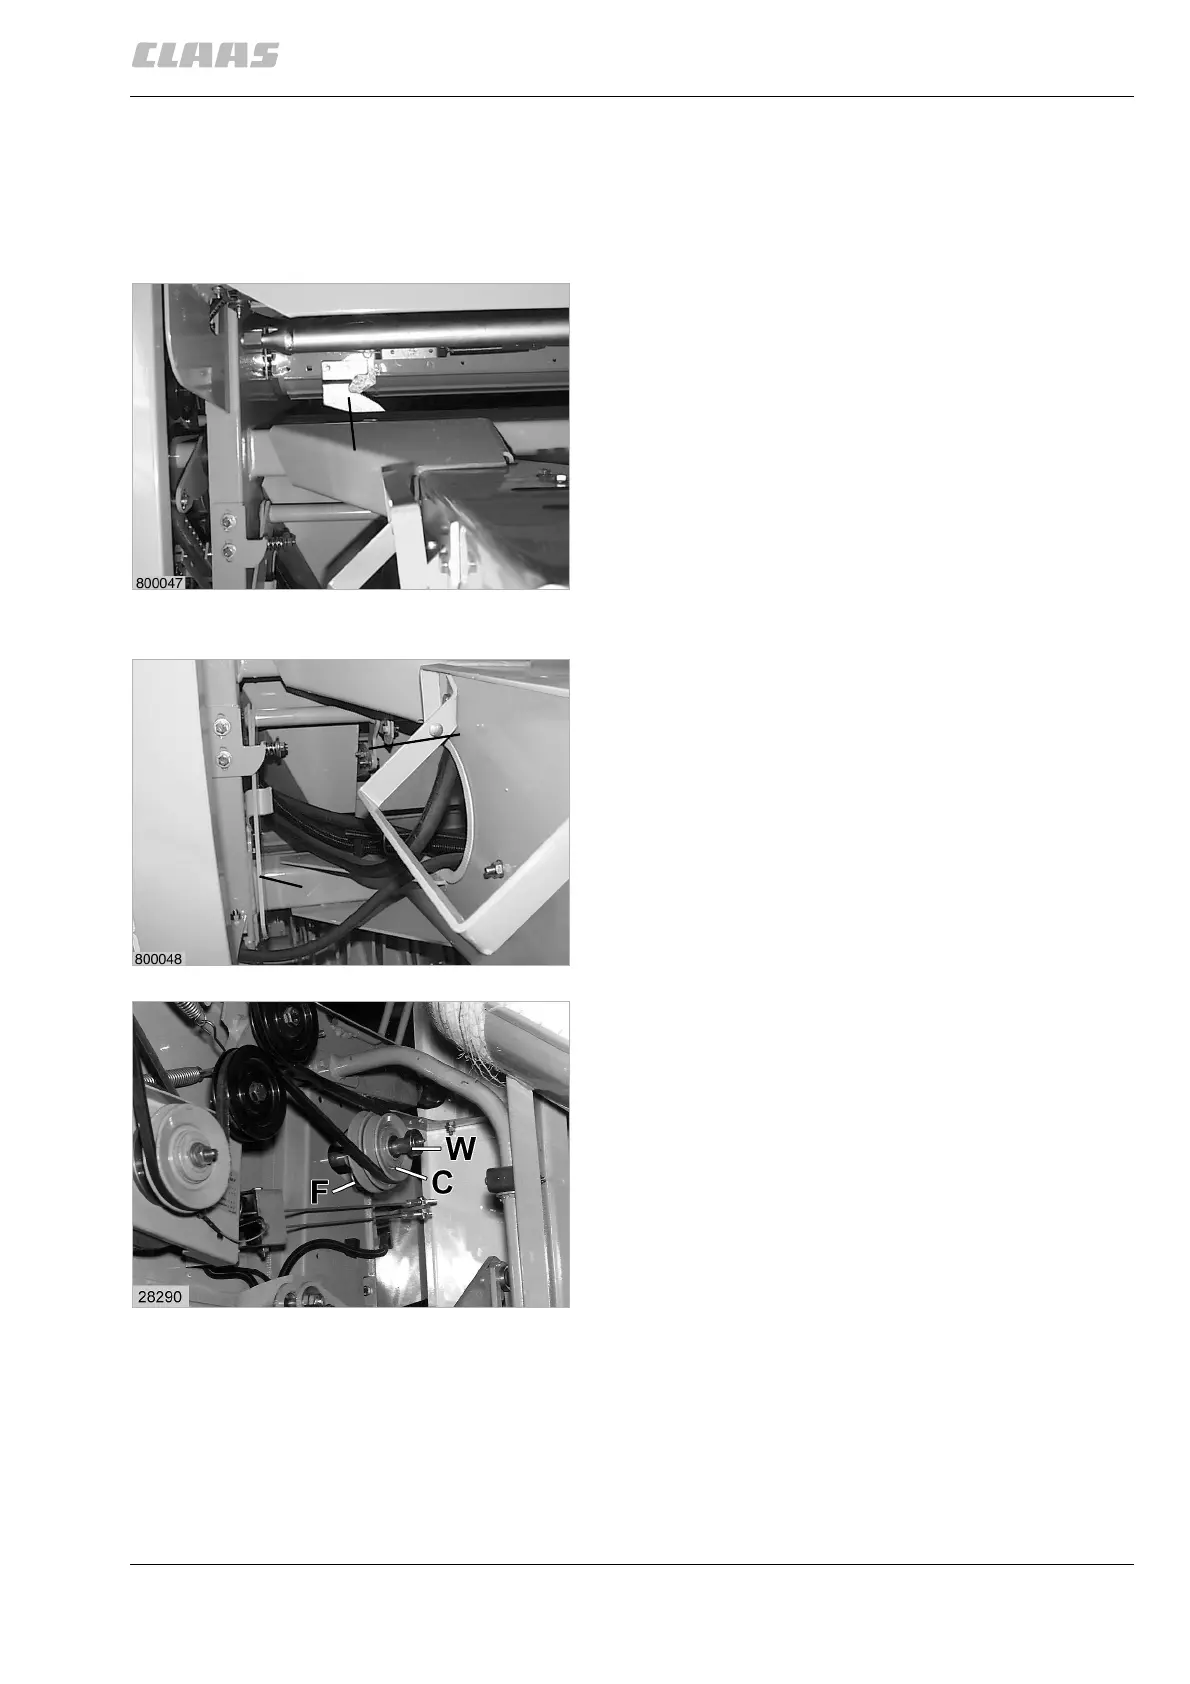
Engaging the drive for the twine wrapping
mechanism
ROLLANT 240/250/254/255 with standard controls:
Using the spring clip (F), lock the V-belt pulley (C) onto
the shaft (W).
The net wrapping mechanism must be disengaged
when using the twine wrapping mechanism.
(Fig. 29)
S
27
H
A
28
29

 Loading...