D-35
(8) Scanner’s Sub-Scanning Zoom Ratio Adjustment
<Requirement>
Perform this adjustment in the following cases.
• After the Scanner Assy. has been replaced
• After the printer’s main scanning & sub-scanning registration adjustments have been
performed
<Adjustment Procedure>
1. Print the test pattern.
2. Enter the “ADJUST” menu in the Service mode.
3. Place the test pattern on the Original Glass and make a test copy.
NOTES
• The test pattern should be positioned vertically.
• Use A4 L or Letter L paper loaded into Tray1 to make the test copy.
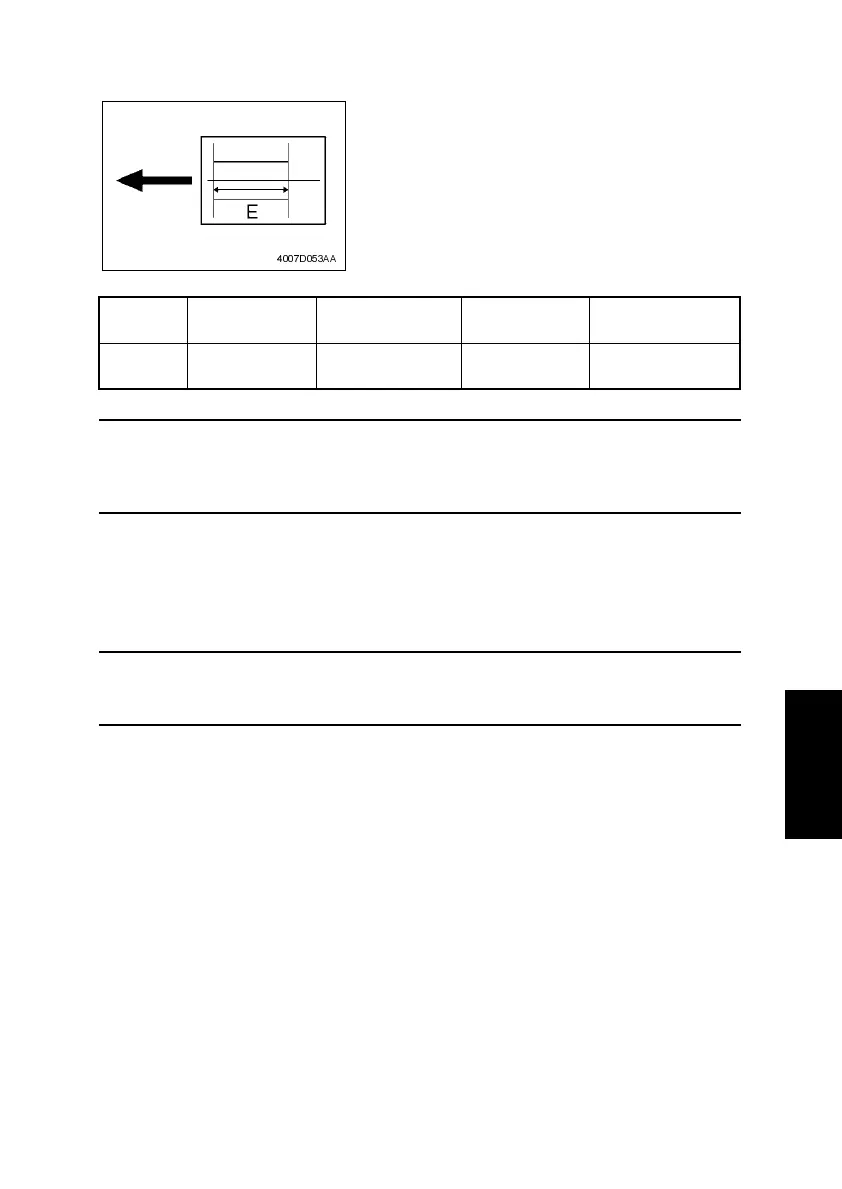
4. Check that the width of E in the copy of the test pattern meets the specification.
Calculation: (1 – Width of E in the document ÷ Width of E in the copy) × 100
If the width of E is out of specification, adjust it according to the following procedure.
5. Change the setting.
If the width of E in the test pattern is longer than the specified width . . . . . Decrease the set-
ting.
If the width of C in the test pattern is shorter than the specified width . . . . . Increase the set-
ting.
✽ If the shift cannot be adjusted to within the specification with a single adjustment, perform
the adjustment again to change the setting.
6. Press the Yes key to apply the setting.
Zoom
Ratio
Specification Mode Function Item Setting Range
Full Size
(100%)
200±0.5 mm “ADJUST” menu
CCD SUB
ZOOM
95 to 105
1 increment = 0.4%
• After finishing the printer’s main scanning & sub-
scanning registration adjustments, place the
printed test pattern on the Original Glass, and
make a copy of it.
• Adjust the width of E in the copy of the test pattern
so that the following specification is met.
4007D053AA