7-2
2. Observe the drive LEDs to verify that the drive is not selected by the storage controller and is
not performing a RAID migration or rebuilding. For more information about drive LEDs, see
"Drive LEDs."
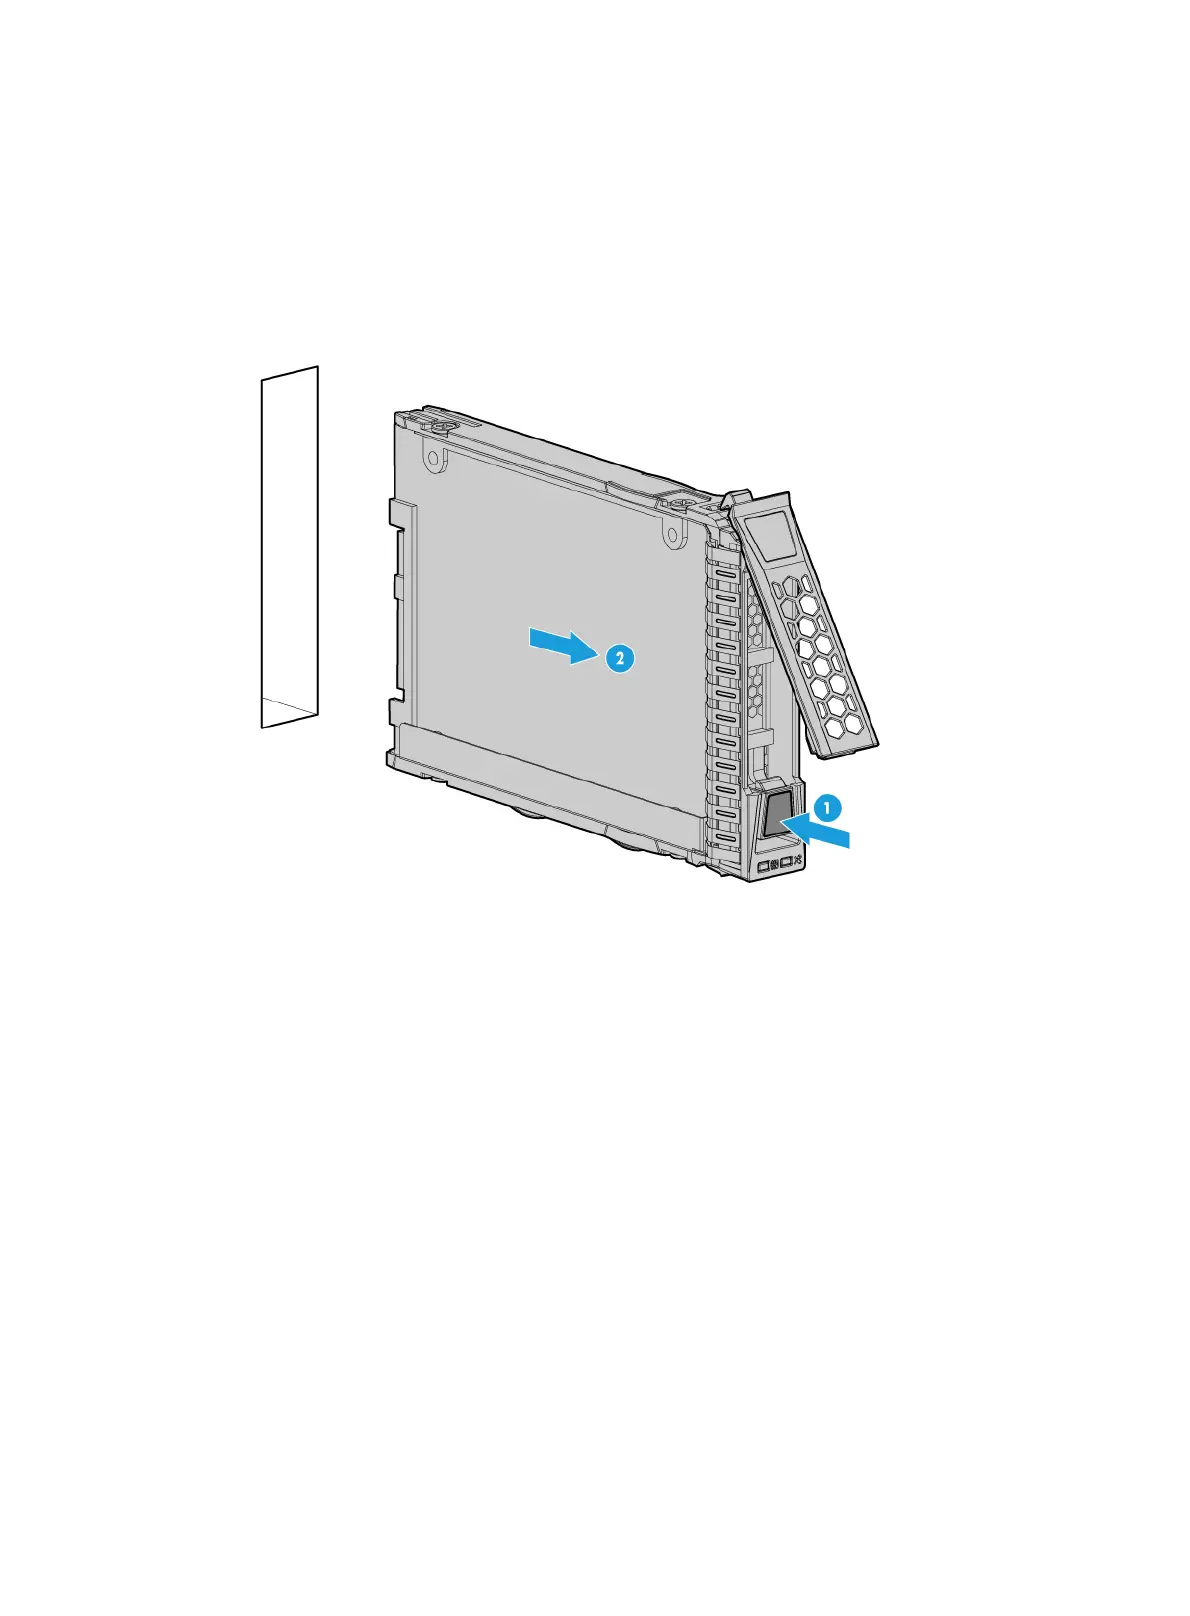
3. Remove the drive, as shown in Figure 7-2:
a. Press the but
ton on the drive panel to release the locking lever, as shown by callout 1.
b. Hold the locking lever and pull the drive out of the slot, as shown by callout 2.
Figure 7-2 Removing a drive
4. Install a new drive. For more information, see "Installing SAS/SATA drives."
5. Install the removed security bezel, if any. For more information, see "Installing the security
bezel."
Verifying the replacement
For information about the verification, see "Installing SAS/SATA drives."
Replacing an NVMe drive
The drives support hot insertion and managed hot removal.
To configure RAID settings after the drive is replaced, see the storage controller user guide for the
server.
Procedure
1. Identify the NVMe drive to be removed and perform managed hot removal for the drive. For
more information about managed hot removal, see "Appendix D Managed hot removal of
NVMe drives."
2. Remove the security bezel, if any. For more information, see "Replacing the security bezel."
3. Remove the drive. For more information, see "Replacing a SAS/SATA drive."
4. Install a ne
w drive. For more information, see "Installing SAS/SATA drives."

 Loading...


