7-50
Figure 7-58 Removing the left chassis ear
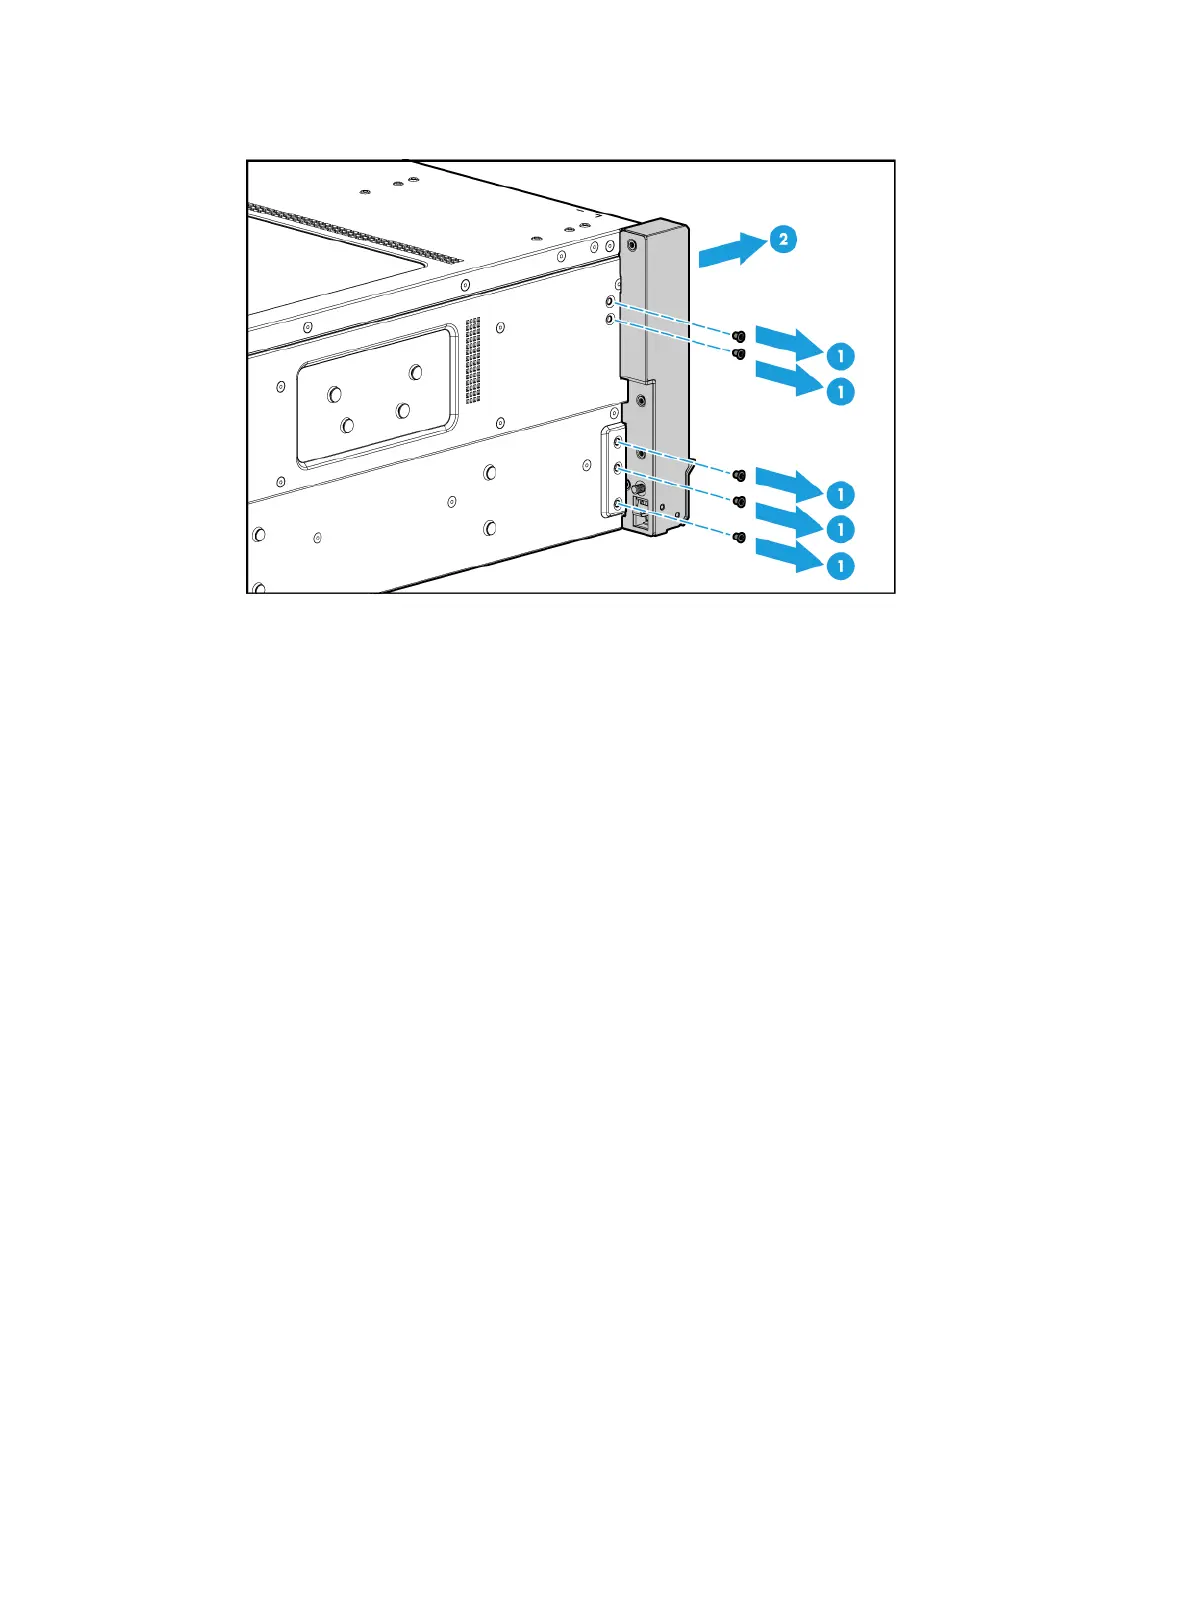
9. Install a new left chassis ear. Attach the left chassis ear to the left side of the server, and use
screws to secure it into place.
10. Insert the front VGA and USB 2.0 cable into cable cutout in the chassis and connect the cable to
the PDB.
11. Install the power supply air baffle. For more information, see "Replacing the power supply air
baffle."
12. Install the ch
assis access panel. For more information, see "Replacing the chassis access
panel."
13. Install the compute modules. For more information, see "Installing a compute module."
14. Install the removed security bezel. For more information, see "Installing the security bezel."
15. Rack-mount the server. For more information, see "Installing the server."
16. Connect the power cord. For more information, see "Connecting the power cord."
17. Powe
r on the server. For more information, see "Powering on the server."
Replacing the TPM/TCM
To avoid system damage, do not remove the installed TPM/TCM.
If the installed TPM/TCM is faulty, remove the management module, and contact H3C Support for
management module and TPM/TCM replacement.

 Loading...


