Chapter 3: ProView 2900 Control Interfaces Electrical Installation
© Harmonic Inc. Manual p/n 101543/Ver 1.0 3-8 ProView 2900 Series/SW Version 1.94
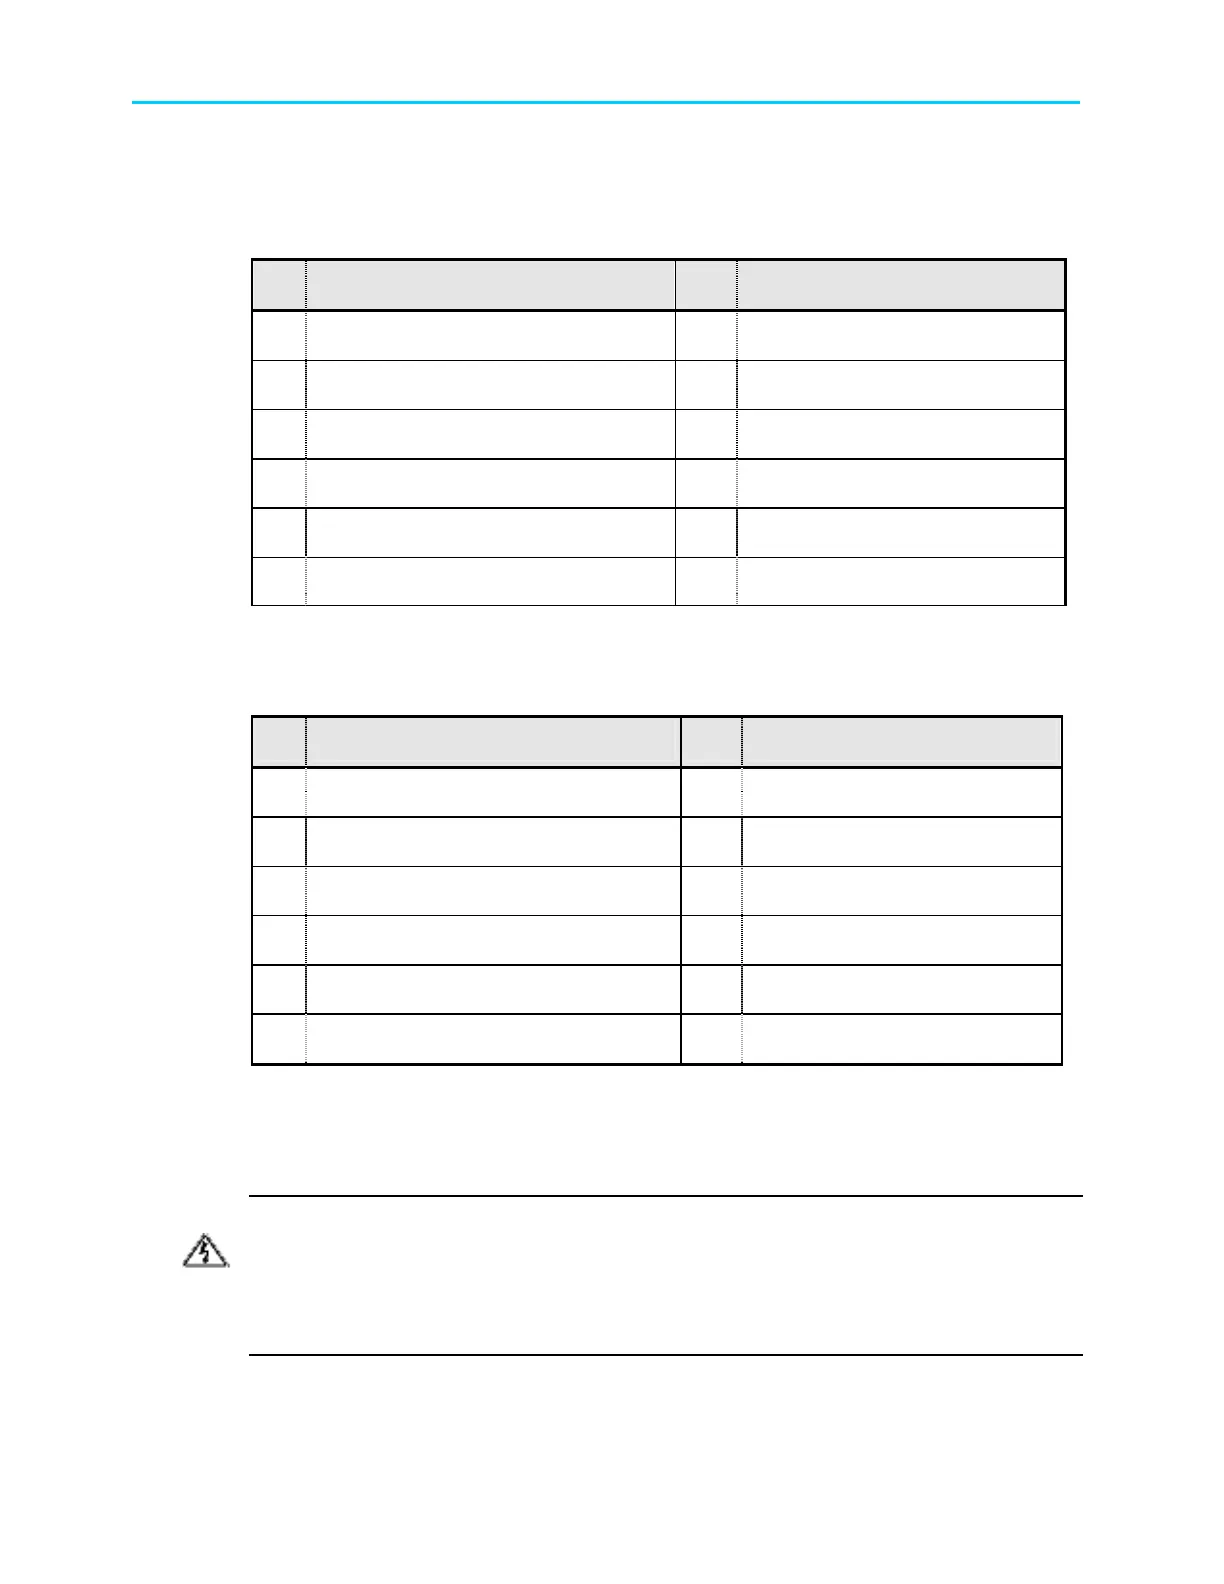
Table 3-5 lists the Audio 3-4 breakout cable interface pin-out.
Table 3-5: Audio 3-4 Breakout Cable Pin-Out (Harmonic P/N
204346)
Pin Function Pin Function
1 Audio 4 XLR Right (+) 8 Audio 4 XLR Left Common
2 Audio 4 XLR Left (+) 10 Audio 3 XLR Left Common
3 Audio 3 XLR Right Common 11 Audio 4 XLR Right (-)
4 Audio 3 XLR Right (+) 12 Audio 4 XLR Left (-)
5 Audio 3 XLR Left (+) 14 Audio 3 XLR Right (-)
7 Audio 4 XLR Right Common 15 Audio 3 XLR Left (-)
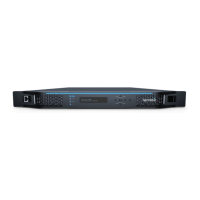
Table 3-6 lists the AES/ABU balanced breakout cable pin-out.
Table 3-6: AES/EBU Balanced Breakout Cable Pin-Out (Harmonic P/N
204345)
Pin Function Pin Function
1 AES/EBU 4 (+) 8 AES/EBU 3 Common
2 AES/EBU 3 (+) 10 AES/EBU 1 Common
3 AES/EBU 2 Common 11 AES/EBU 4 (-)
4 AES/EBU 2 (+) 12 AES/EBU 3 (-)
AES/EBU 1 (+) 14 AES/EBU 2 (-)
7 AES/EBU 4 Common 15 AES/EBU 1 (-)
3.3.2. Electrical Power Connection
The ProView 2900 is powered by an AC power supply unit or by an optional external DC
power source. The following describes the AC and CD electrical power connections.
DANGER: Do not connect power to the unit until you have verified that the line voltage is
correct and the correct fuses are installed. Failure to do so may result in electrical shock. If
the unit is rack mounted, ensure that the unit is grounded to the rack and the rack is correctly
grounded.
A rack-mounted ProView 2900 Grounding jackscrew must be connected to the rack housing,
which must be correctly grounded (see Figure 3-4 and Figure 3-5).