Keysight N9010A EXA Service Guide 545
Assembly Replacement Procedures
Disk Drive
4. Remove the disk drive (2) from the carrier assembly.
5. Place the new disk drive onto the carrier assembly and attach with the 4
machine screws (1). Torque to 9 in-lbs.
6. Refer to Figure 15-64. Replace the disk drive carrier assembly (2) into the
instrument and tighten the screw to 9 in-lbs.
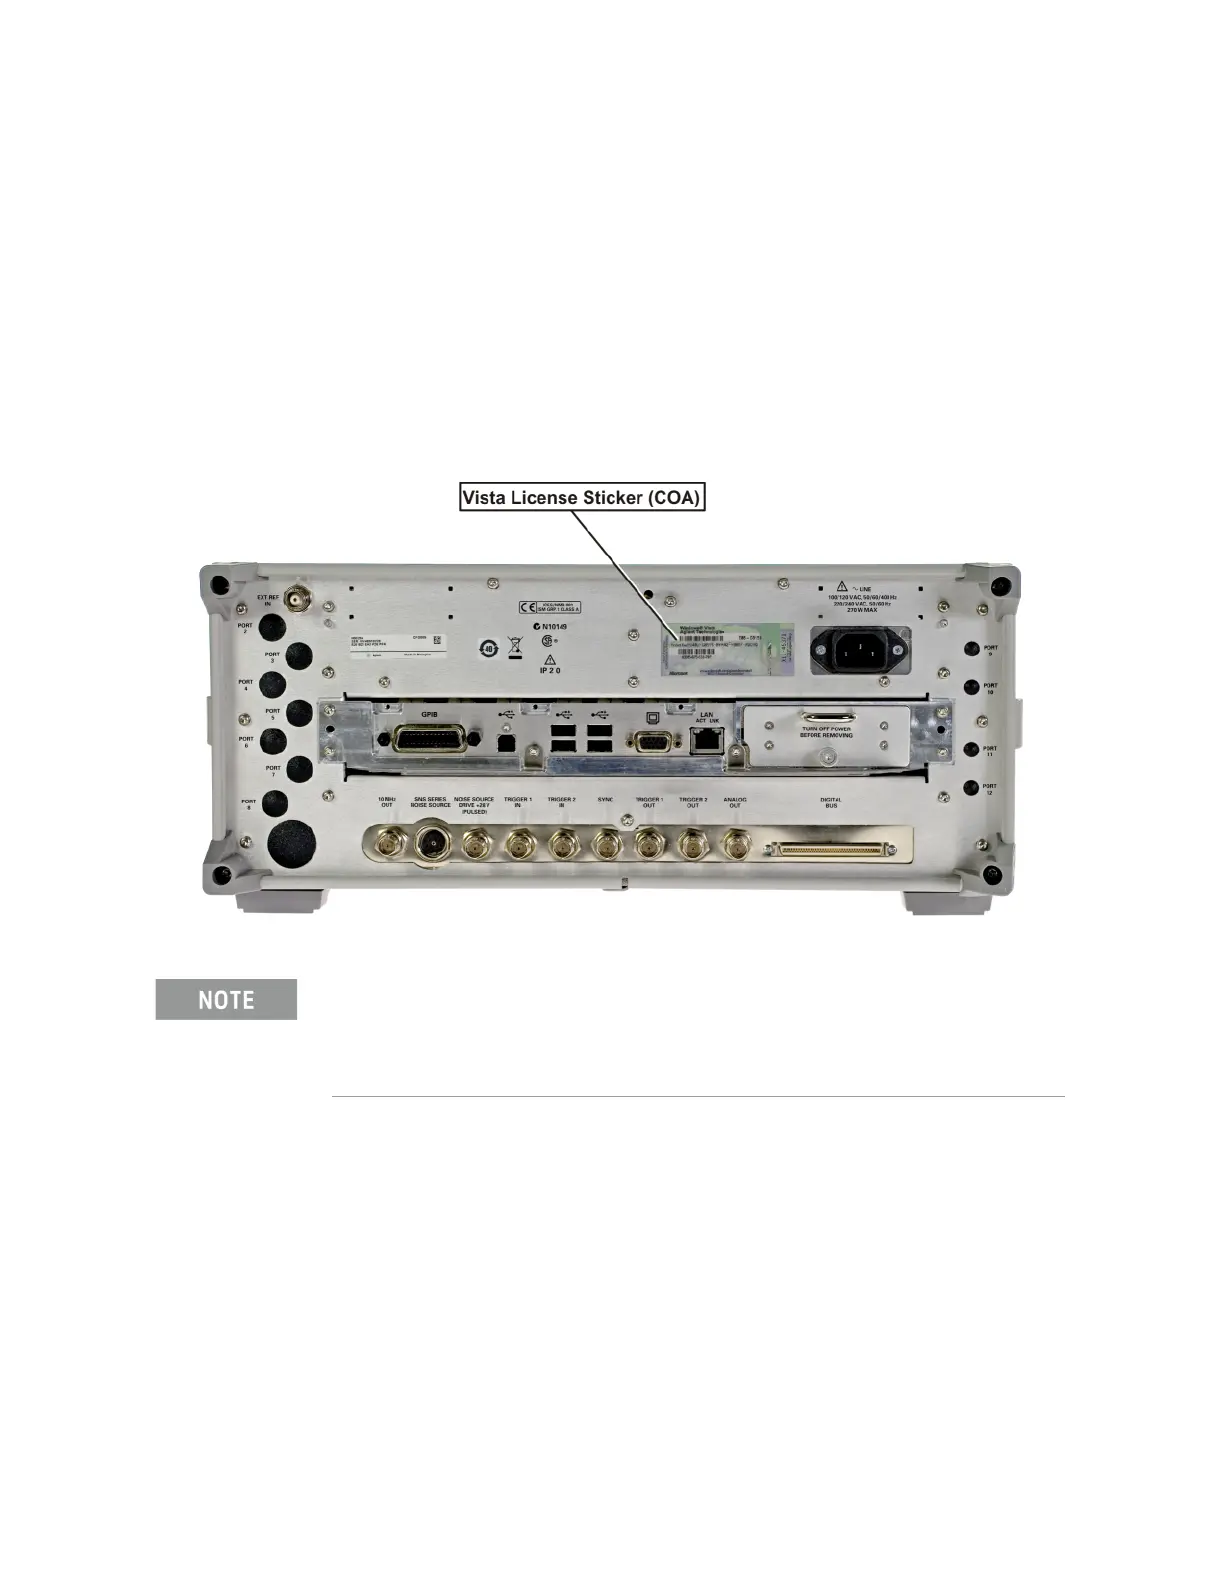
7. Locate the Windows Vista License Sticker that came with the replacement
disk drive and apply it to the rear of the instrument as shown in Figure
15-66, covering the existing license sticker.
Figure 15-66 Windows License Sticker Rear Panel Location
8. Refer to Chapter 16, “Post-Repair Procedures.” and perform all of the
specified tasks for replacing the A5 Disk Drive assembly.
While the replacement disk drive has the Windows XP operating system loaded onto it, the
license that accompanies it in this kit is for Windows Vista. This is being done within the scope of
our license agreement with Microsoft and is necessary at this time, as the instrument
applications software is not supported or qualified with any operating system other than
Windows XP.

 Loading...


