Upgrading from Flashback2 to Flashback3 or FlashbackHD
Flashback3 & Flashback HD User’s Guide
Page 246 L3 Mobile-Vision 6.23.2017
19 L
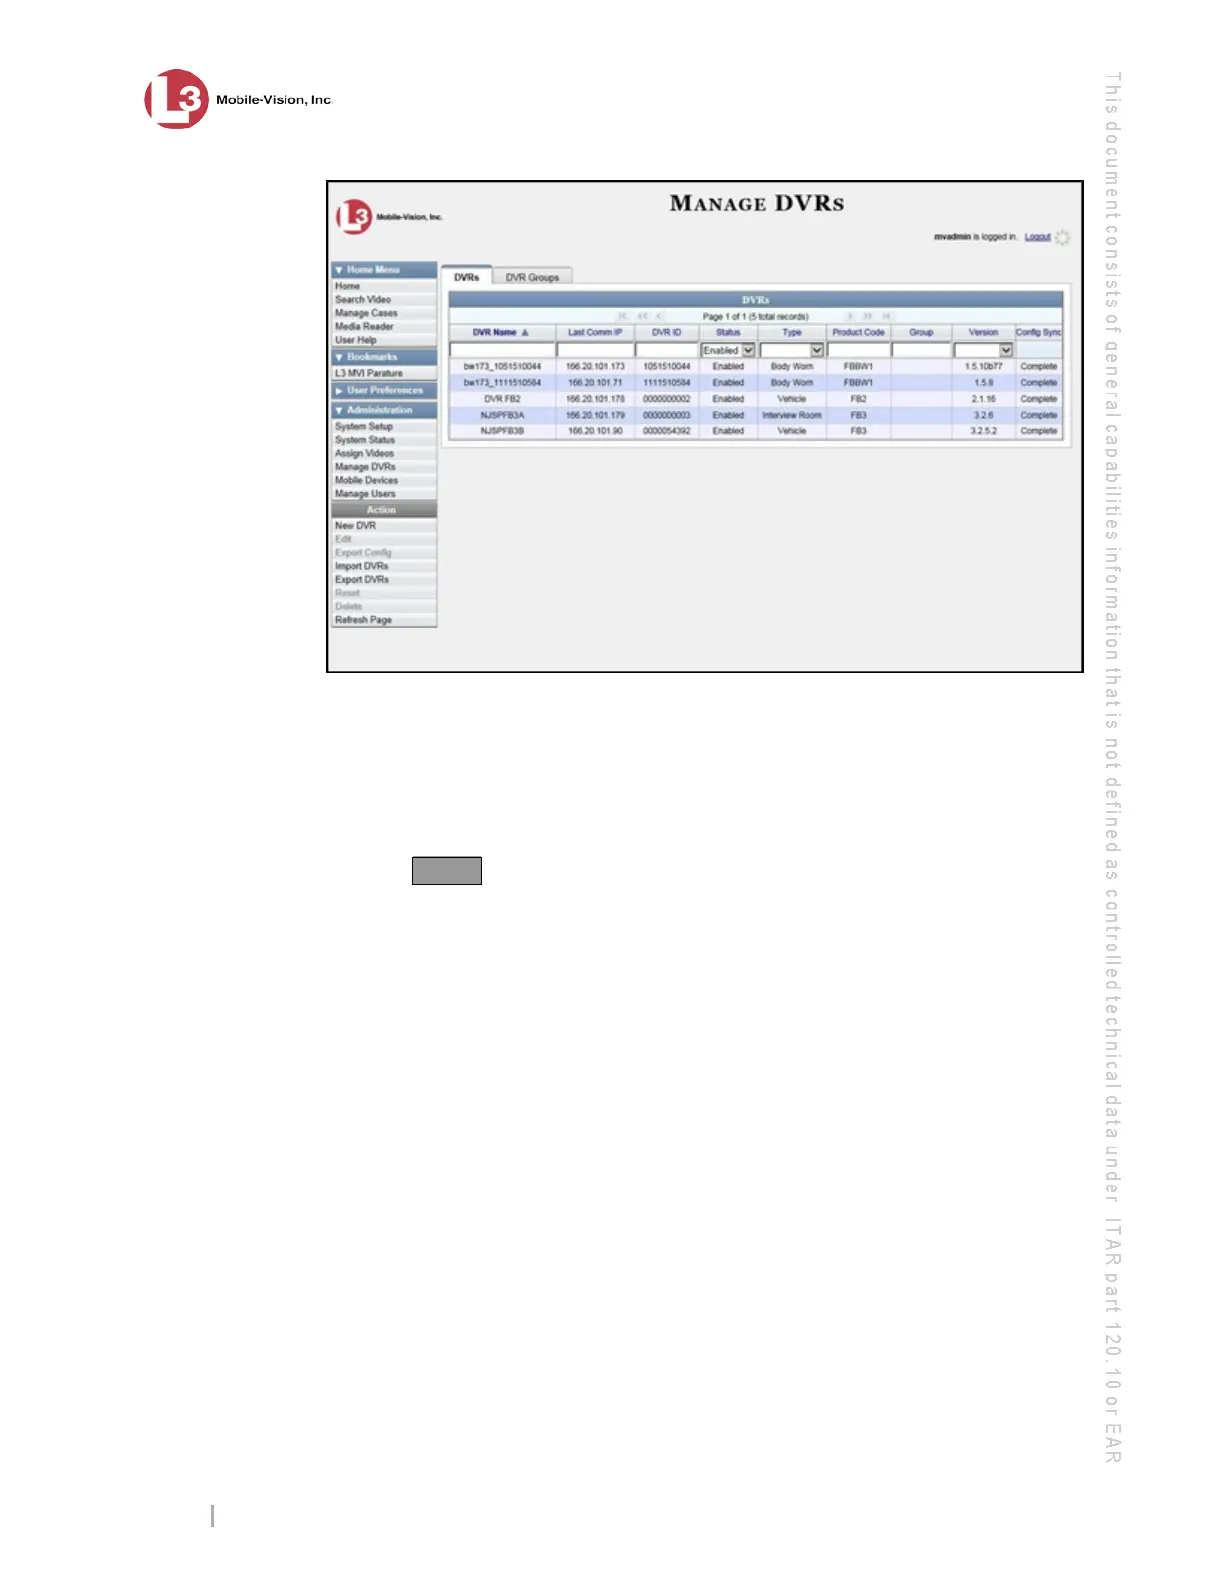
ocate the DVR record for the Flashback2 unit you are replacing. If you have a large
number of records to scan through, use the navigation icons or search fields at the top
of the page to locate the record.
20 C
lick on the Flashback2 record to highlight it.
21 Go to the Action column and click Reset. A confirmation message displays.
22 Click Yes.
23 W
ait 10 minutes, then proceed to the next step.
24 R
eturn to the vehicle or Interview Room.
25 I
nsert the new Flashback3 or FlashbackHD unit and re-connect all wires and cables.
If necessary, refer to the diagram on page 4. If you will be using one or more Bullet
cameras, use the 3-Part Breakout Cable and Camera Extension Cable to connect them
to the Flashback3’s
CAMERA 3-5 port. Alternately, you can use the Camera
Extension Cable to connect one of the Bullet cameras to the
CAMERA 2 port.