L-Gate User Manual 37 LOYTEC
Version 3.2 LOYTEC electronics GmbH
• Could not send value update: The new value has been set but it has not been sent out
on the network. The reason can be that the peer node is currently offline or there is a
configuration error. The data point status reflects this error.
• Could not set value (error code): The new value has not been set because of an
internal error. Please contact LOYTEC with the error code.
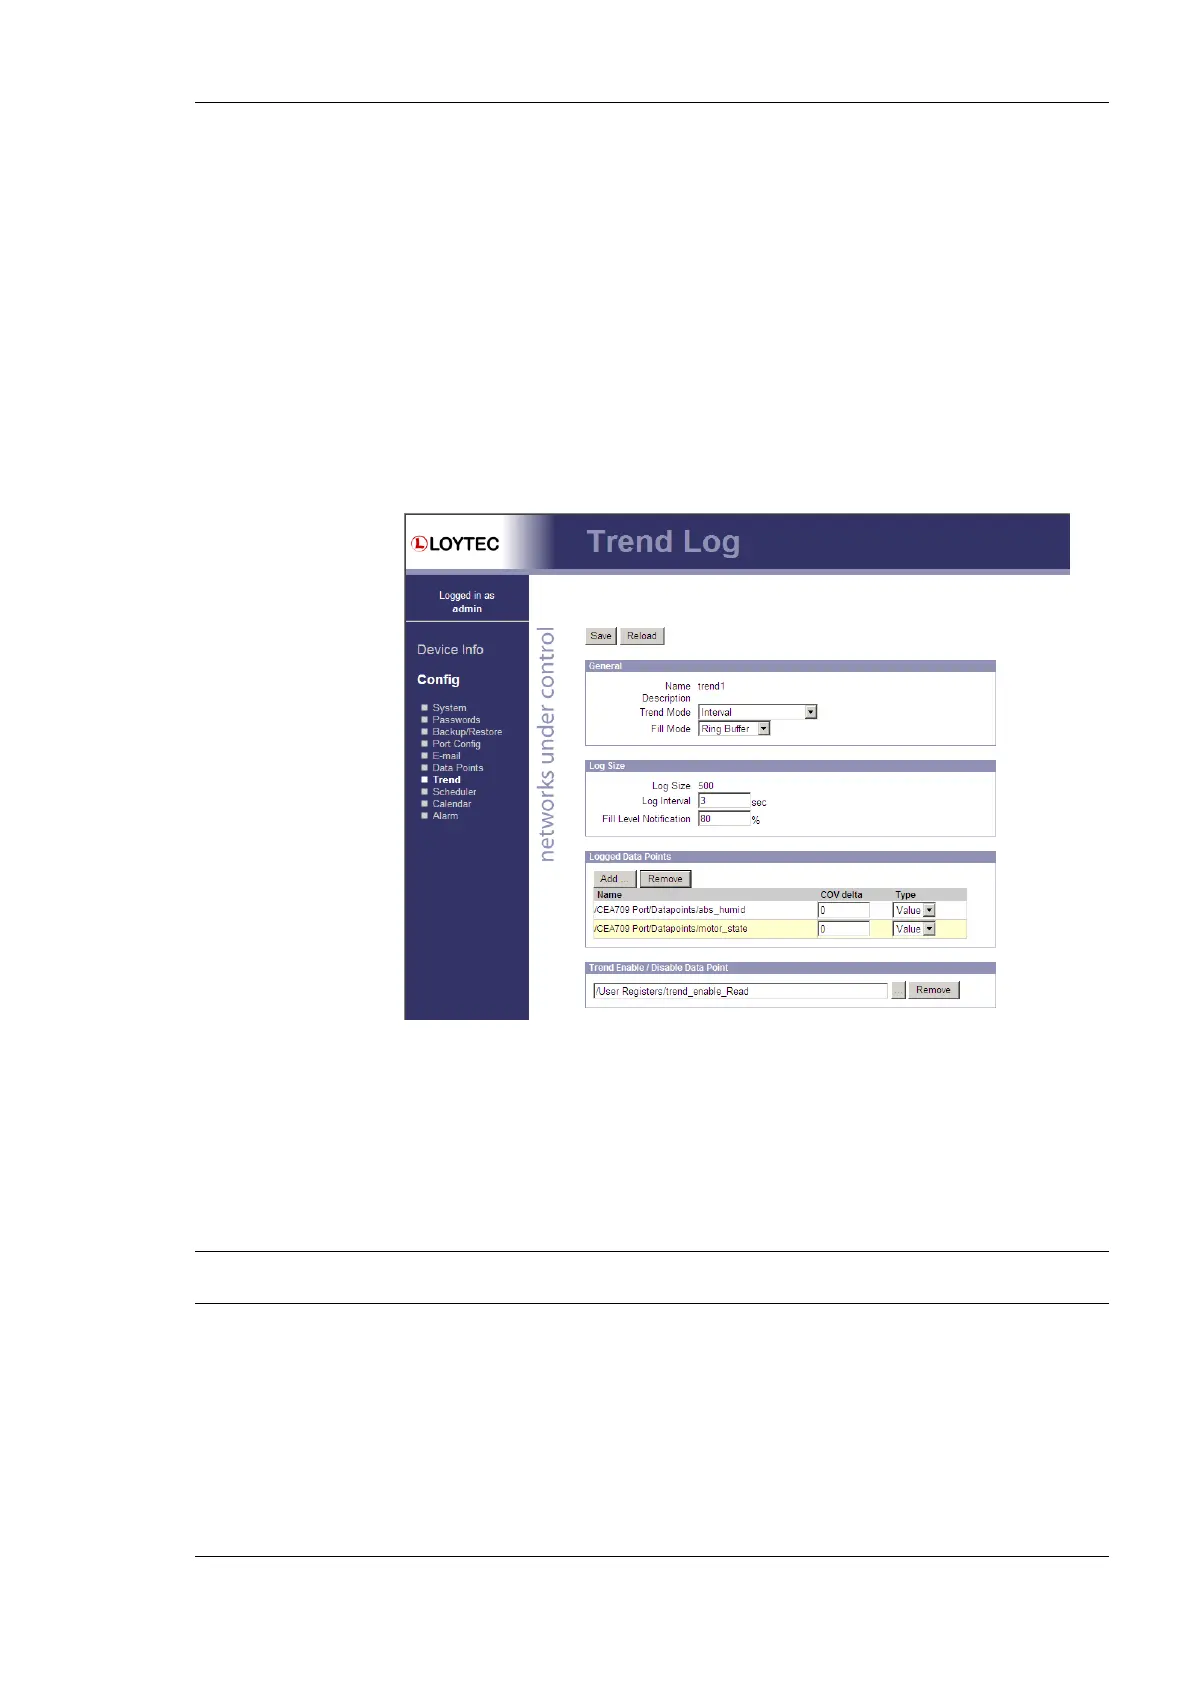
4.2.13 Trend
The Web interface provides a configuration page to re-configure trend logs at run-time.
The changes made to the trend logs take effect immediately without the needs for a reboot
of the device. Allocating new trend logs can only be done in the configuration software
(see Section 6.14.1). The trend log main page displays all available trend logs. Click on the
trend log to be edited. This opens the trend log configuration page. An example is shown in
Figure 27.
Figure 27: Trend log configuration page.
The user can change the Trend Mode, the Fill Mode, the Log Interval and the Fill Level
Notification. Furthermore, data points can be added to the trend log by clicking the Add…
button. A data point selector dialog opens. Click on a data point for adding it. For removing
a data point from the trend log, click on it in the Logged Data Points list and hit the
Remove button. Save the changes made by clicking the Save button. For more information
on how a trend log can be configured please refer to the Configurator Section 6.14.
Note: This firmware version does not allow configuring trended data points on local BACnet
trend logs. The feature is currently limited to CEA-709 trend logs.
4.2.14 Scheduler
The Web interface provides the scheduler page to edit its schedules at run-time, i.e., change
the times and values that shall be scheduled. Allocating new schedules can only be done in
the configuration software (see Section 6.12). The scheduler main page displays all
available schedules. Click on the schedule to be edited. This opens the scheduler page. An
example is shown in Figure 28.