Channel configuration controls 243
PRO2 Live Audio System
Owner’s Manual
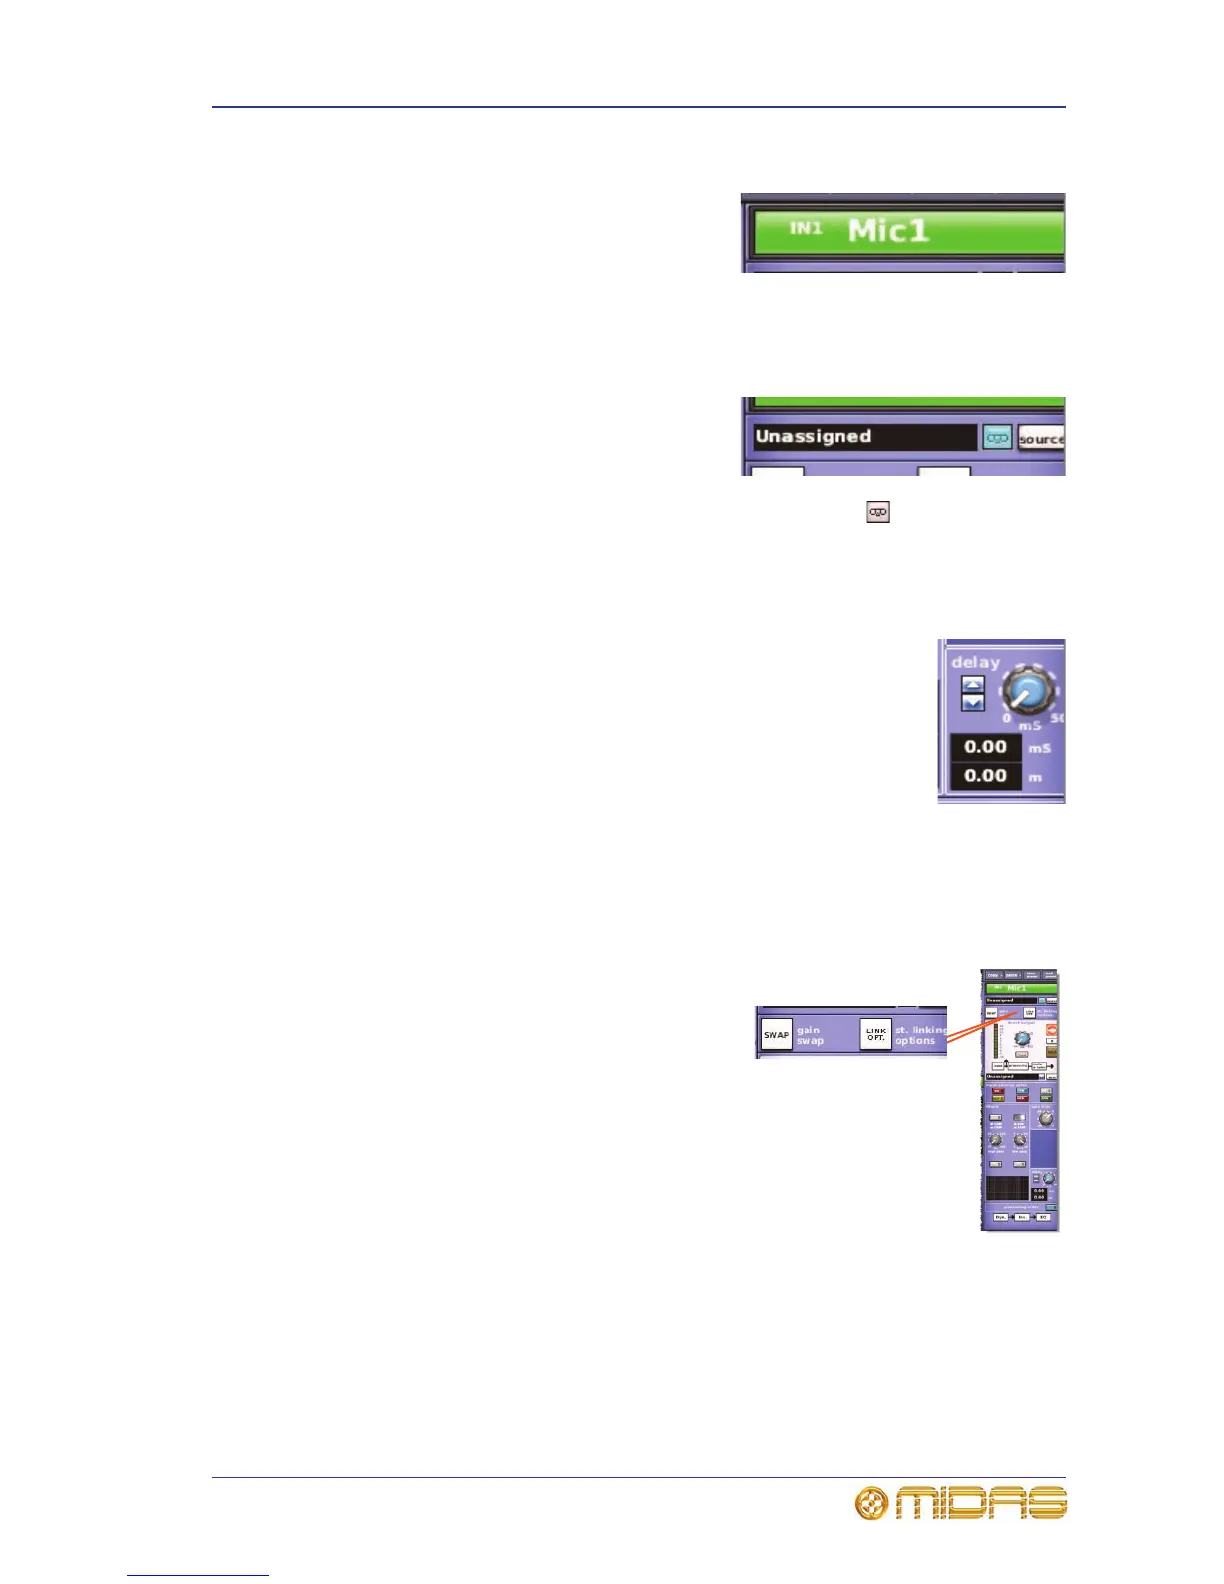
Input channel ID (GUI only)
You can change the channel name via the GUI,
which can be done directly in the input channel
overview or in any of the detail areas (see
“Text editing” on page 42).
To change the background colour of the input channel name field (default is green),
open the Naming Sheet screen of the GUI menu.
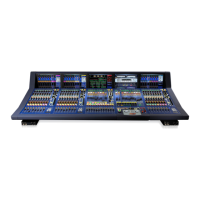
Input channel source select (GUI only)
The channel’s source is shown in the text field;
if none has been selected, it will contain the text
“Unassigned” (as shown right). You can select
the source for this channel by clicking source,
which opens the Patching screen (see Chapter
8 "Patching" on page 47). Also, by clicking the recorder button you can set the
input source to tape returns to obtain an alternative input, for example, from a hard
disk recorder for a virtual soundcheck.
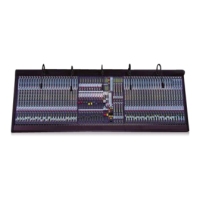
Input channel delay (GUI only)
The input channel delay can only be changed via the delay section of
the configuration detail area (GUI channel strip). This section has a
control knob for adjusting the delay in the range 0ms to 50ms; this
value is displayed in both milliseconds (ms) and metres. You can fine
tune the delay value using the spin buttons to the left of the control
knob.
The delay section allows you to incorporate a time delay on an input
channel, which is used mainly for mic placements and time aligning to
reduce comb filtering. For example, on a drum kit mic set up, you may have a mic
close to a snare drum and a couple of overhead mics. In this case, setting an input
channel delay on the snare drum — to bring it more in line with the overheads — will
probably produce a better sound.
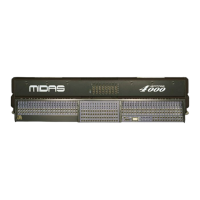
Stereo linking (GUI only)
The linking/gain swap section of the
configuration detail has a LINK OPT. button that
opens a Stereo Linking Options window from
where you can choose which parameters you
want to link between the pair.
For more information, see Chapter 10 "Stereo
Linking" on page 95.