2 - S - 5
FIXING UNIT
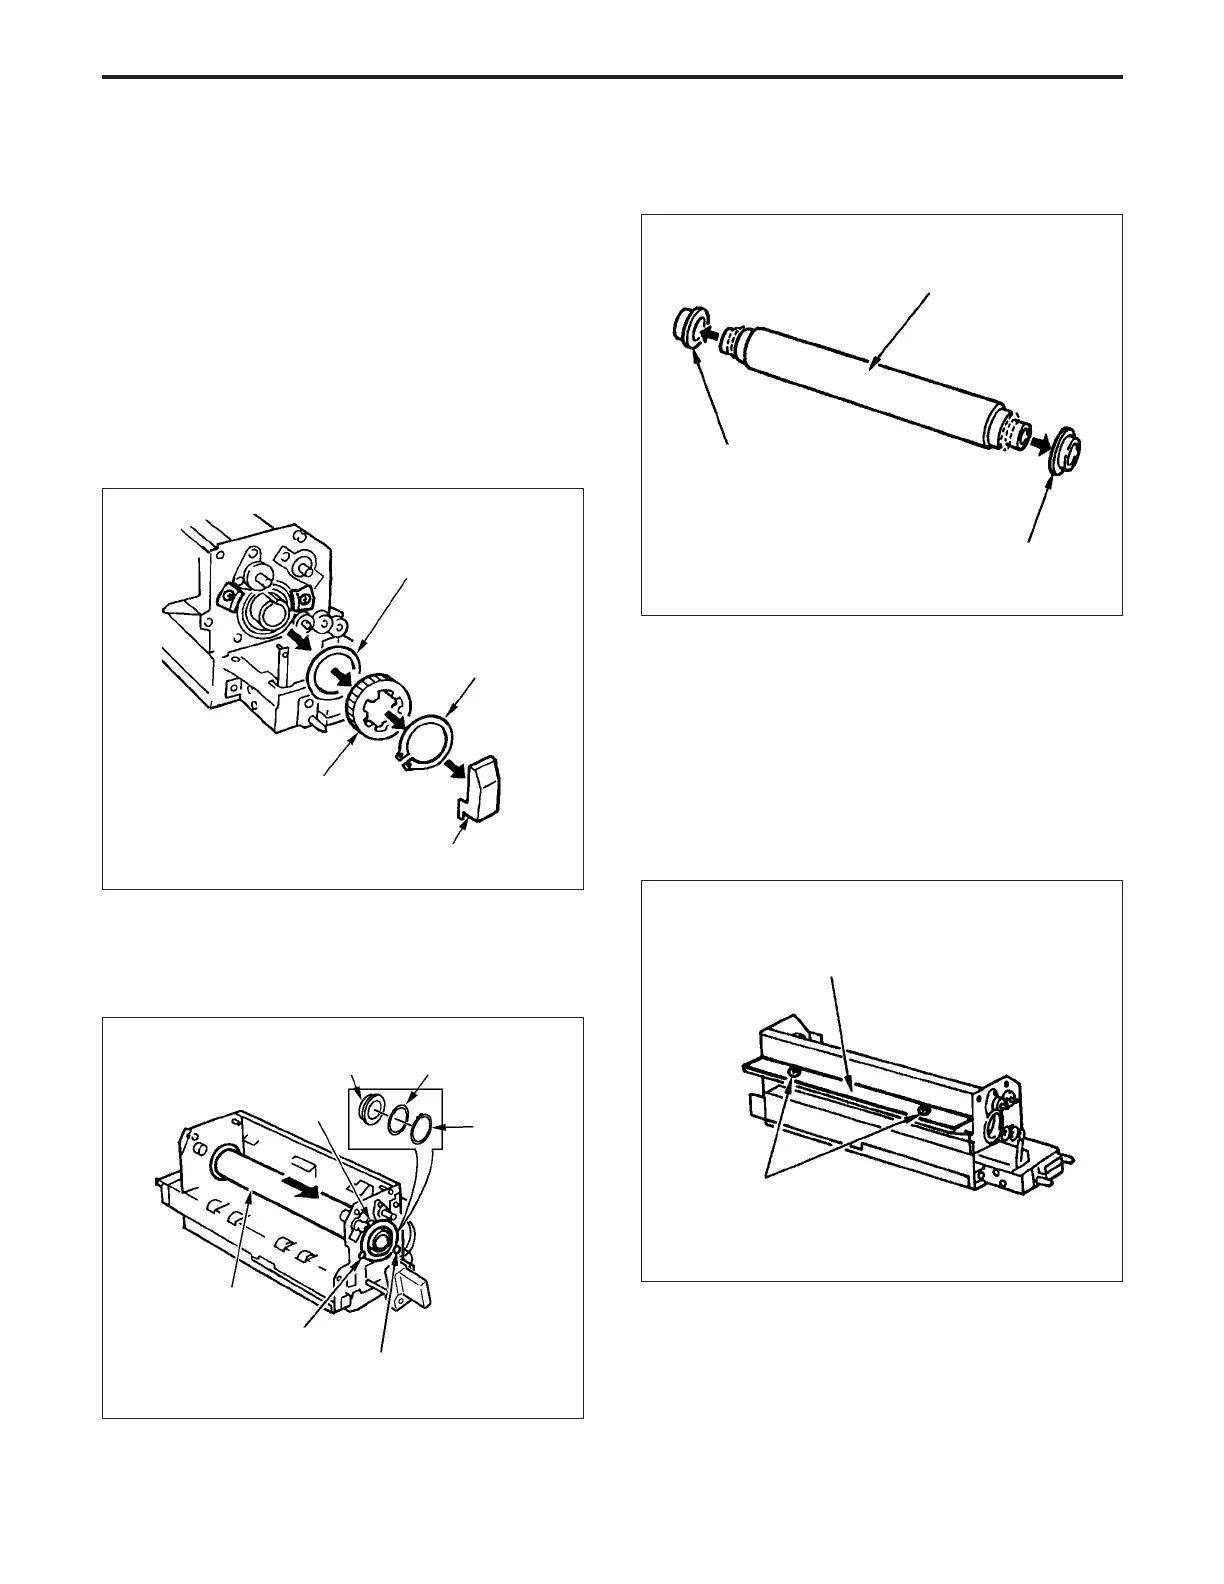
6. Removing and Re-installing the Upper Fixing
Roller
Caution:
When replacing the heat insulation sleeves, coat
the inside and outside of the sleeves with “GREASE”,
then fit the sleeves onto the roller shaft.
a. Procedure
(1) Remove the upper paper exit roller unit, upper fixing
cover, oil pad, fixing heater lamps (upper), oil apply
roller and fixing cleaning roller.
(2) Remove the lamp terminal cover at the rear, then
remove the C ring, collar and gear from the upper fixing
roller.
Collar
(5) Remove the two heat insulation sleeves from the upper
fixing roller.
(6) Re-install the upper fixing roller in the opposite se-
quence to removal.
7. Removing and Re-installing the Lower Fixing
Roller
a. Procedure
(1) Remove the fixing heater lamp (lower) and upper fixing
roller.
(2) Remove the two set screws, then remove the fixing
entrance cover.
Heat insulation sleeve
Heat insulation sleeve
(3) Remove the two set screws, then remove the entrance
guide plate (upper).
(4) Remove the two set screws, then remove the entrance
guide plate (lower).
Set screws
Upper fixing roller
Fixing entrance cover
(3) Remove the three set screws at the front, then remove
the C ring and the collar.
(4) Remove the bearing, then pull out the upper fixing
roller from the front.
Gear
Collar
C-ring
terminal cover
Set screw
Set screw
Bearing holder
plate
Bearing holder
plate
Upper fixing roller
Set screw
Bearing
Collar
C ring
FIXING UNIT-1