Firewall Protection
178
NETGEAR ProSAFE VPN Firewall FVS318G v2
3. In the Add Customer Service section, enter the settings as described in the following table:
4. Click the Appl
y button.
Your changes are saved.
To edit a service:
1. Log in to the unit:
a. In the address field of any of the qualified web browsers, enter
https://192.168.1.1.
The NETGEAR Configuration Manager Login screen displays.
b. In the User
name field, enter admin and in the Password / Passcode field, enter
password.
Use lowercase letters. If you changed the password, enter your persona
lized
password. Leave the domain as it is (geardomain).
c. Click
the L
ogin button.
The Router Status screen displays. After five minutes of inactivity,
which is the default
login time-out, you are automatically logged out.
2. Select Securi
ty > Services.
The Services screen displays.
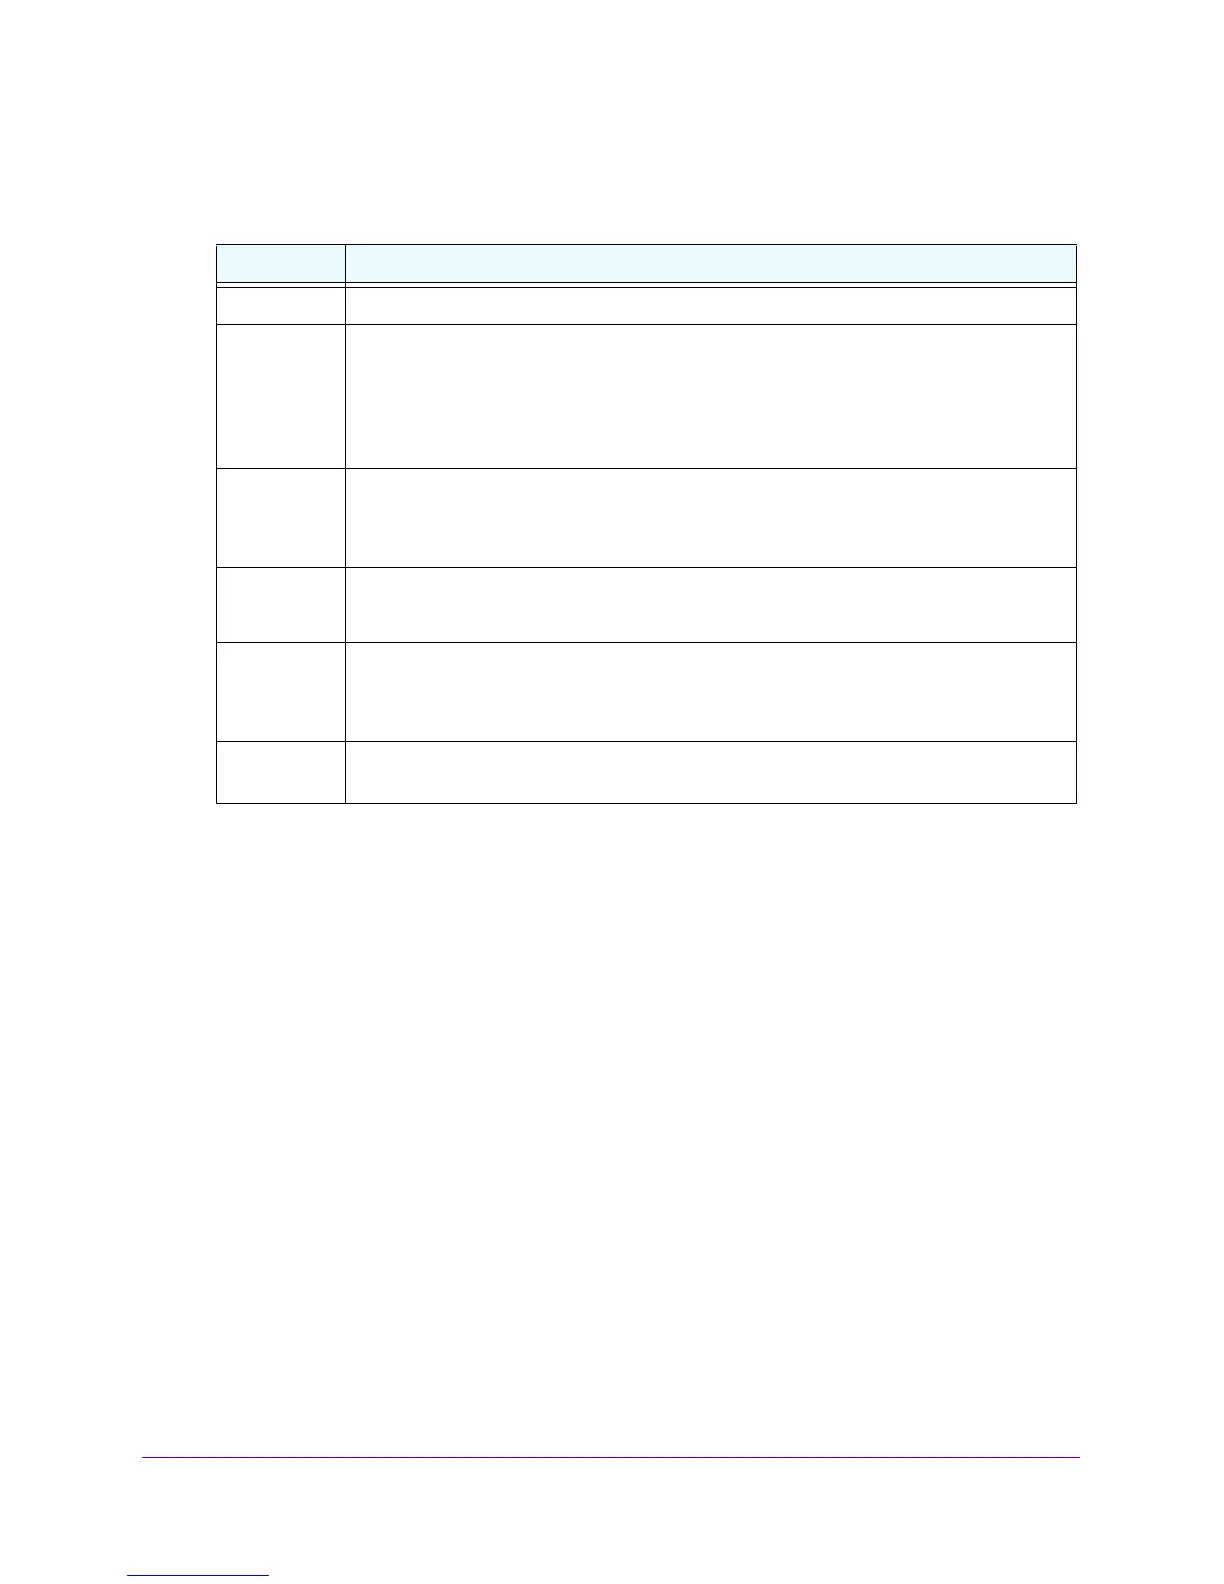
Table 33. Services screen settings
Setting Description
Name A descriptive name of the service for identification and management purpo
ses.
Type Select the Layer 3 protocol that the service uses as its transport protocol:
• TCP
• UD
P
• ICMP
• ICMPv6
ICMP T
ype A numeric value th
at can range between 0 and 40. For a list of ICMP types, visit
http://www.iana.org/assignments/icmp-parameters.
Note: This field is enabled only when you select ICMP or ICMPv6 from the Type list.
Start Port The first TCP or UDP port of a range that the service uses.
Note: This field is enabled only when you select TCP or UDP from the Type list.
Finish Port The last TCP or UDP port of a range that the service uses. If the service uses only a single
port number, enter the same number in the Start Port and Finish Port fields.
Note: This field is enabled only when you select TCP or UDP from the Type list.
Default QoS
Priority
Select the QoS profile that you want to assign to the service. For more information about
QoS profiles, see Preconfigured Quality of Service Profiles on page 183.
 Loading...