Firewall Protection
208
NETGEAR ProSAFE VPN Firewall FVS318G v2
3. In the Add Port Triggering Rule section, enter the settings as described in the following table:
4. Click the Add
table button.
The new port triggering rule is added to the Port Triggering Rules table.
To edit a port triggering rule:
1. Log in to the unit:
a. In the address field of any of the qualified web browsers, enter
https://192.168.1.1.
The NETGEAR Configuration Manager Login screen displays.
b. In the User
name field, enter admin and in the Password / Passcode field, enter
password.
Use lowercase letters. If you changed the password, enter your persona
lized
password. Leave the domain as it is (geardomain).
c. Click
the L
ogin button.
The Router Status screen displays. After five minutes of inactivity,
which is the default
login time-out, you are automatically logged out.
2. Select Securi
ty > Port Triggering.
The Port Triggering screen displays.
3. In the Port Triggering Rules table to the right of the port triggering
rule that you want to edit,
click the Edit table button.
The Edit Port Triggering Rule screen displays.
4. Modify the settings that you wish to change.
See
Table 40 on page 20
8.
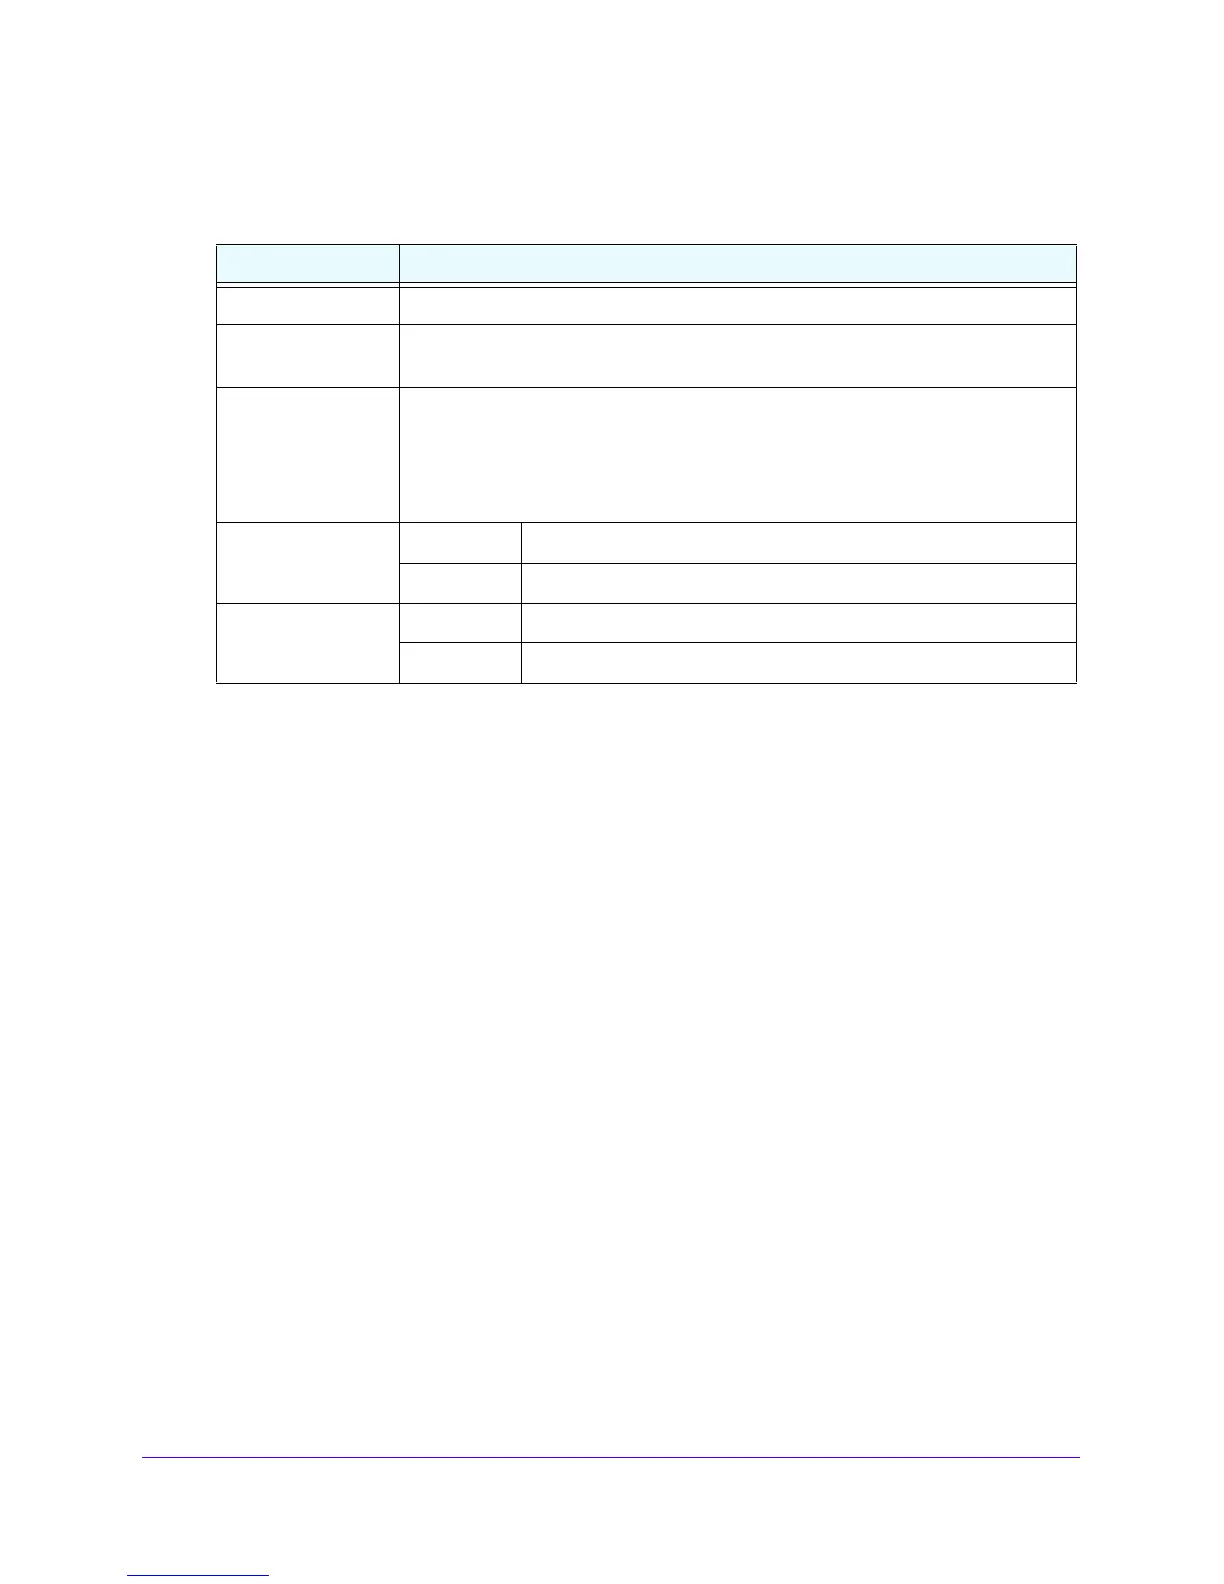
Table 40. Port Triggering screen settings
Setting Description
Name A descriptive name of the rule for iden
tification and management purposes.
Enable From the list, select Yes to enable the rule. (You can define a rule but not enable it.)
The default setting is No.
Protocol From the list, select the protocol to which the rule applies:
• TCP.
The rule applies to an application that uses the Transmission
Control
Protocol (TCP).
• UDP. The rule applies to an application that uses the User Datagram
Protocol
(UDP).
Outgoing Ports Start Port The start port (1–65535) of the range for triggering.
End Port The end port (1–65535) of the range for triggering.
Incoming Ports Start Port The start port (1–65535) of the range for responding.
End Port The end port (1–65535) of the range for responding.
 Loading...