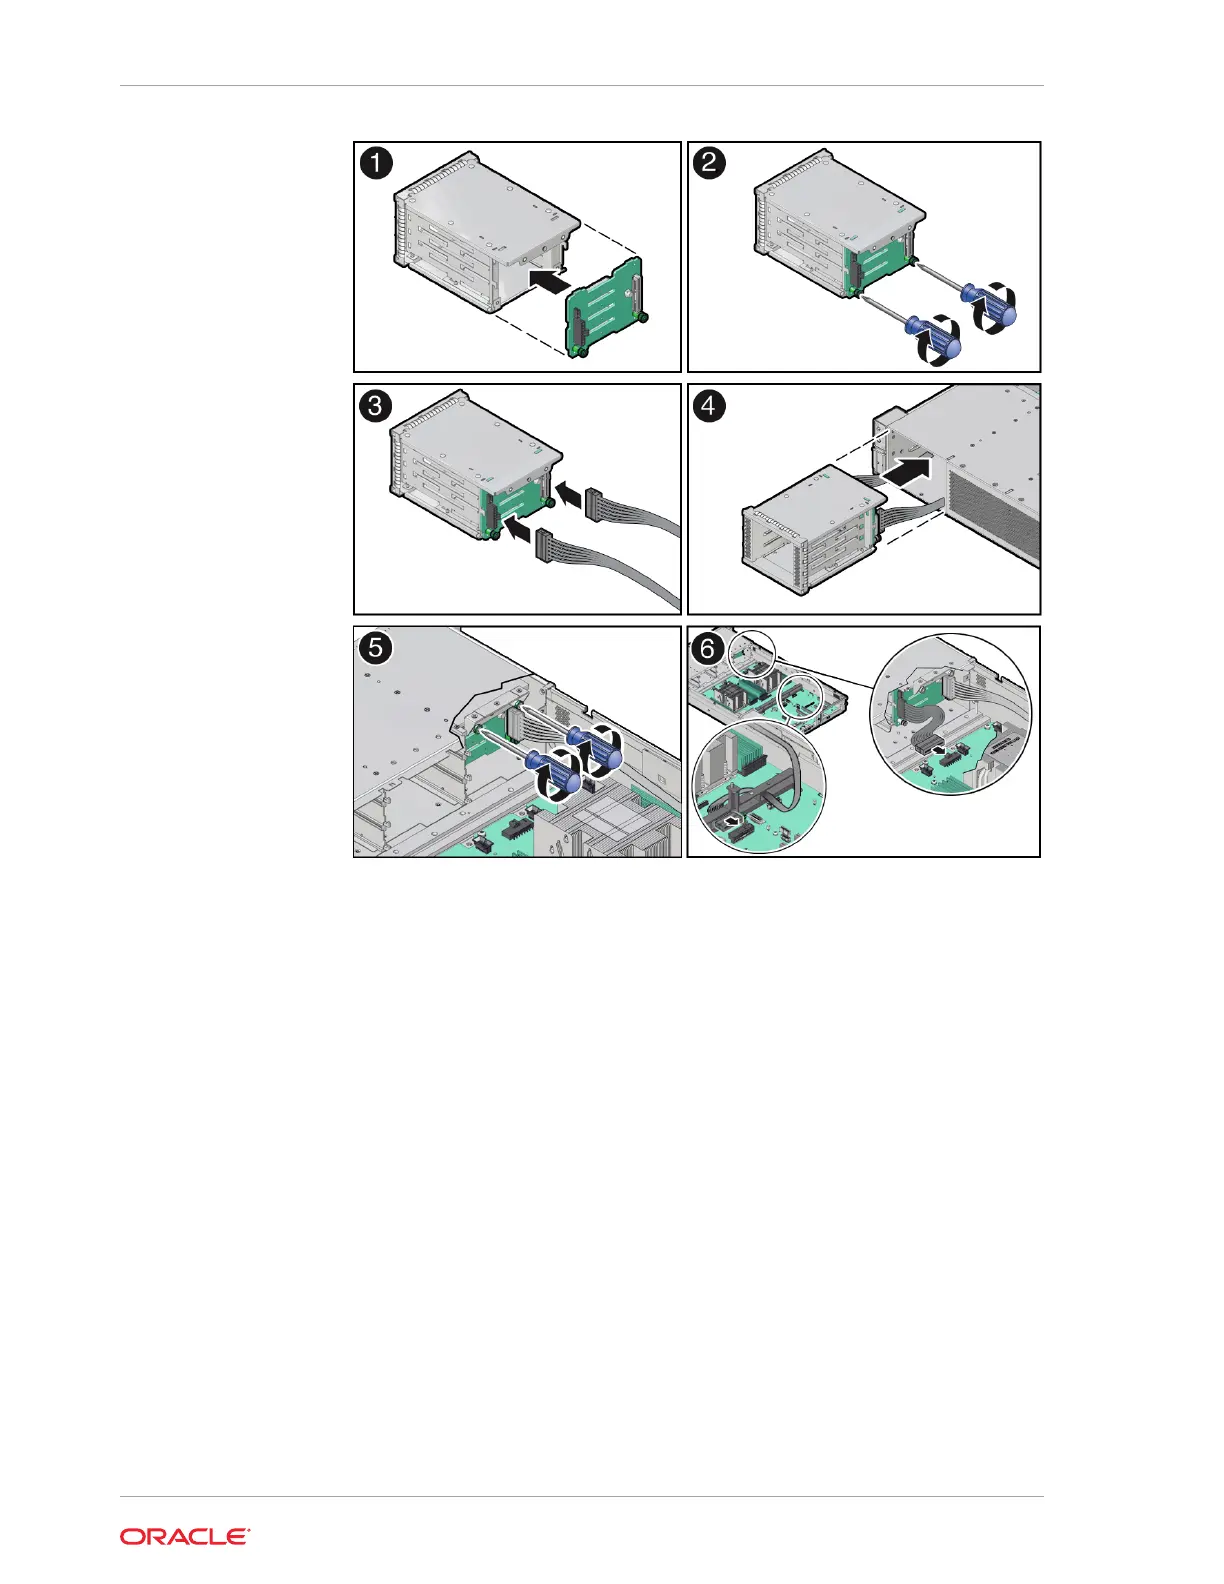
b. Reconnect the DBP power cable and the DBP auxiliary signal cable to the disk
backplane [3].
2. Install the storage drive cage in to the chassis.
a. Align the storage drive cage with the opening in the front panel of the server.
Pull the attached DBP power cable and DBP auxiliary signal cable through the
opening while gently pushing the storage drive cage in to the chassis until it is
fully seated in the chassis [4].
b. Using a Torx T15 screwdriver, tighten the two spring-mounted screws to
secure the storage drive cage to the chassis [5].
c. Gently insert the DBP auxiliary signal cable in to the left-side cable trough.
Reconnect the DBP auxiliary signal cable and DBP power cable to the
motherboard connectors [6].
See also Install the Disk Backplane Signal Cable.
d. Reinstall the storage drives in to the front
3. Reinstall all NVMe storage drives into the server front panel storage drive cage.
See Install a Storage Drive.
4. Return the server to operation.
a. Install the fan tray.
Chapter 14
Install the 4-Drive Backplane
14-4