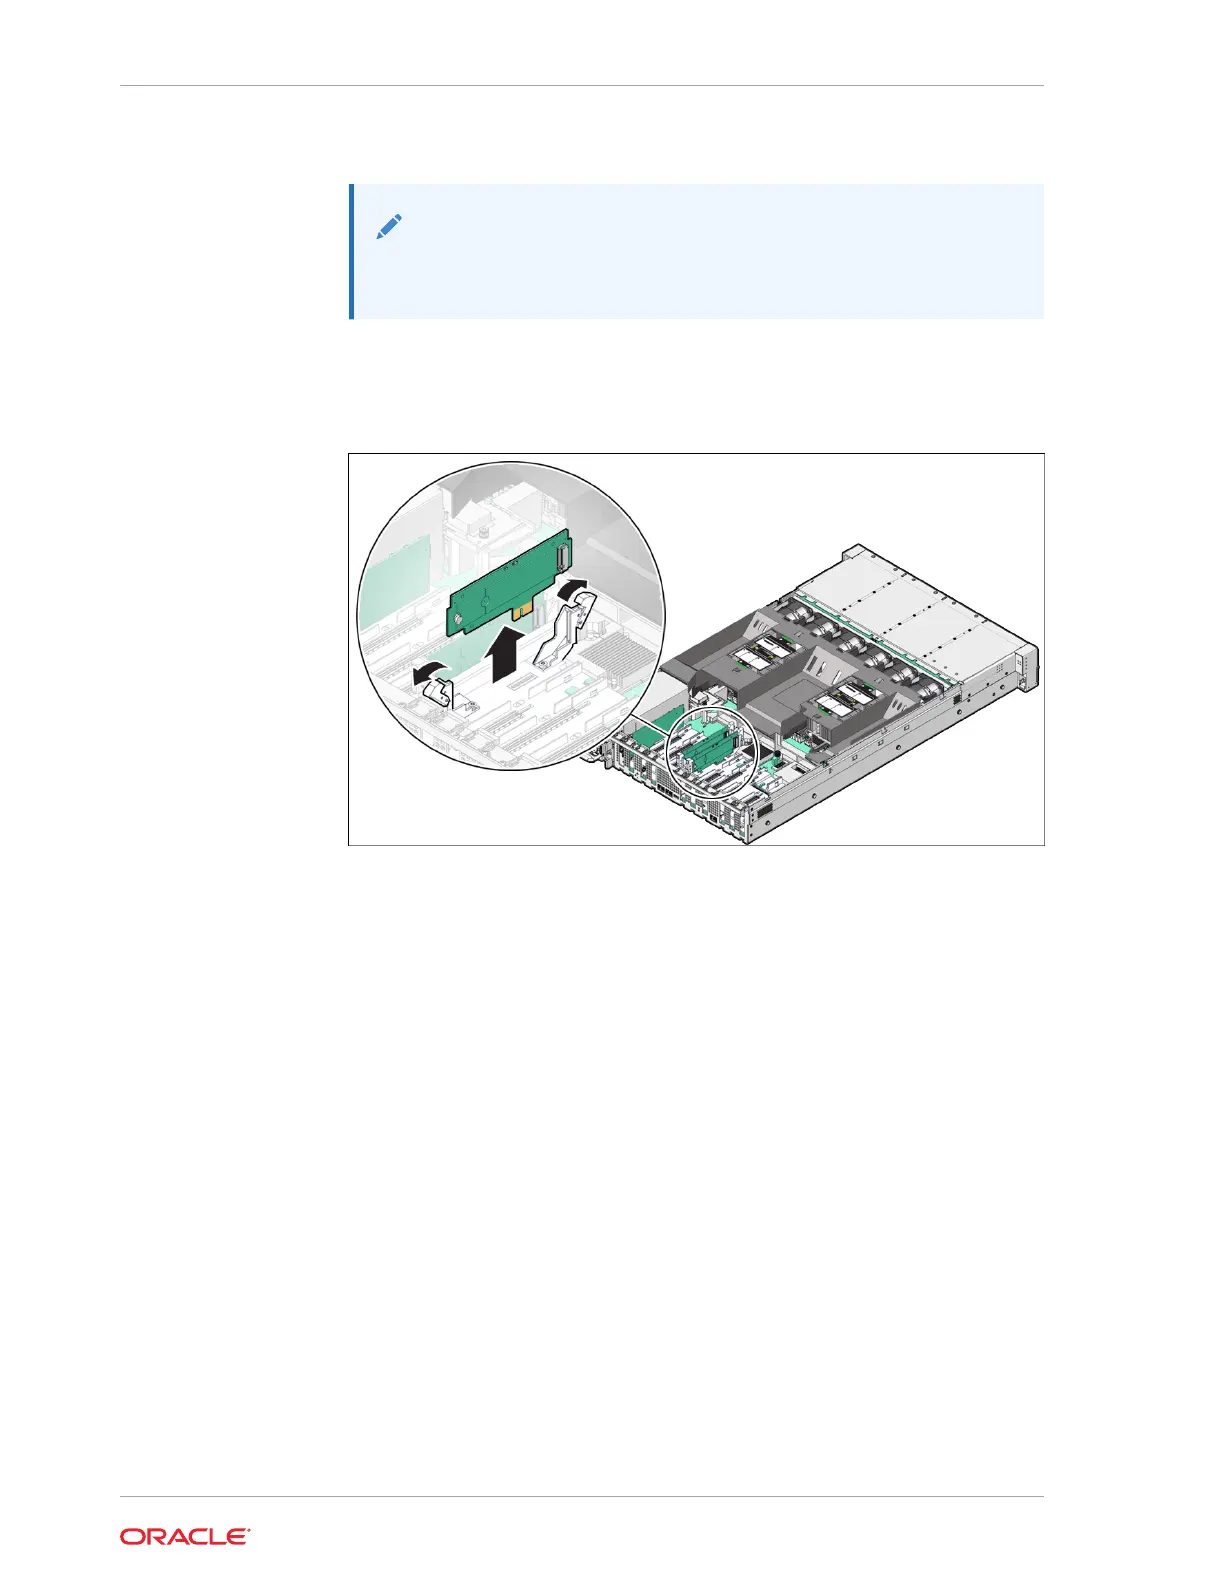
a. Rotate both riser board socket levers outward as far as they go.
Note:
The green Power LED indicator located on the riser board is
extinguished when you open the socket levers.
b. Carefully lift the riser board straight up to remove it from the sockets.
Place the riser board on an antistatic mat. If required, perform the procedures
for removing the M.2 flash SSD from the flash riser board. See Identify and
Remove an M.2 Flash SSD.
Install a Flash Riser Board
The system motherboard provides two slots (labeled SSDR 0 and SSDR 1) for flash
riser boards. When installing flash riser boards, install the first riser board into slot
SSDR 0 and then into SSDR 1.
1. Unpack the replacement flash riser board and place it on an antistatic mat.
If required, ensure that you have installed an M.2 flash SSD onto the riser board
before installing the riser board into the server. See Install an M.2 Flash SSD.
2. Install the flash riser board.
a. Ensure that the riser board socket levers are in the open position.
b. Align the notch in the replacement riser board with the connector key in the
connector socket.
The notch ensures that the riser board is oriented correctly.
c. Push the riser board into the connector socket until the riser board is securely
seated in the socket.
Chapter 7
Install a Flash Riser Board
7-2