1. Disconnect all the cables and power cords from the server.
2. Remove the cable management arm (CMA).
See Remove the Cable Management Arm.
3. Extend the server to the maintenance position.
See Extend the Server to the Maintenance Position.
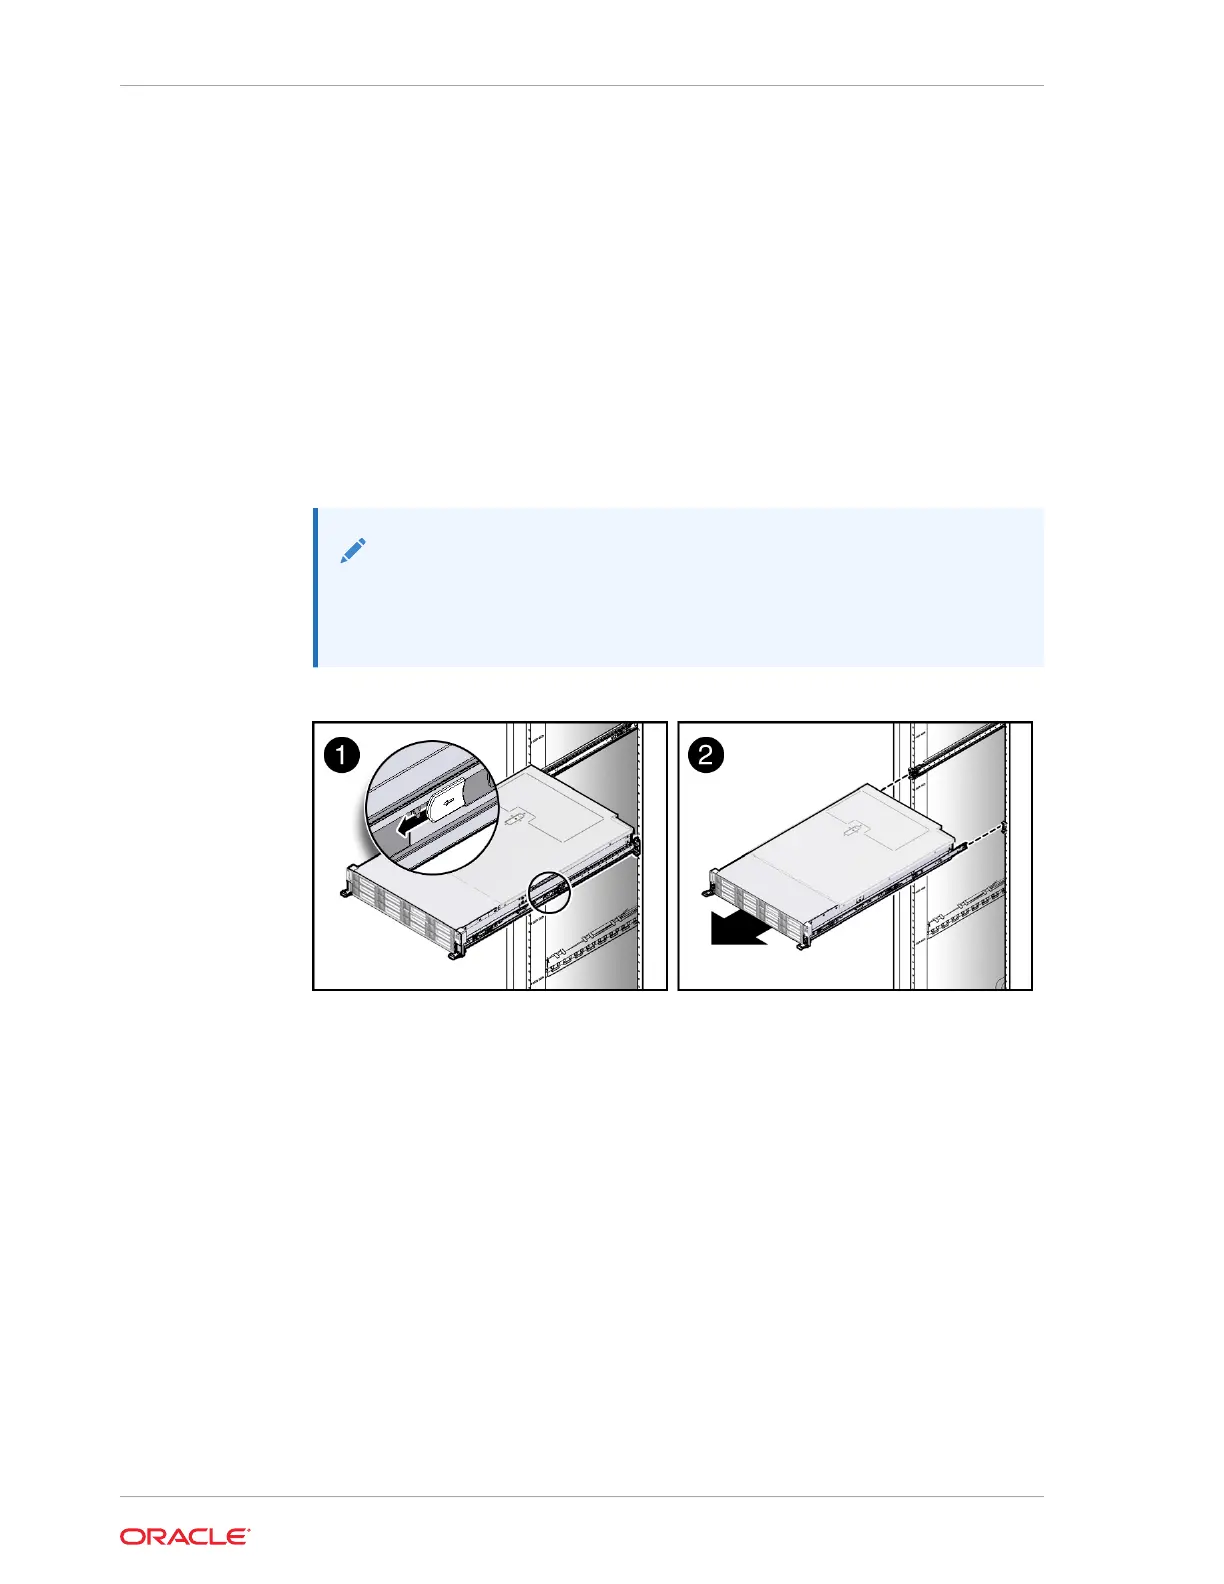
4. From the front of the server on both sides, pull the gray slide-rail release tabs
toward the front of the server, and pull the server out of the rack until it is free of
the rack rails [1 and 2].
Use a mechanical lift or two people to remove the chassis from the rack and
transport it.
A slide-rail release tab is located on each slide-rail.
Note:
To pull the gray slide-rail release tab, place your finger in the center of
the tab, not on the end, and apply pressure as you pull the tab toward
the front of the server.
5. Set the server on a sturdy, ESD safe work surface.
Take Antistatic Measures
1. Prepare an antistatic surface on which to set parts during removal and installation.
Place electrostatic discharge ESD-sensitive components such as the printed
circuit boards on an antistatic mat. You can use the following items as an antistatic
mat:
• Antistatic bag used to wrap a replacement part
• Oracle ESD mat (orderable item)
• Disposable ESD mat (shipped with some replacement parts or optional system
components)
2. Attach an antistatic wrist strap.
Chapter 3
Preparing the Server for Component Replacement
3-10