See Disconnect Cables From the Server.
c. Extend the server to the maintenance position.
See Extend the Server to the Maintenance Position.
d. Attach an antistatic wrist strap.
See Take Antistatic Measures.
e. Remove the server top cover.
See Remove the Server Top Cover.
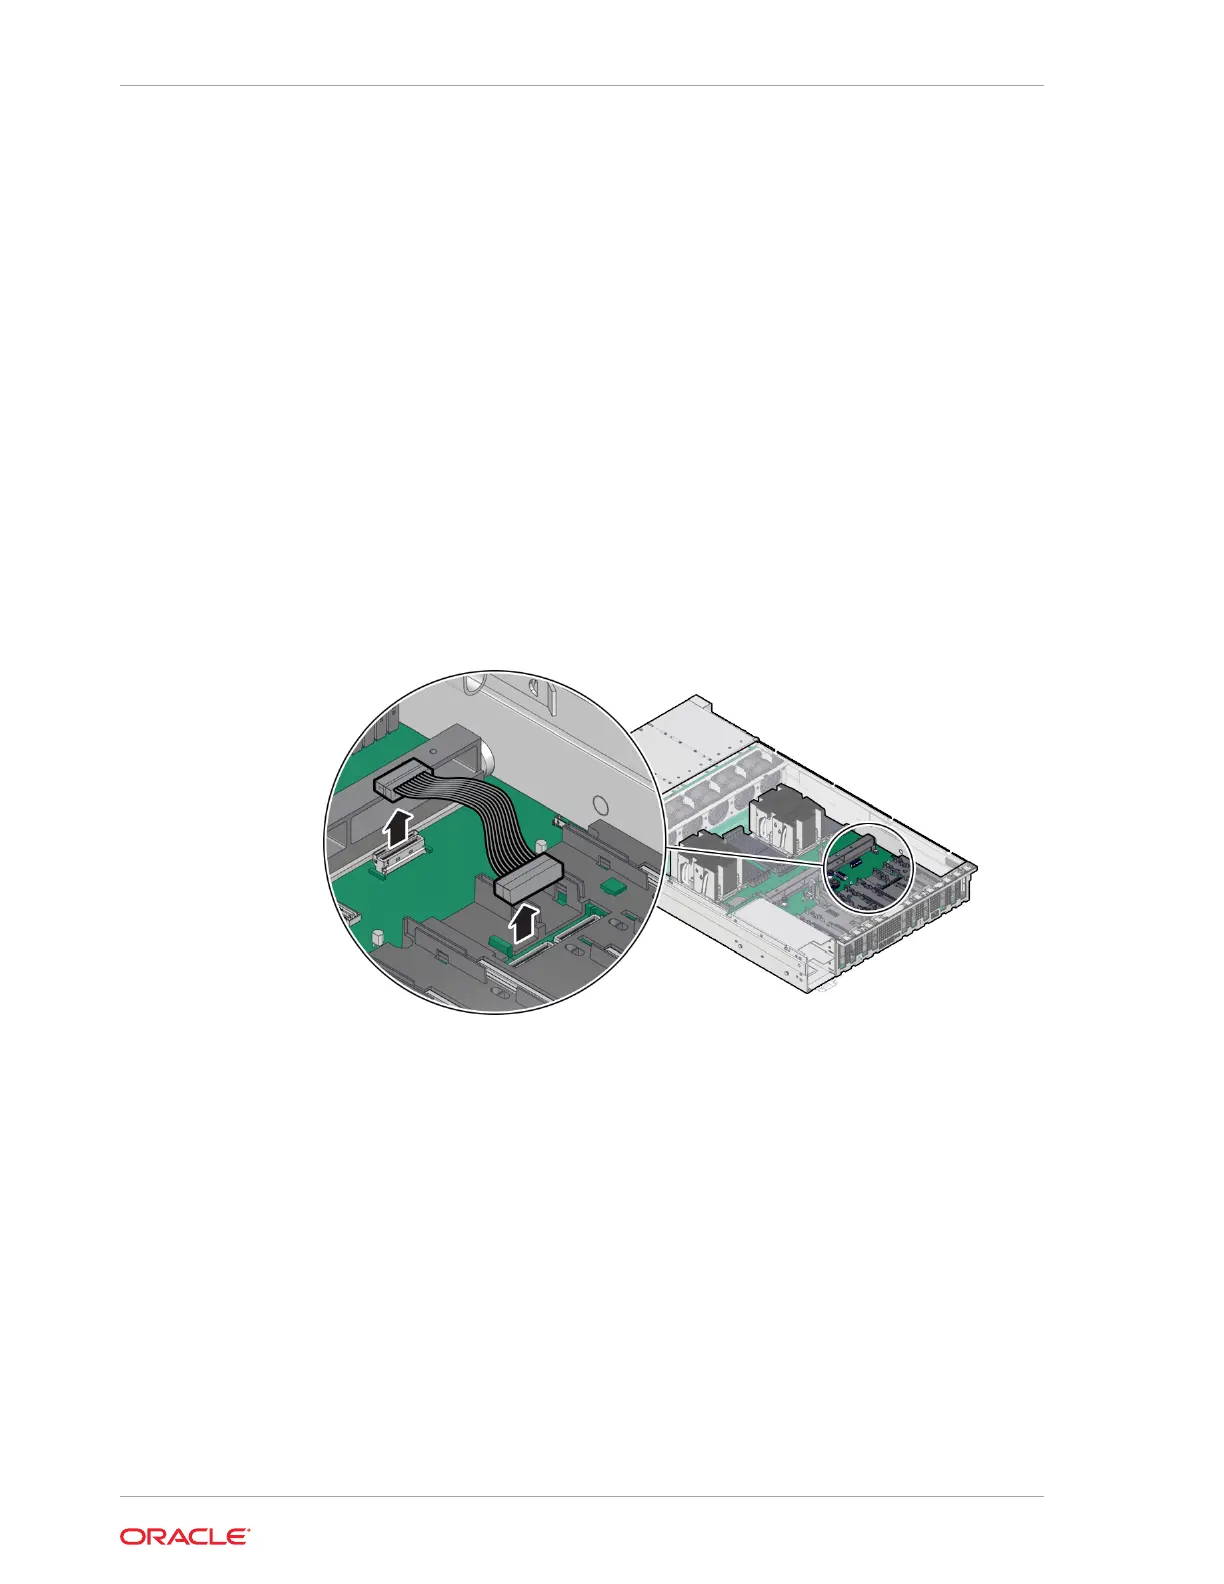
2. Locate the PCIe Flyover cable in the server.
The PCIe Flyover cable is installed on the rear left side of the system, between the
motherboard handle and behind PCIe slots 6 and 7. The PCIe Flyover cable is
connected to either the PCIe slot 6 or slot 7 electrical interface connector. Note
which PCIe electrical interface is being used.
3. If necessary, remove PCI Riser 6 to ease access to the PCIe Flyover cable.
See Remove a PCIe Riser .
4. Disconnect and remove the PCIe Flyover cable.
At each end of the cable, press and hold the metal clip to disengage the locking
mechanism, then gently lift the PCIe Flyover cable from the electrical interface
connector.
Install the PCIe Flyover Cable
Before installing the PCIe Flyover cable, review the rules for configuring the PCIe
electrical interfaces. See Configure PCIe Electrical Interfaces Using the PCIe Flyover
Cable.
1. Unpack the replacement PCIe Flyover cable and place it on an antistatic mat.
2. Connect the PCIe Flyover cable to the motherboard connector and to either the
PCIe slot 6 or slot 7 PCIe electrical interface connector.
For information on which PCIe slot to connect the PCIe Flyover cable, see
Configure PCIe Electrical Interfaces Using the PCIe Flyover Cable.
Chapter 11
Install the PCIe Flyover Cable
11-14