4: Repair Internal Assemblies — Rear Chassis
100
Rear I/O Assembly
Preparation
1 Open the Case. See “Opening the Case” on page 87.
2 Tilt the Rear Chassis, see “Tilting Rear Chassis” on page 91.
3 Position the open HeartStart XL+ display side down, Capacitor to your left.
Removal
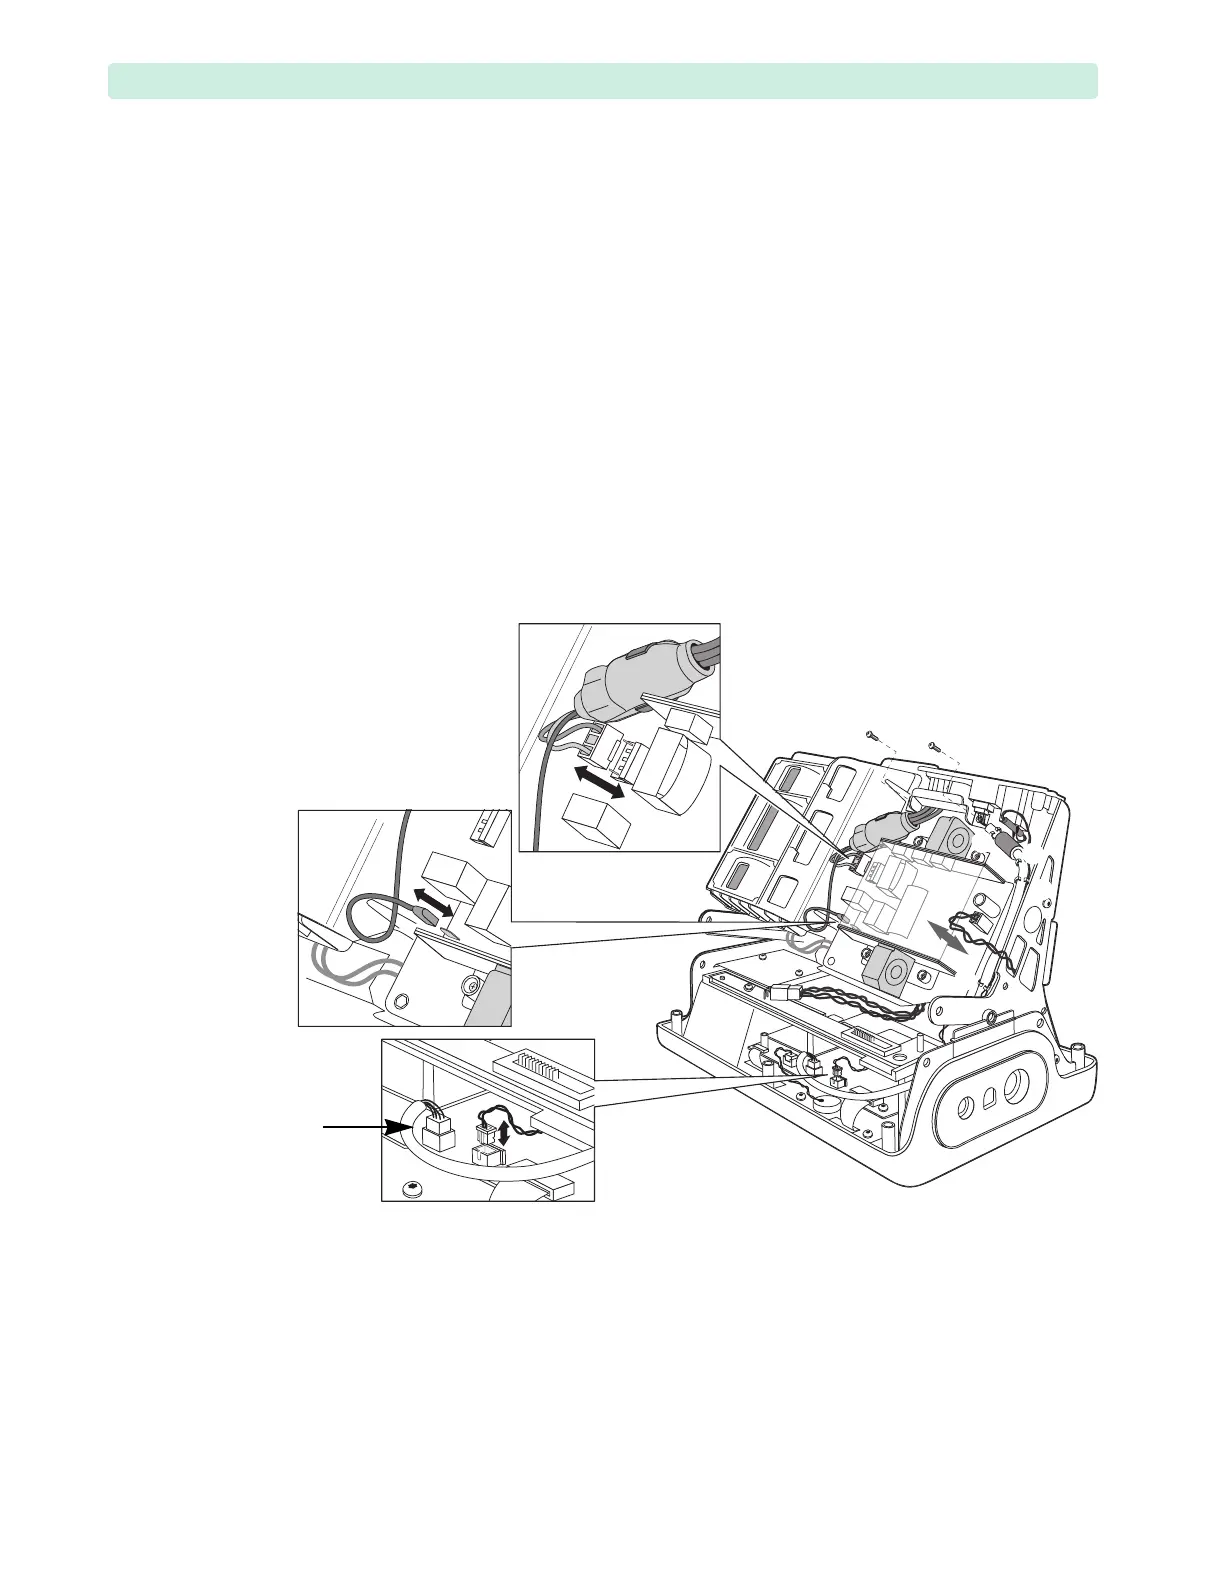
1 Disconnect the Power and ECG Out cables, see Figure 61:
a Disconnect the AC power 2-wire bundle from the Power Supply (
➊).
b Disconnect the AC ground spade connector from the Power Supply (
➋).
Use pliers if necessary.
c Disconnect the ECG Out 2-wire bundle from the Processor PCA (
➌).
d Disconnect the Therapy PCA power 2-wire bundle from the Power Supply (
➍).
Do not disconnect the Network cable.
2 Release the Network cable and ECG Out 2-wire bundle from the four saddle clamps (
➎).
3 Remove the two T10 screws from the Rear I/O Assembly bracket (
➏).
4 Remove the AC ferrite core from the AC ferrite clamp.
5 Disconnect the Network cable from the Rear I/O Assembly.
Figure 61 Rear I/O Assembly
➊
➋
➌
➏
➍
Do not
disconnect the
Network Cable
from the
Processor PCA
➎
➎
➎
➎
➏