4: Repair Internal Assemblies — Rear Chassis
102
Fans
This procedure replaces both Fans.
Preparation
1 Open the Case. See “Opening the Case” on page 87.
2 Position the open HeartStart XL+ display side down, Capacitor to your left.
3 Remove the Rear Chassis Shelf. See “Rear Chassis Shelf” on page 93.
Removal
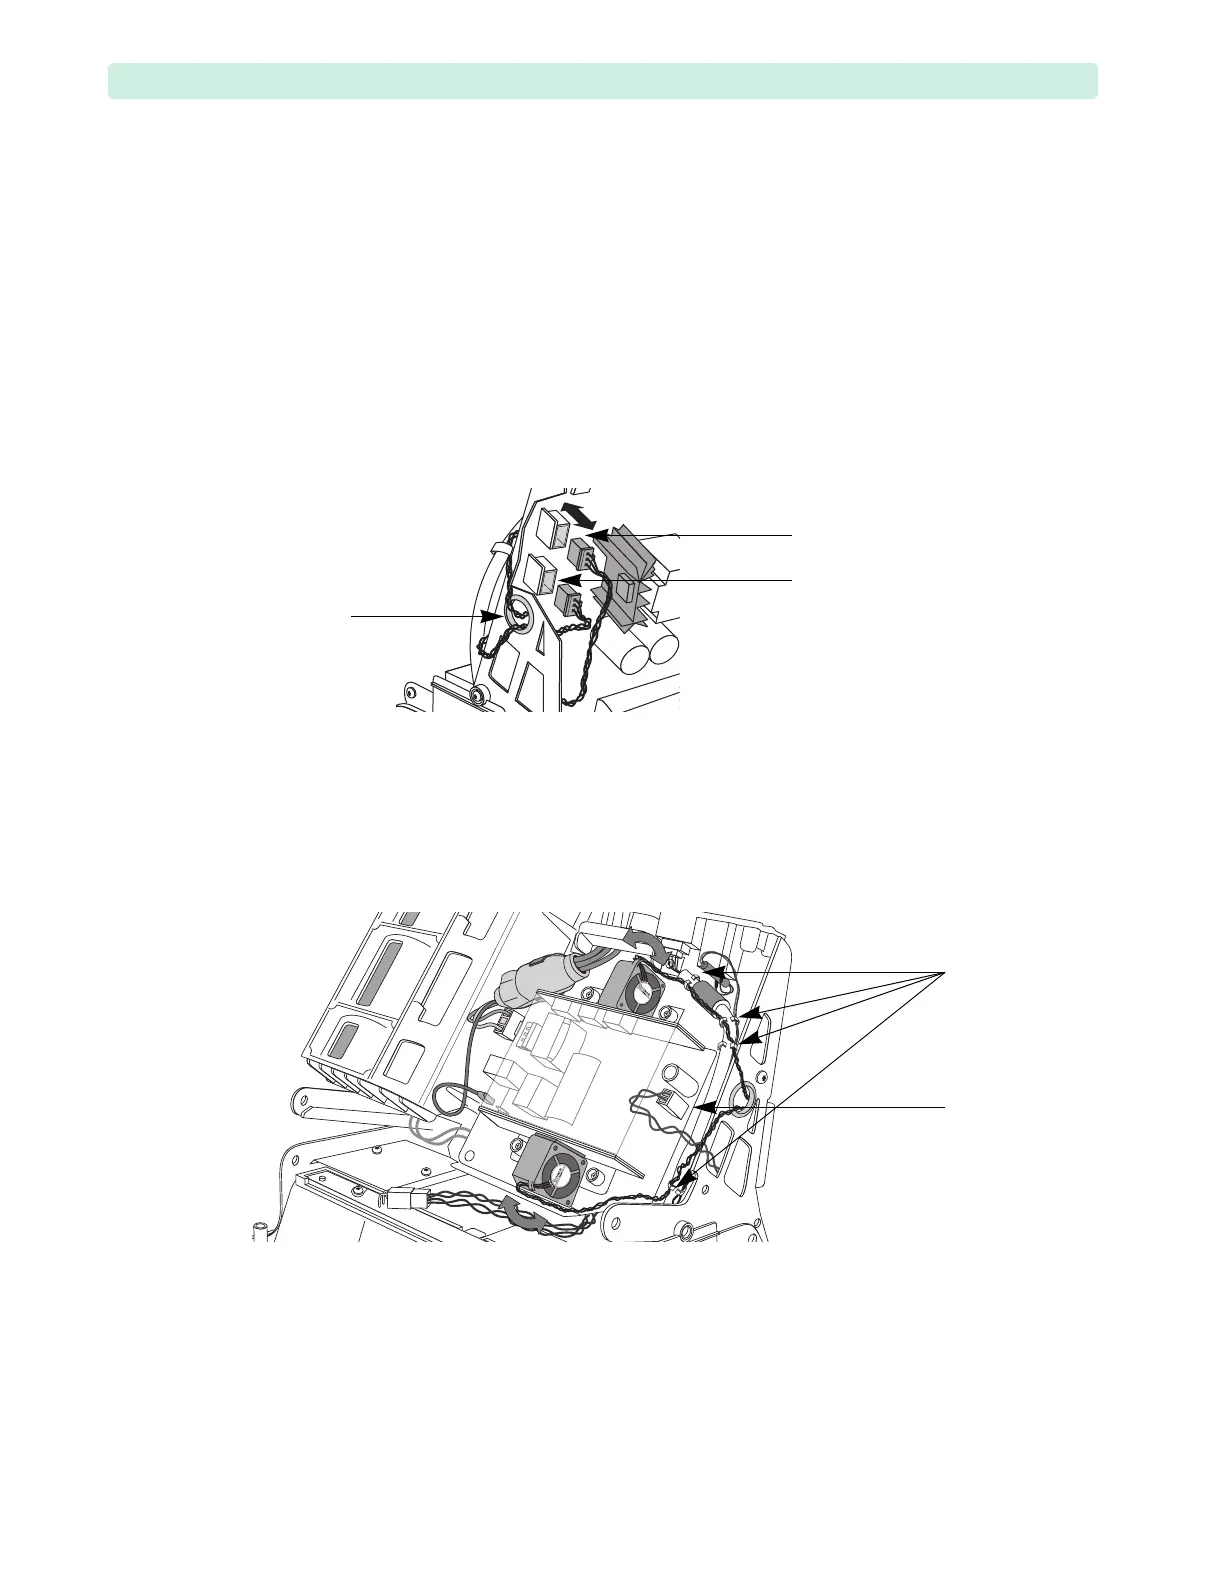
1 Disconnect both braided Fan cables from the Therapy PCA J12 and J13 connectors, see Figure 62.
2 Remove both Fan wires from the Rear Chassis grommet.
3 Disconnect the Therapy PCA AC power 2-wire bundle from the Power Supply (see Figure 63).
4 Release the Network cable, ECG Out 2-wire bundle, and both Fan braided wires from four saddle
clamps (see Figure 63).
5 Remove the upper Fan:
a While holding the Capacitor Tray with your left hand, slowly rock the Fan side to side to loosen
the adhesion, being careful not to damage the sheet metal.
b When the Fan is loose, lift it off of the adhesive.
6 Tilt the Rear Chassis. See “Tilting Rear Chassis” on page 91.
7 Repeat Step 5 to remove the lower Fan.
Figure 62 Fan Connectors
Figure 63 Fan Wires
Rear
Chassis
grommet
J13
connector
J12
connector
saddle
clamps
Therapy PCA
AC power cable