Overview 4: Repair
69
Key Components
Replacement assemblies marked with an asterisk (*) in the Replacement Parts tables contain one or more
Key Components. Key Components require detailed tracking, by recording the key component part
number and the key component’s date code, its serial number, or both. Record this information on the
Customer Service Order (CSO) for both the failed assembly and the replacement assembly.
The Key Components that are part of the replacement assemblies are listed in Table 60“Key
Components” on page 189.
Repair Notes
The following sections provide details of how to successfully work with the internal assemblies of the
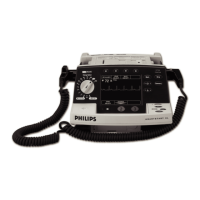
HeartStart XL+ defibrillator/monitor.
Safety Precautions
WARNING: Remove all power sources (AC and battery) before opening the HeartStart XL+. Failure to do so may
allow the device to charge without warning and could result in serious injury or death.
CAUTION: Take the necessary precautions against shock or injury before you conduct defibrillator/monitor tests or
repairs.
• Only properly trained engineers and technicians should service the device.
• The device can contain deadly voltages even if the device is turned off.
• Make sure the device is disarmed.
To disarm the defibrillator, press the Disarm soft key. If the Shock button has not been pressed
within the time period specified in the Time to Auto Disarm configuration setting, the defibrillator
disarms automatically. Additionally, you can disarm the HeartStart XL+ any time by turning the
Therapy Knob to the Off position.
• Make sure that you disconnect all power before opening the device.
• Make sure you discharge the device before working with it.
• Make sure you work in a static-safe environment. Use a static-control wrist band, in conjunction
with an antistatic pad grounded per the manufacturer’s instructions.
• Special cleaning technologies are used during the manufacturing of the PCAs. Be careful not to
touch the surface areas of the PCAs with bare hands because skin oil can affect product performance.
Use anti-static or cotton gloves or rubber finger tips.
• Keep replacement PCAs in antistatic pouches until ready to install.
• Note that the edges of the metal chassis may be sharp. Take care not to cut yourself or shear the
wires.
Internal Connections
Whenever troubleshooting indicates a particular PCA may be at fault, it is always good practice to check
all the connections to that PCA and retest before replacing the PCA.

 Loading...


