4: Repair External Assemblies
78
Handle Assembly
Preparation
1 Turn the device off and remove the battery and the AC power.
2 Position the device on the work surface with the rear side facing you.
Removal
1 Completely loosen but do not remove the four T15 screws in the handle. See Figure 37.
2 Position the device so there is at least a foot (30 cm) of free working surface between you and the rear
side.
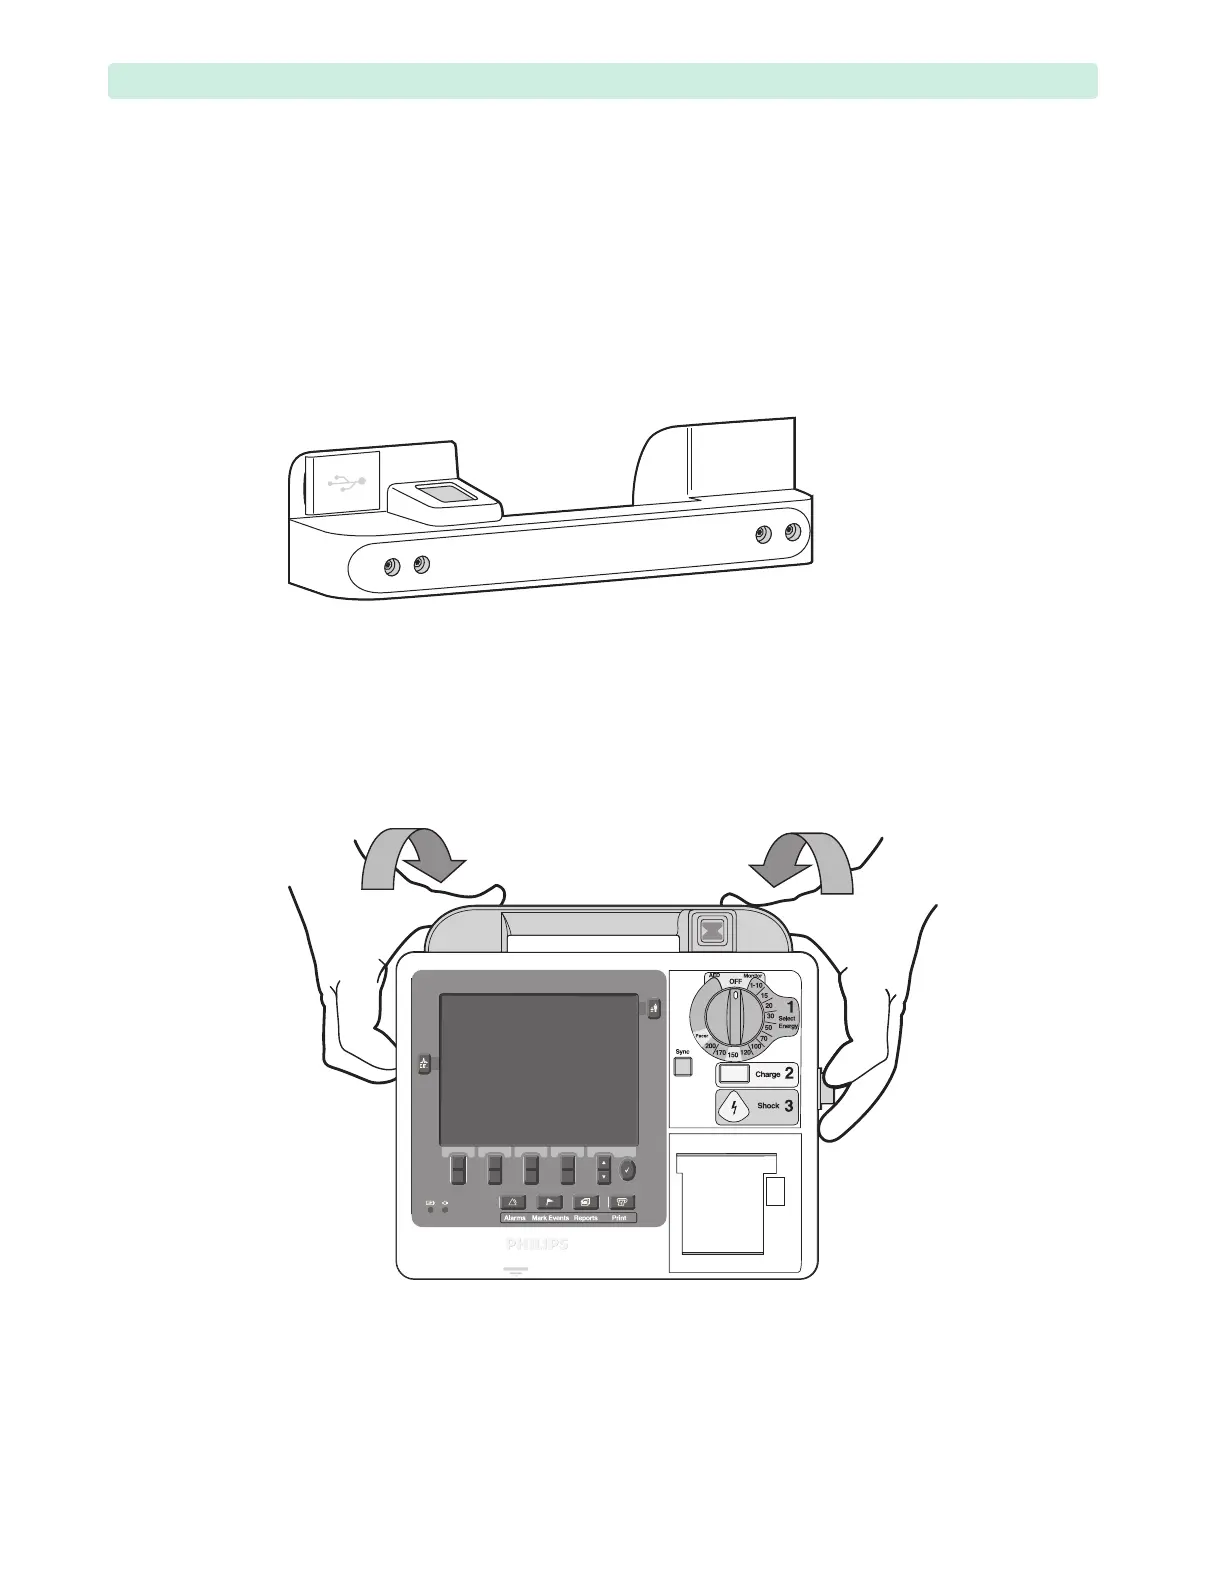
3 Grasp the device from both sides and position your thumbs in the handle over the screw holes.
See Figure 38.
4 Roll the device toward yourself.
5 While holding the handle in place, slide your thumbs to let the screws fall out.
6 Once the screws are all out and accounted for, position the device on the work surface with the rear
side facing you.
7 Carefully lift the handle and remove the RFU-and-USB Assembly from the handle.
Grasp the rubber mount, wiggle and pull. Do not disconnect from the Front Case. See Figure 39.
Figure 37 Handle Screws
Figure 38 Handle Removal