3: Troubleshooting Troubleshooting Flowcharts
44
10 Examine the device’s repair history.
Some intermittent problems cannot be reproduced. If the device was returned before for the same
problem, replace the most likely subassembly.
11 Run the Service Mode tests, if needed.
Use the tests available in Service Mode to focus in on possible causes. See “Service Mode Tests” on
page 40 for more information.
12 Repair any problems found.
Follow the procedures in the “Repair” chapter to replace defective parts or subassemblies. When the
repair is complete, continue with Step 13.
13 Verify the device’s performance.
Use the procedures described in the “Performance Verification” chapter to verify that the device is
operating properly. Be sure the testing you perform is appropriate for the level of repair. The
requirements for testing are described in “Required Testing Levels” on page 155.
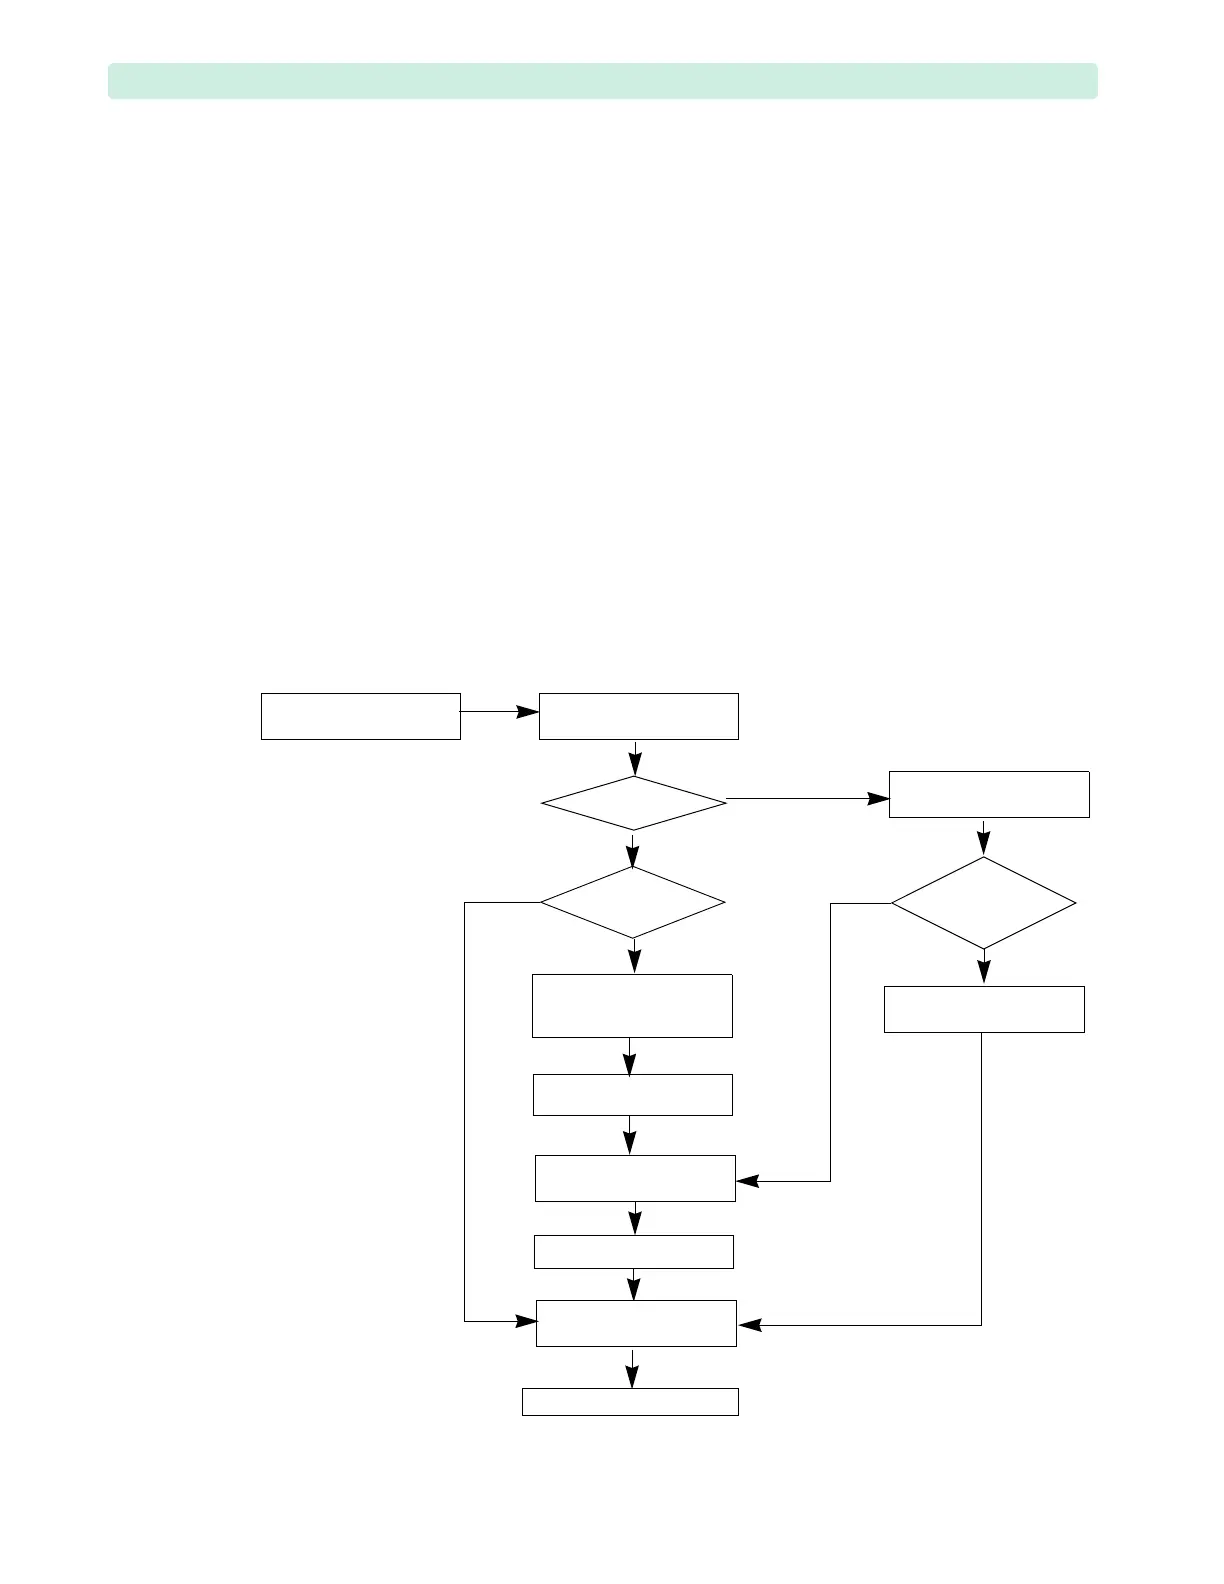
Troubleshooting Flowcharts
Figure 31 and Figure 32 show the troubleshooting steps for different states of the RFU Indicator.
Figure 31 RFU Indicator: Hourglass
Hourglass
Turn Therapy Knob to
Monitor
Technical Alarm
displayed?
Take appropriate action.
Run Operational Check, if
necessary.
Check Hardware
Error Log
Repair
Run Performance
Verification tests
Place device back in service
Troubleshoot device using
tables if necessary
No
Yes
Turn Therapy Knob to
AED
Replace Display
Assembly
Yes
No
Voice prompt
heard?
Yes
Is screen blank?
No