Chapter 5: Dismantling ABL77 Service Manual
Lower Module, Continued
Removing the
lower module
Follow these steps to remove the lower module.
Step Action
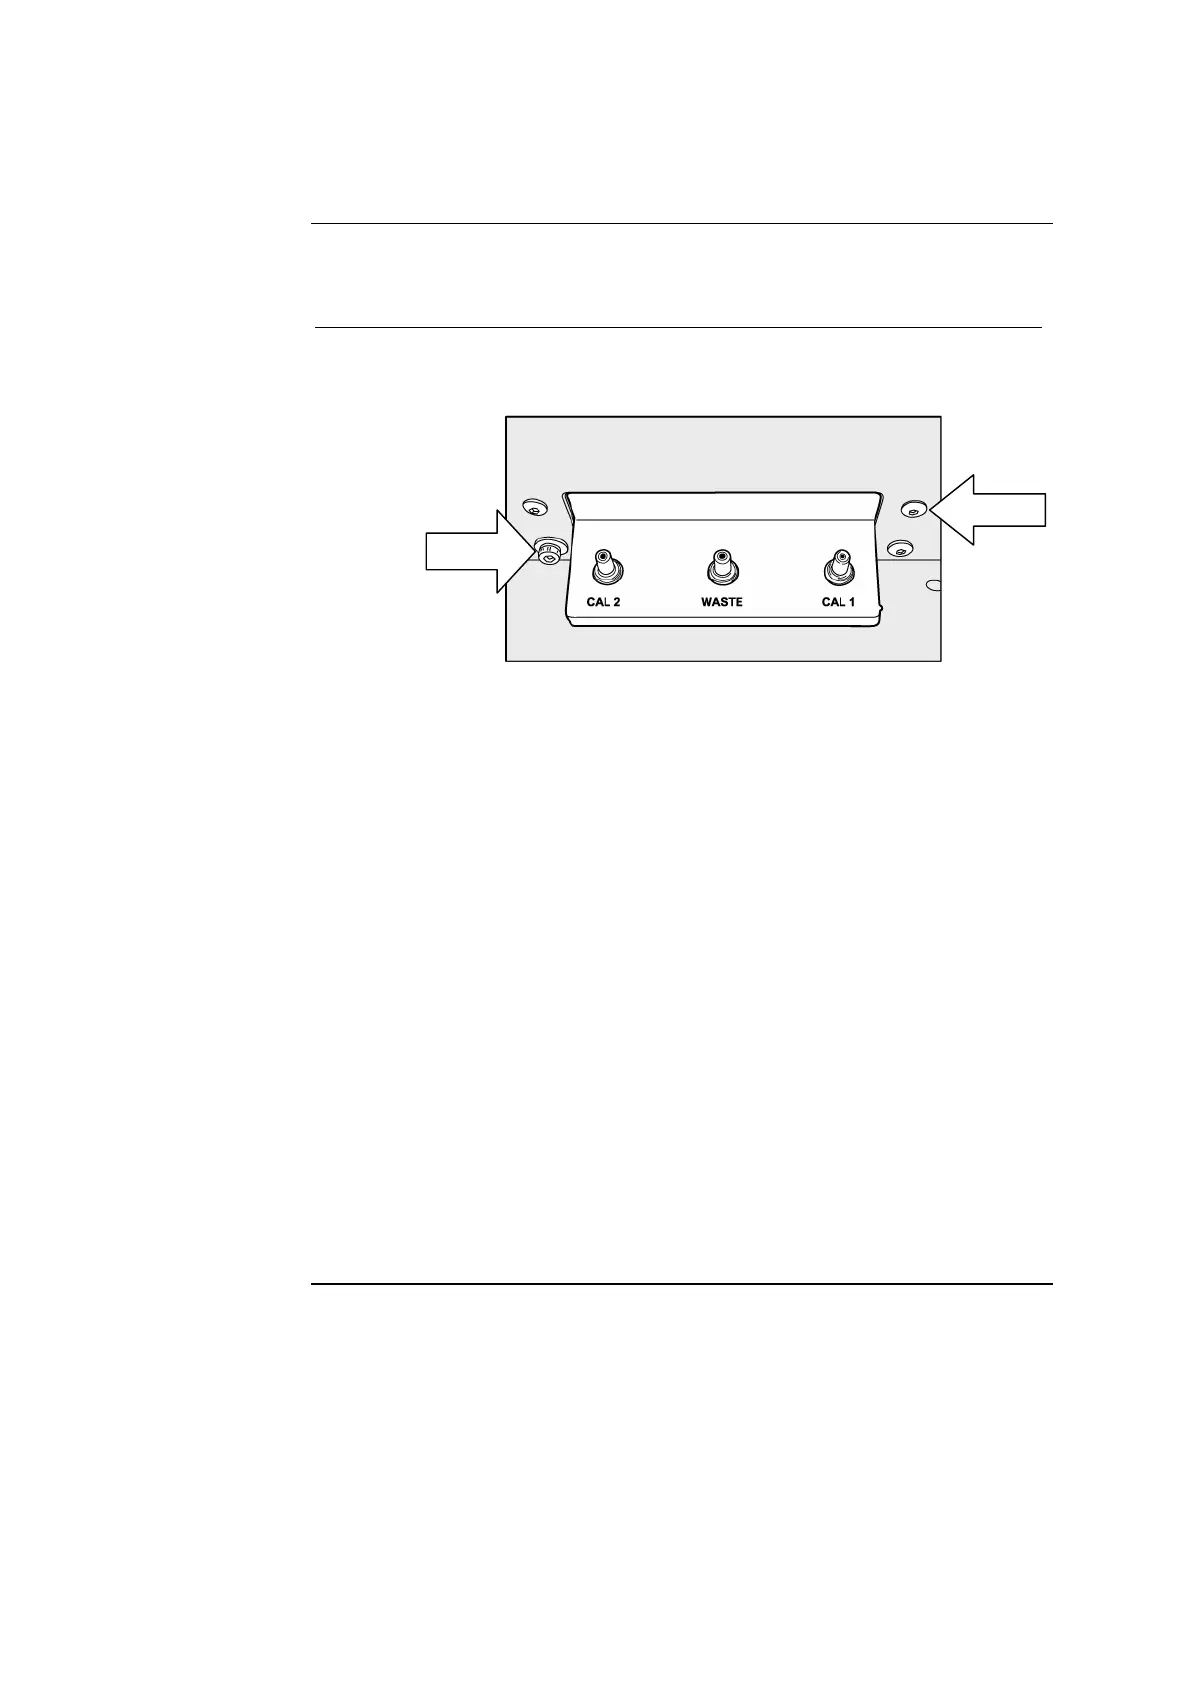
1.
From the back of the analyzer, remove the lower left 7/64” screw and
the upper right 5/64” screw from the manifold using the appropriate
Allen wrenches (Figure 5-11).
Figure 5-11
2.
If replacing the lower module, remove the printer door. This step is
not required when making an internal repair.
3.
Turn the analyzer around and remove the two mounting screws in the
bottom right and left corners of the printer chassis using a 7/64” Allen
wrench.
4.
Gently pull the lower module away from the main housing. The
manifold will remain attached to the main housing.
5.
• If the analyzer has a valve board / manifold assembly attached, go
to step 6.
• If the analyzer has separate valve board and manifold components,
disconnect the tubing then go to step 8.
6.
Using a 5/16” nut driver, remove the two hex nuts from the manifold
while holding the screws from the back with a 5/64” Allen wrench.
7.
Pull the manifold away from the main housing.
8.
Disconnect the I/O cable from the J3 connector on the valve board.
9.
Disconnect the sensor cable from the J2 connector on the valve board.
10.
Disconnect the printer data and power cables from the connectors on
the printer module.
5/64”
7/64”
5-18 Rev. F
 Loading...