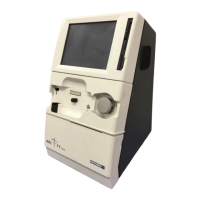
ABL77 Service Manual Chapter 4: Test and Calibration Procedures
Testing the Valve Connections
Introduction
Follow these steps to test the valve connections after replacing the valve board
tubing.
NOTE: Verify that the manifold is properly installed to prevent other fluidic
problems from arising.
NOTE:
NOTE: Flush water or air from a syringe through the sensor cassette luer
ONLY while the waste pump is running. Flushing without activating the waste
pump can disconnect internal tubing.
Step Action
1.
Apply power to the analyzer.
2.
Select the Hardware screen from the Options menu. Use password
MK592 when entering the Options screen to gain access to the
Hardware screen.
NOTE: This password is for Radiometer use only. Do not share this
password with customers.
3.
Insert an index card (or equivalent) into the door slot. The door
indicator in the Hardware screen will change from 1 to 0. This will
simulate the presence of a sensor cassette and allow the Pump Cal1
and Pump Cal2 buttons to function.
4.
Place a soft cloth or gauze over the manifold ports to collect the water
from the following steps.
NOTE: Be prepared to collect all fluids that exit the manifold.
NOTE: Observe the valve board and connections for leaks during
this process.
5.
Fill a syringe, with luer adapter, with DI water.
6.
a) Place the syringe at the sensor cassette fitting luer.
b) Press Aspirate and flush the waste lines with de-ionized water.
Fluid should exit the waste port of the manifold.
7.
a) Refill the syringe with DI water and replace it onto the cassette
luer
b) Press Pump Cal1
c) Flush the Cal1 line. Fluid should exit the Cal1 port of the
manifold.
8.
a) Refill the syringe with DI water and replace it onto the cassette
luer
b) Press Pump Cal2
c) Flush the Cal2 line. Fluid should exit the Cal2 port of the
manifold.
Continued on next page
Rev. F 4-11