The Safety Designer supports the following file formats: BMP, JPG, PNG.
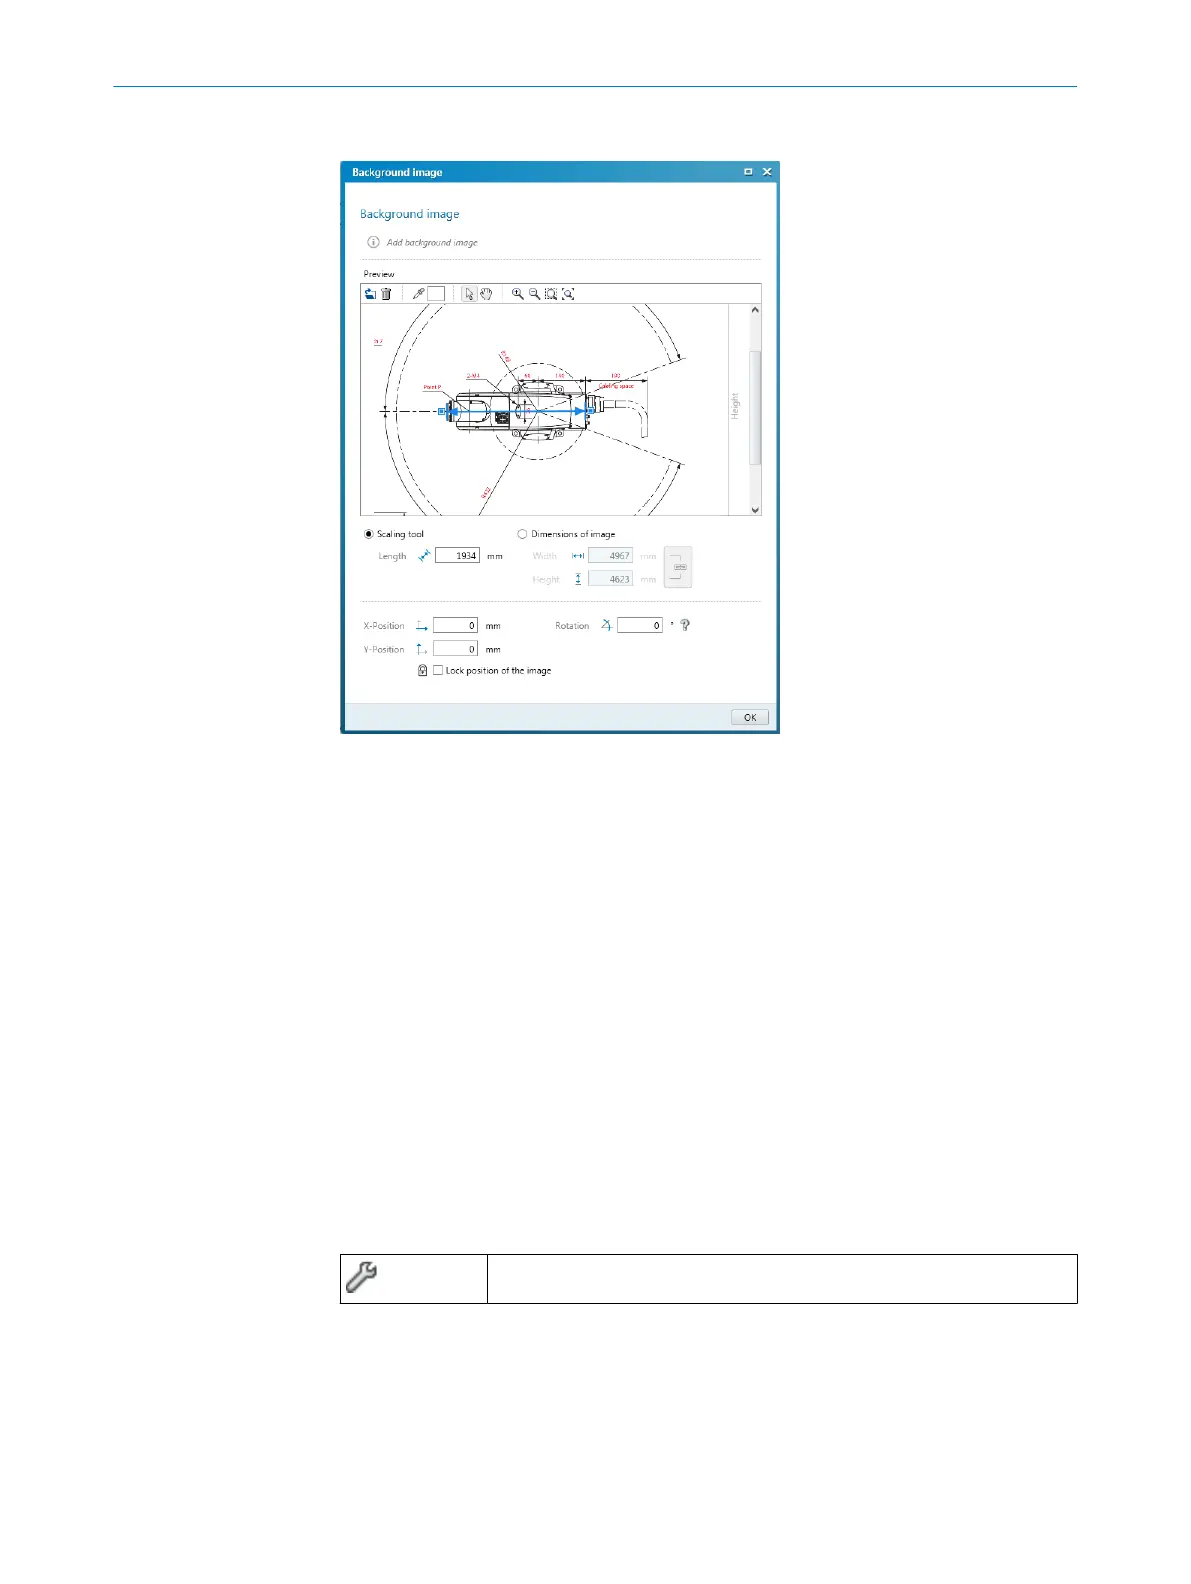
Figure 68: Background image
1.
Click on Edit background image in the toolbar.
✓
The Background image dialog box opens.
2. Click on Browse ....
3. Select the file for the background image.
✓
Safety Designer displays the background image.
4. If necessary, use the pipette icon to select a color of the image to make this color
transparent.
5. Adjust the size of the image with the scaling tool or by directly entering the
dimensions. Use the scaling tool to move the tips of the blue arrow to two known
points and then enter the distance between the points in the Length field.
6. Enter X-Position, Y-Position and Rotation in the coordinate system of the field editor.
You can then freely move or rotate the background image in the field editor.
7. If necessary, click on the L
ock position of the image option.
✓
It is no longer possible to change the background image in the field editor.
7.12.5 Settings for the field editor
Overview
Table 12: Settings for the field editor
Edit field editor settings
Field calculation
Y
ou specify whether the fields are calculated manually or automatically after drawing.
If you select the Manual option, first draw the areas to be monitored. Then click on
Calculate field sets so that the Safety Designer calculates the field that the safety laser
scanner actually monitors.
7 C
ONFIGURATION
110
O P E R A T I N G I N S T R U C T I O N S | microScan3 – EtherCAT® 8025220/1L9Q/2023-08-14 | SICK
Subject to change without notice