Scanning
5-2 ACUSON Cypress™ Operator’s Manual
Overview of the Scanning Process
General Information
Scanning is controlled using the Mode keys, Soft Window knobs, Tools, TGC
slide pots, the Main knob, the
FREEZE and <ENTER> keys. For a description
of each of the controls, see “Keyboard Controls” on page 2-3.
Use the Mode keys to switch between modes and between different formats
of the same mode. See the sections in this chapter for specific information
about each scanning mode.
Basic Steps to Complete a Scanning Session
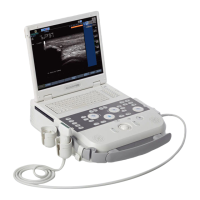
1. If you are not using the Siemens Cypress cart, place the Cypress system on
a stable, level surface.
2. Connect the power cord.
3. Connect the transducer (and ECG cable for Cardiac studies).
4. Turn the Cypress system ON and allow it to complete the boot-up sequence.
Never turn the Cypress system
OFF until boot-up is complete.
5. Press the PATIENT function key to add a new patient, or select a patient with
a previous study from the patient directory.
6. Scan the patient and use the system controls to optimize the image.
7. Use the Mode keys to activate the scanning modes.
8. Use the FREEZE key to freeze the image and activate the scrolling memory.
9. Press the Q SAVE or •SAVE key to save frames or loops.
10. To perform calculations, press the CALC key.
11. To view saved loops, press the VIEW key. To exit View, press a Mode key.
12. Press the 2D key to exit any screen and return to the 2D screen.
13. Transfer the study to an MO disk or to a network server.
14. To scan another patient, press the PATIENT function key and select another
patient from the directory, or add a new patient (see “Adding a New Patient”
on page 4-9).
15. When finished scanning, press the PATIENT or SETUP function key and
select the Shutdown tab.

 Loading...