SVAN 948 USER MANUAL
4 - 75
The spectra registered in the buffer’s file can be presented on the display in the BUFFER VIEW
sub-list of the DISPLAY list. These spectra are saved with the same step as selected in the VLM profiles
(see the description of the BUF. STEP position of the MEASURE SETUP sub-list).
In order to display the registered in the buffer’s file spectra the user has to:
- press the <SHIFT> and <
> push-buttons for the spectra stored later;
- press the <SHIFT> and <
> push-buttons for the spectra saved earlier.
In the BUFFER VIEW sub-list it is also possible to examine the time history for 1/3 OCTAVE filter
selected by the cursor (cf. the description of the BUFFER VIEW sub-list in Chapter 5).
Notice: Many time histories can be saved in the buffer’s file of the instrument during the
measurements performed in different sessions. The presentation of these results is possible using the
BUFFER VIEW window of the DISPLAY list (path: MENU / DISPLAY / BUFFER VIEW) (cf. Chapter 5).
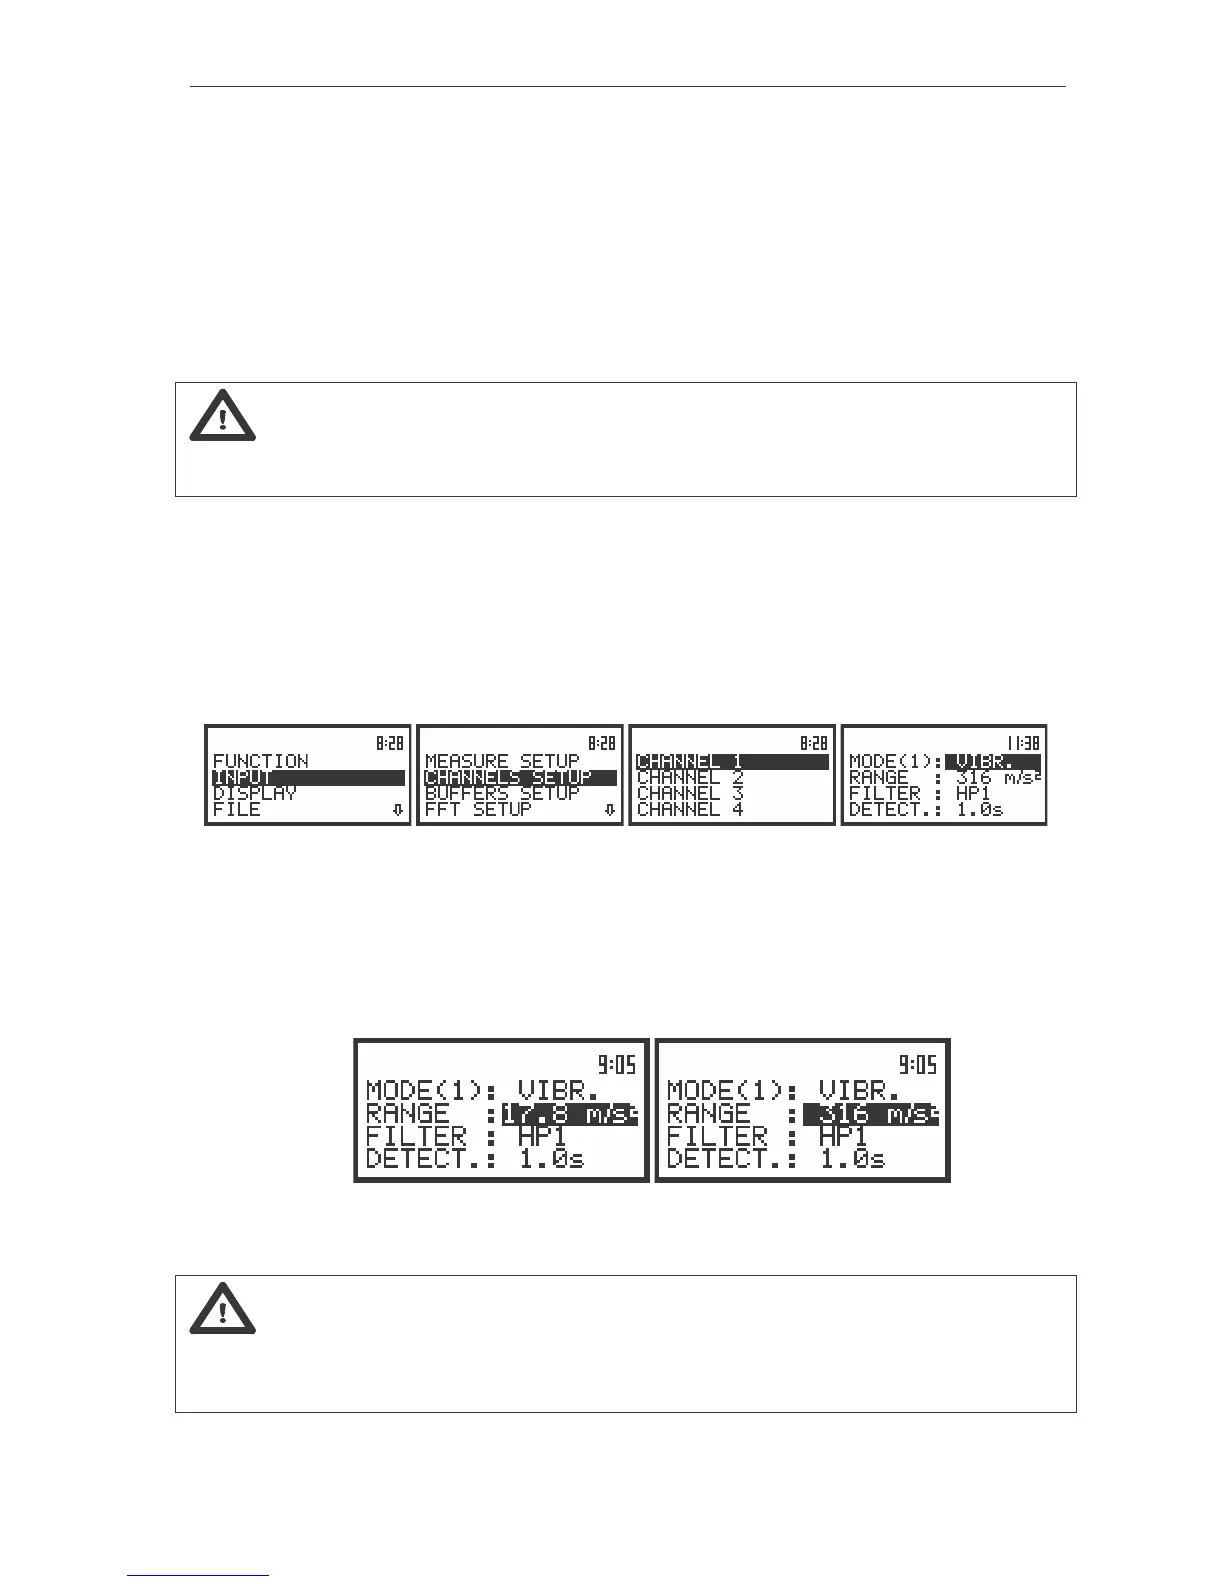
Measurement range selection in 1/3 OCTAVE analysis of vibration signal - RANGE
The selection of the input range is possible after entering the RANGE position (path: MENU / INPUT
/ CHANNEL x / RANGE) (from the INPUT/ CHANNEL x sub-list by means of the <
>, <
> (or <
>,
<
>) push-buttons and pressing the <ENTER> one. The input ranges specified in Appendix C. The return
to the CHANNEL x sub-list is made after pressing the <ESC> push-button (ignoring the changes) or
<ENTER> push-button (confirming the selection).
The view of the displays with the RANGE (path: MENU / INPUT / CHANNEL x /RANGE) position selected
It is possible to change RANGE in VIBRATION mode. The instrument operates in two input ranges
117.8 m/s
2
and 316 m/s
2
, which can be selected by means of the range position. In order to change the
mode of the range the user has to press the <
>, <
> push-buttons.
The return to the CHANNEL x list is made after pressing the <ESC> push-button (ignoring the
changes) or <ENTER> push-button (confirming the selection).
The view of the displays with the RANGE (path: MENU / INPUT / CHANNEL x / RANGE) position selected
in case of VIBRATION signal
Notice: It is not possible to change the range of the measurements during the execution
of the measurements. It is possible to open different lists and sub-lists but the positions in these lists are
not displayed inversely and so - not accessible. The “Loudspeaker” icon indicates that the instrument is
in the measurement process. In order to change the range the measurement must be finished!