Chapter 2 - Installing Software Installing the Terason DICOM Utility
Terason t3000 / Echo Ultrasound System User Guide 47
e. Click Next>. The installation program copies all required files, then exits.
5. Restart the computer.
When configuring the DICOM utility, you must enter network names, addresses, and other
network details. Contact your network system administrator to get the needed information.
Configuring the DICOM Utility
To configure the DICOM utility, complete these steps:
1. Start the configuration utility using one of these methods:
• Double-click the DICOM icon in the taskbar
• Select
Start > Programs > TerasonDICOM > Terason.
The system opens the DICOM Configuration Window.
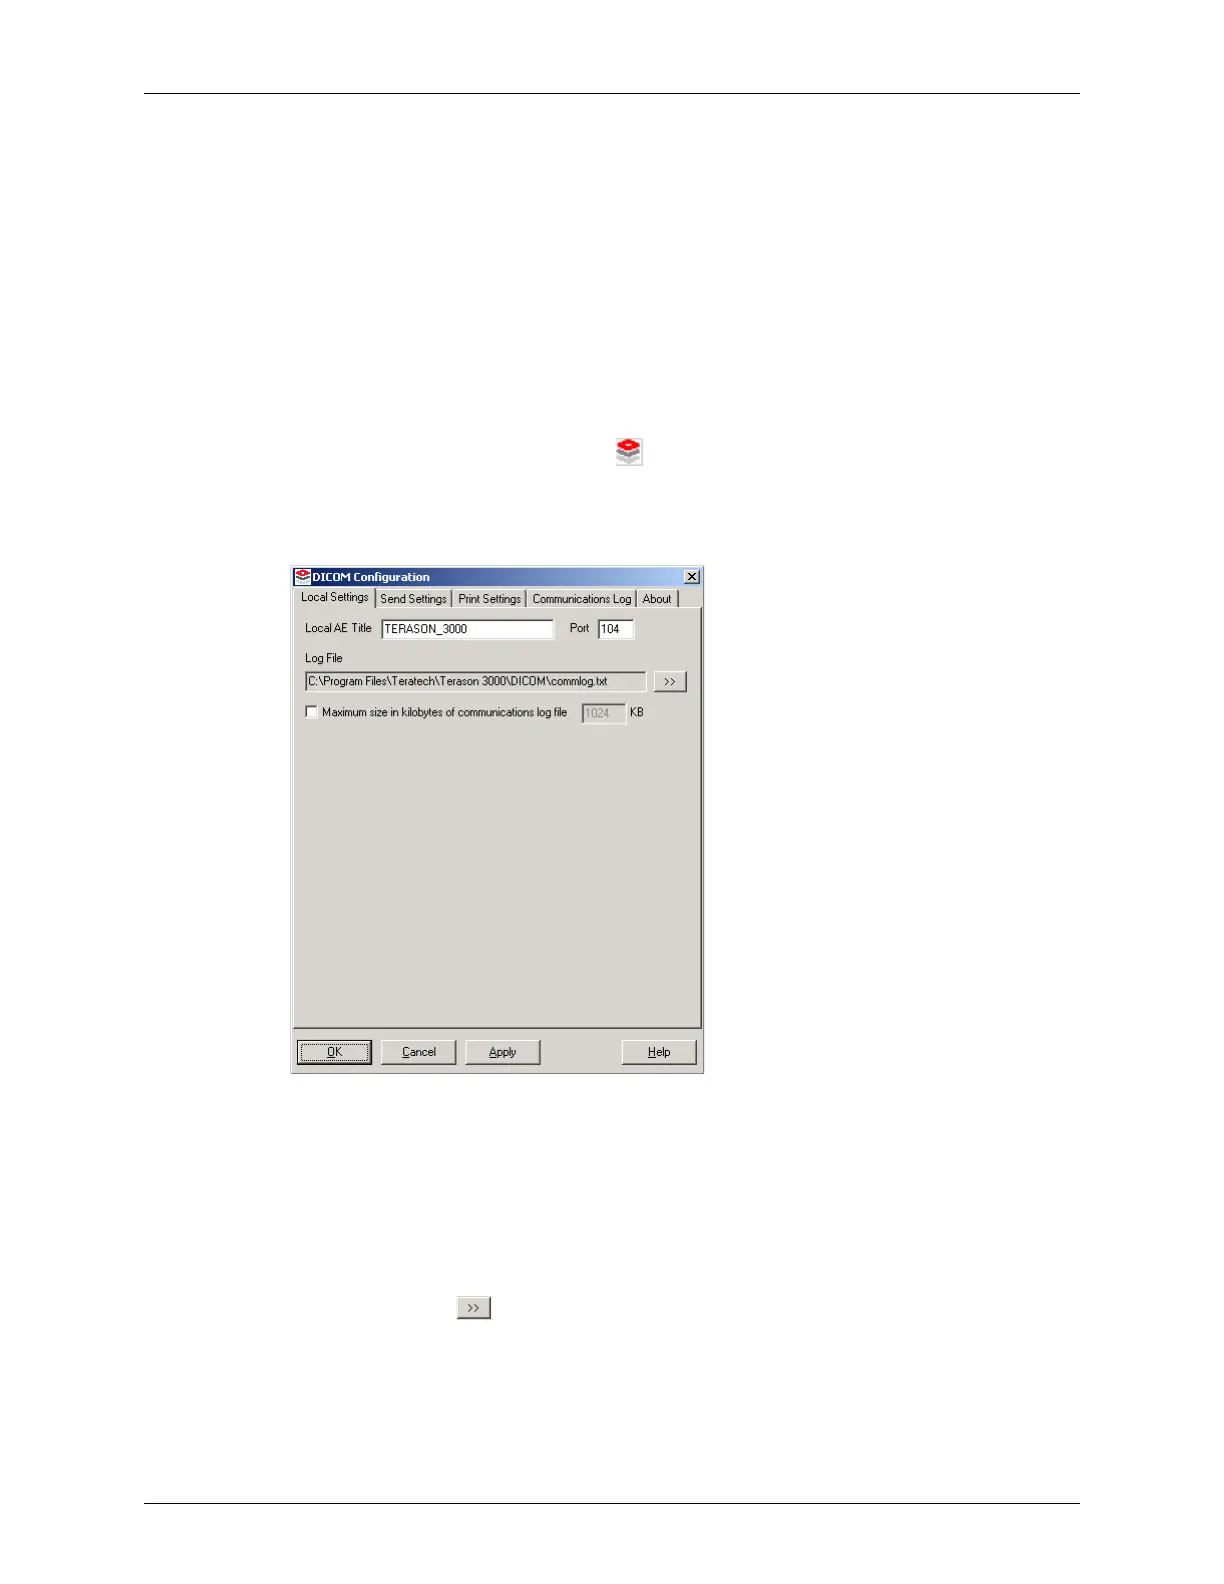
DICOM Configuration Window / Local Settings Tab
2. Configure the Local Settings tab:
a. Verify that the Local AE Title and port number are correct for your DICOM server.
The default values are
TERASON_3000 and 104, respectively. Your server or network
configuration may require different values, especially if your facility has more than
one Terason Ultrasound System.
b. If necessary, select a different path and file name for the communication log by
clicking the button and using the Windows dialog boxes to select a different
location.
c. To limit the size of the communications log file, select the check box and enter a
value in the KB text box. When the maximum size is reached, the system overwrites
the oldest entries.