Maintenance
2722−2/A1
Winterthur Gas & Diesel Ltd.
5/ 8
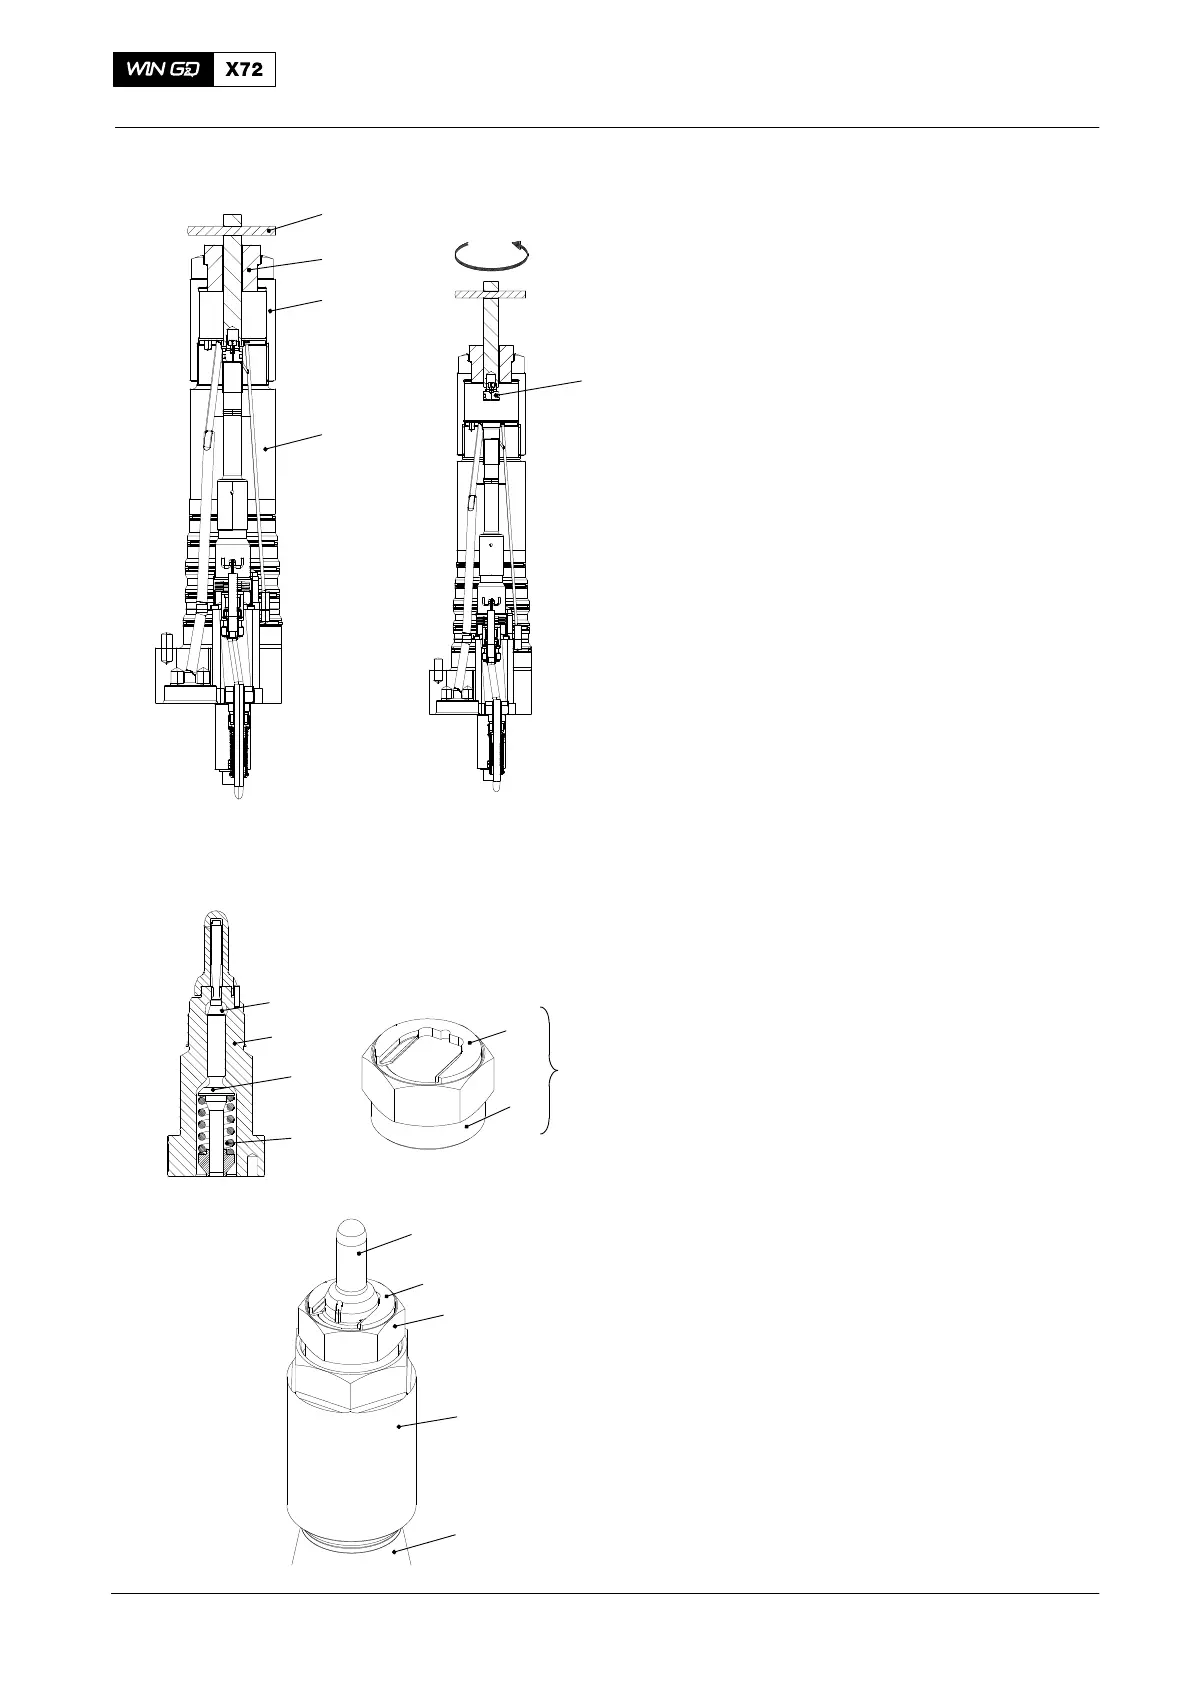
4.2 Pilot Valve − Removal
1) Remove the pilot valve (3, Fig. 3) from
the injection valve (2) as follows:
Note: When you do the step blow, it is
not necessary to torque the
coupling nut (1).
2) Attach the coupling nut (1) to the
injection valve (2).
3) Attach the bush (94289C) to the
coupling nut (1).
4) Put the T-handle (94289A) in position
as shown.
5) Engage the T-handle (94289A) with the
pilot valve (3).
6) Turn the T−handle (94289A) to remove
the pilot valve (3).
7) Examine all parts for damage and
corrosion. Replace parts that have
damage or corrosion.
5. Nozzle Tip − Replace
5.1 Removal
Note: It is possible, but not
recommended, to replace the
nozzle tip with the needle installed.
Remove only the locknut.
1) Do the procedure given in paragraph 4,
step 1) to step 7).
2) Make sure that the needle (1, Fig. 4),
compression spring (4) and tappet (3)
are removed from the nozzle body (2).
3) Attach the nozzle body (2) with
coupling nut (6) to the injection valve
(7) on the test bench.
4) Attach the hexagonal nut (D1, 94278A)
to the nozzle body (2).
5) Put the plate (D2) in the clearance
between the nozzle body (2) and the
nozzle tip (5).
6) Carefully turn the hexagonal nut (D1)
up to remove the nozzle tip (5).
7) Remove the nozzle tip (5) from the
nozzle body (2).
8) Remove the tool (94278A) from the
nozzle tip (5).
2015
Injection Valve: Disassemble, Checks, Assemble Injection Valve with FAST
94289A
94289C
3
WCH02427
Fig. 3
1
2
Fig. 4
D1
D2
94278A
WCH02740
WCH02428
6
WCH02741
D1
D2
1
2
4
3
5
7