Maintenance
5612−1/A1
Winterthur Gas & Diesel Ltd.
3/ 4
6. Installation
1) If the VCU is a new item, carefully
remove it from its package.
WARNING
Injury Hazard: You must
put on gloves and eye
protection when you use
white spirit. White spirit
can damage the skin and
eyes.
2) Use white spirit, e.g. Shellsol TD,
Shellsol T or Solvent FP68 to clean the
VCU.
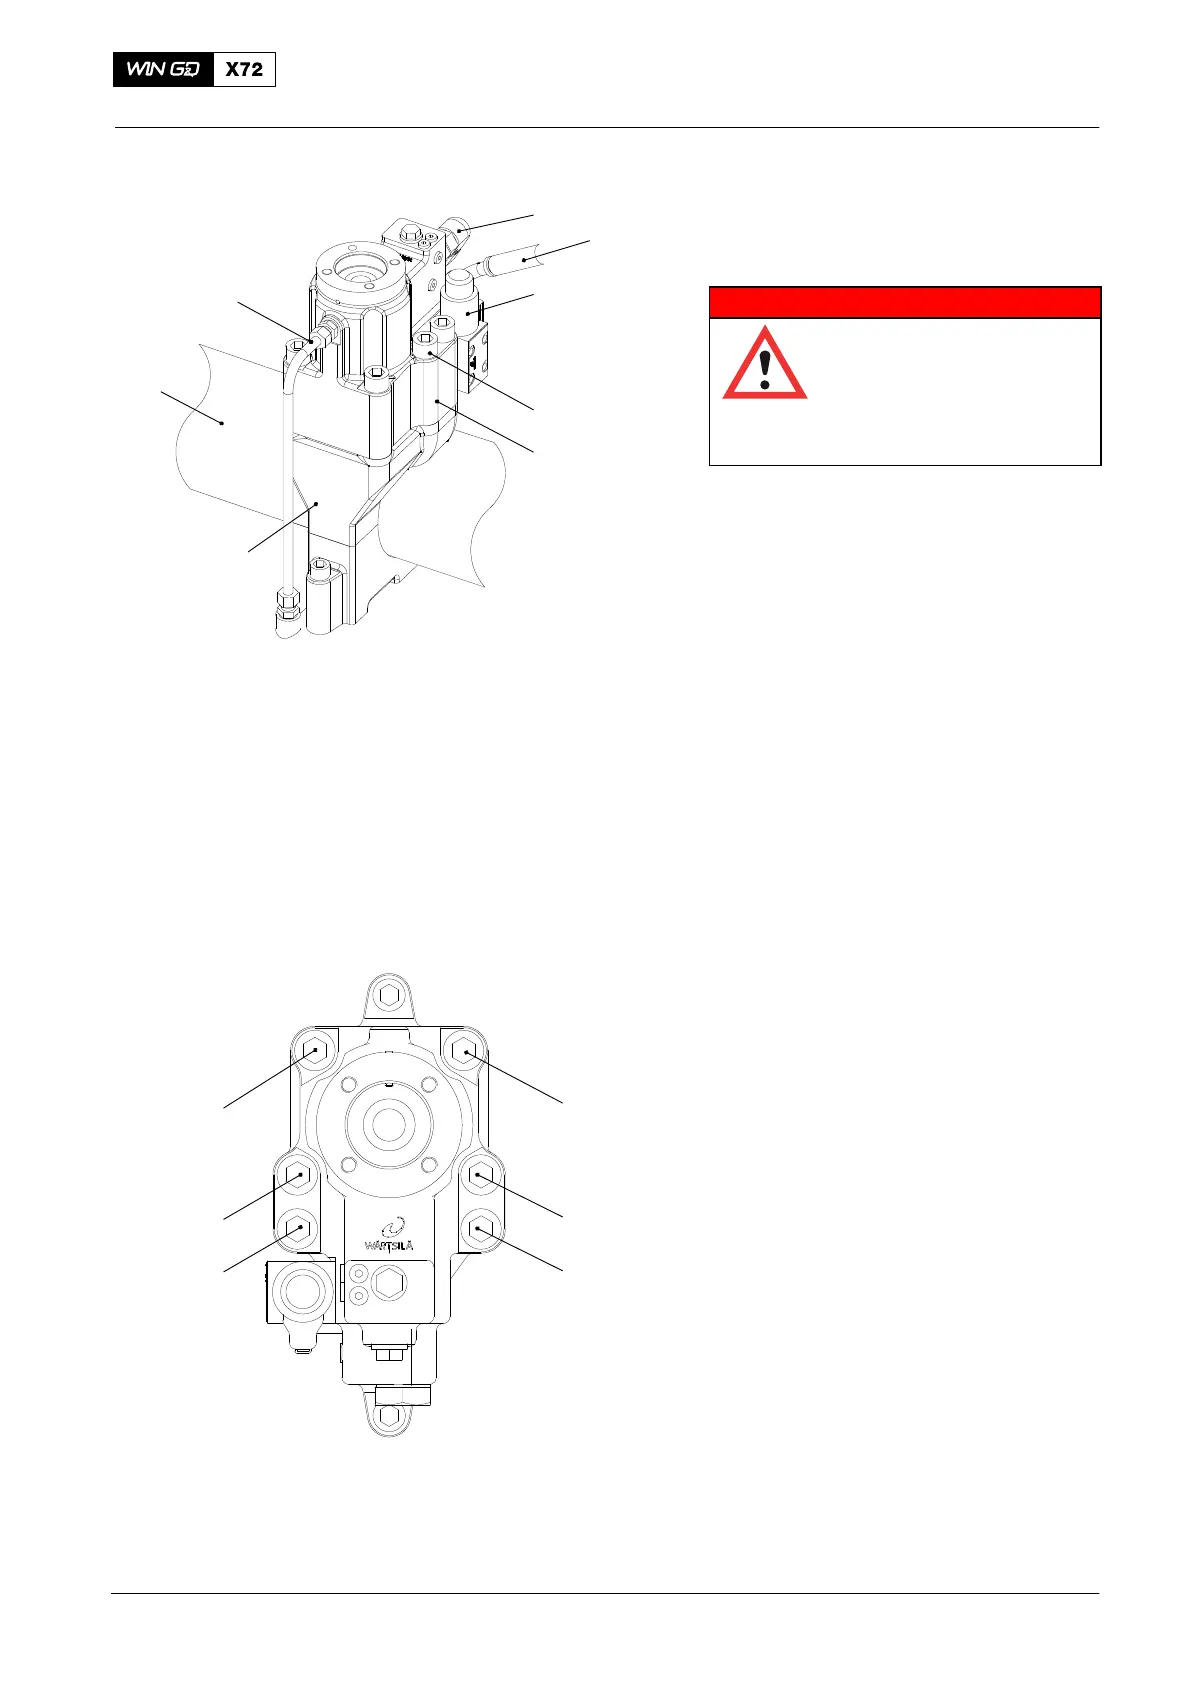
3) Remove the blanks from the ports in
the VCU (5, Fig. 3).
4) Remove the protection from the
holder (6) and the servo oil rail (7).
5) Clean the seating surfaces of the VCU
(5) and the holder (6).
6) Make sure that the seating surfaces of
the holder (6) and the VCU (5) have no
damage.
7) Carefully put the VCU (5) in position on
the holder (6).
8) Apply oil to the threads of the six
screws (4).
9) Tighten with your hand the six
screws (4).
10) In the sequence given in Fig. 4, torque
the six screws to 350 Nm.
11) Install the supply pipe (8, Fig. 3) to the
VCU (5).
12) Install the return pipe (1) to the
VCU (5).
13) If the VCU (5) installed is adjacent to
the driving end of the servo oil rail (7),
do step a):
a) Install the HP hose (2) to the
VCU (5).
14) Connect the electrical connection to the
4/2-solenoid valve (3).
7. Completion
1) Install the hydraulic pipe, see 8460−1.
2) Put the replaced VCU in its original
package.
3) Put the replaced VCU in an applicable
dry storage area. The storage area
must not be contaminated (e.g. with
exhaust gases or corrosive air).
2015
Exhaust Valve Control Unit: Removal, Disassemble, Assemble, Installation
WCH02299
a
e
d
c
f
b
Fig. 3
Fig. 4
4
1
8
7
6
5
3
2
WCH02370

 Loading...


