Maintenance
2303−1/A1
Winterthur Gas & Diesel Ltd.
3/ 12
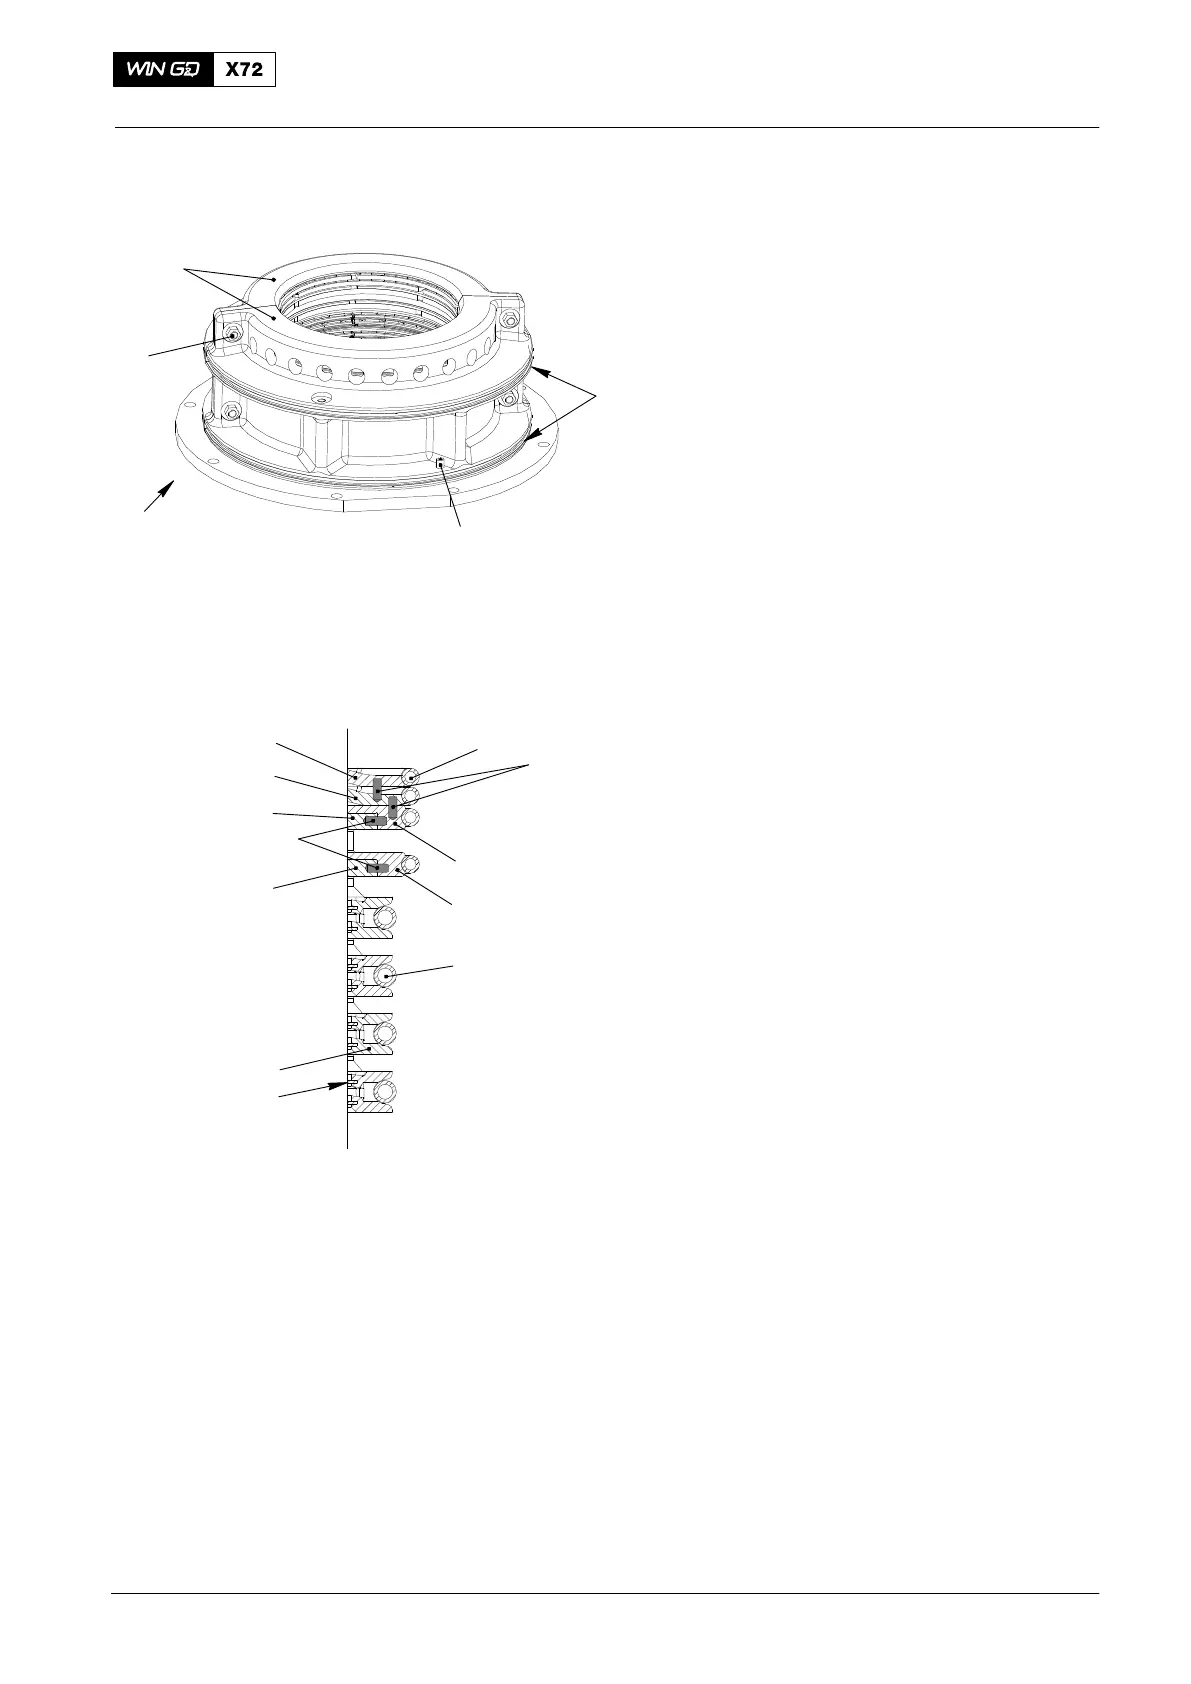
2.2 Piston rod gland − disassemble
1) Remove the four screws (3) (see
Fig. 4).
2) Remove the O-Rings (5).
3) Push the two parts of the housing (2)
away from the piston rod.
4) Remove the two parts of the
housing (2).
5) Remove the spring dowel pin (4).
6) Remove the parts that follow (see
Fig.5):
D Tension springs (19, 20)
D Scraper rings (10, 11, 16)
D Gaskets (12, 13, 14)
D Spring dowel pins (17, 18)
D Ring supports (15).
2.3 Wear Measurement
Note: You can find the maximum permitted wear in 0330−1 Clearance Table,
Piston Rod Gland. If necessary, replace the worn parts.
1) Compare the wear of the parts that follow (see Fig. 5):
D Scraper rings (10, 11, 16)
D Gaskets (12, 13, 14).
2) Make sure that the tension springs (19, 20, Fig. 5) and O-ring (5, Fig. 4) are
serviceable. If necessary, replace the unserviceable parts.
2014
Replace, Assembling, Wear Measurement
Fig. 4
3
4
1
WCH02376
2
5
Fig. 5
16
15
19
12
11
10
13
14
12
20
WCH02292
18
17