Maintenance8447−1/A1
Winterthur Gas & Diesel Ltd.
2/ 5
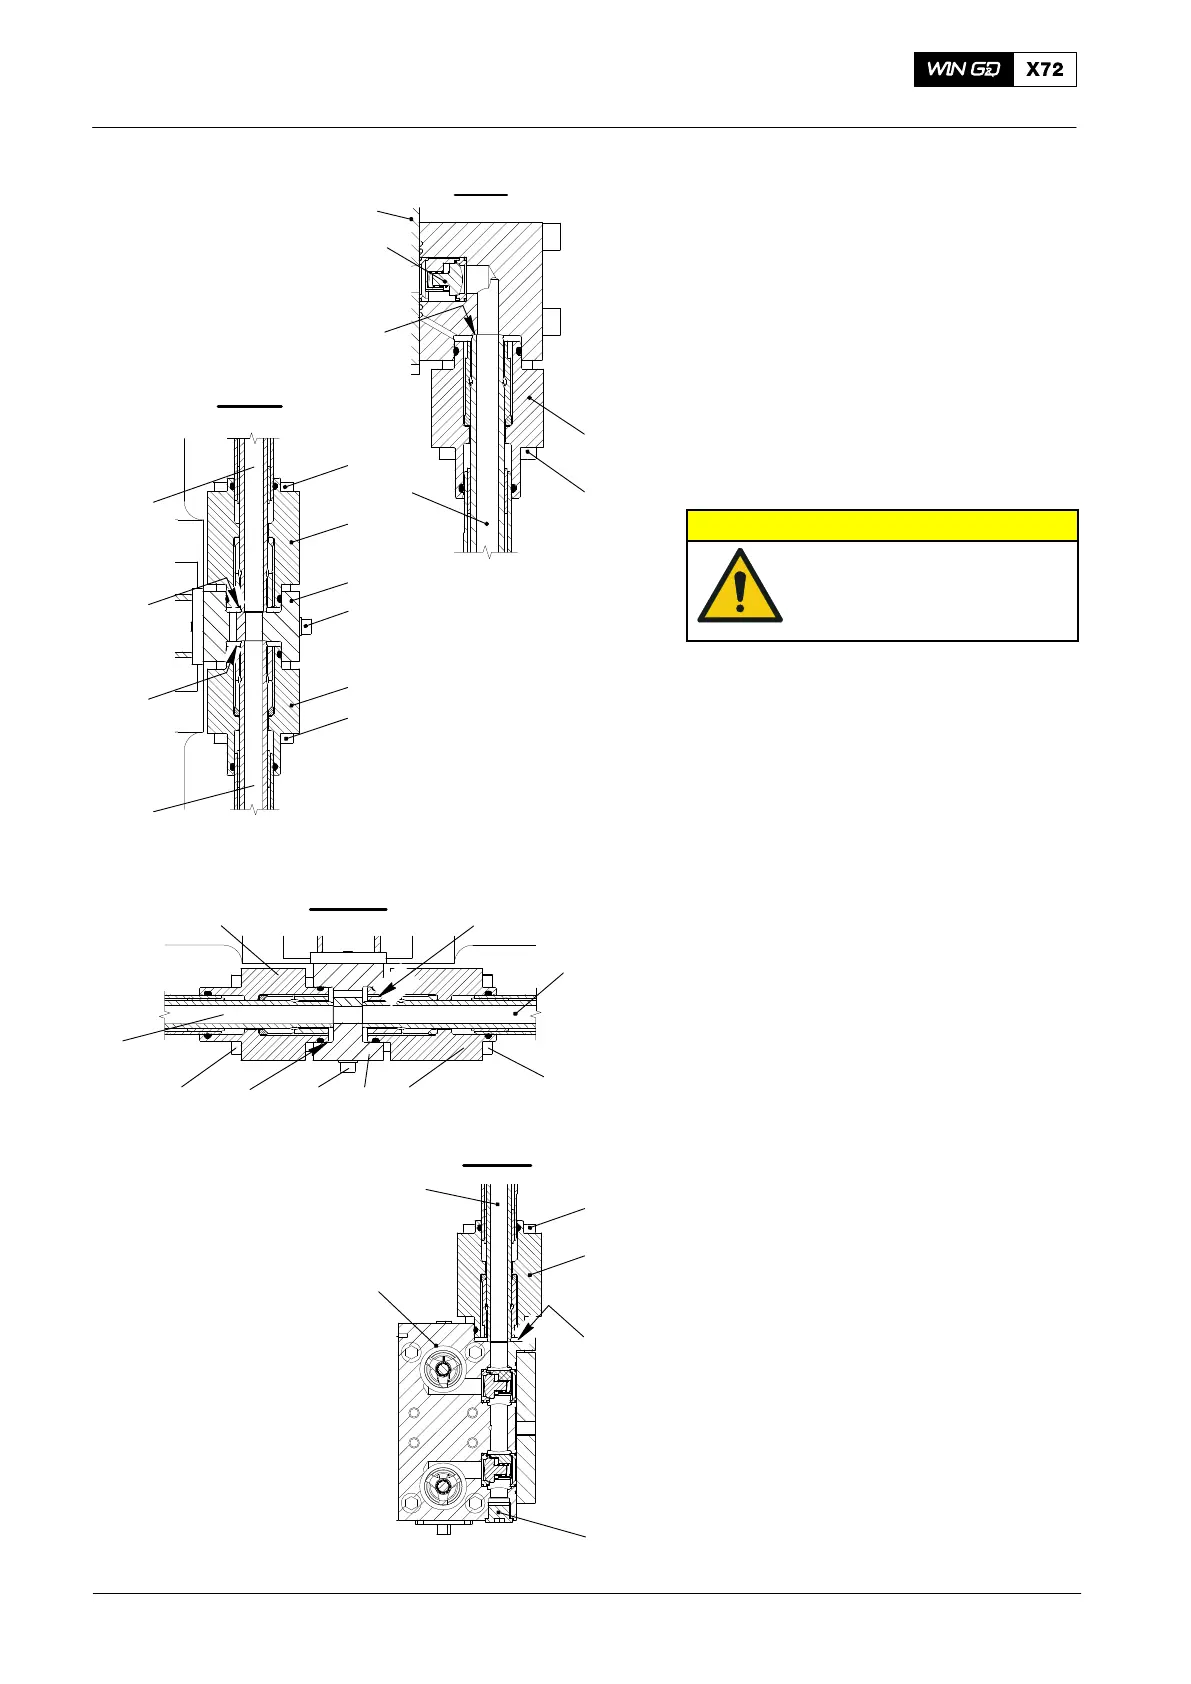
4) Loosen the screw plug (22, Fig. 2) to
drain the HP servo oil pipes (3, 12 and
13).
5) On the flange (1), loosen the four
screws (2).
6) Push down the flange (1) to get air into
the HP servo oil pipe (3).
After approximately one minute, the oil will
drain from the servo oil pipes.
2. Removal
CAUTION
Damage Hazard: Make sure
that you do not damage
the sealing faces or the HP
servo oil pipes.
1) Remove the four screws (20) from the
flange (21).
2) Move the flange (21) up.
3) Remove the four screws (14) from the
flange (15).
4) Move the flange (15) away from the the
intermediate piece (16).
5) Remove the two screws and
washers (17) from the intermediate
piece (16).
6) Carefully remove the HP servo oil
pipe (13).
7) Apply protection to the sealing
faces (SF) to prevent damage.
8) Remove the four screws (18) from the
flange (19).
9) Move the flange (19) away from the
intermediate piece (16).
10) Remove the intermediate piece (16).
11) Remove the four screws (11) from the
flange (10).
12) Move the flange (10) down.
13) Carefully remove the HP servo oil
pipe (12).
14) Apply protection to the sealing
faces (SF) to prevent damage.
2015
HP Servo Oil Pipe: Removal, Grind the Sealing Faces and Installation (with Hawe SOP)
4
I - I
II- II
2
1
SF
5
WCH02240
WCH02240
III-III
WCH02240
Fig. 2
WCH02240
IV-IV
3
8
9
7
10
6
11
SF
3
12
SF
12
13
SF
15
14
18 1617
SF
19
20
21
22
13
SF
23

 Loading...


