Maintenance2722−1/A1
Winterthur Gas & Diesel Ltd.
2/ 3
2. Installation
CAUTION
Injury Hazard: When you
do work with white spirit,
always put on gloves and
safety goggles that have a
closed side frame. White
spirit can cause damage to
your skin and eyes.
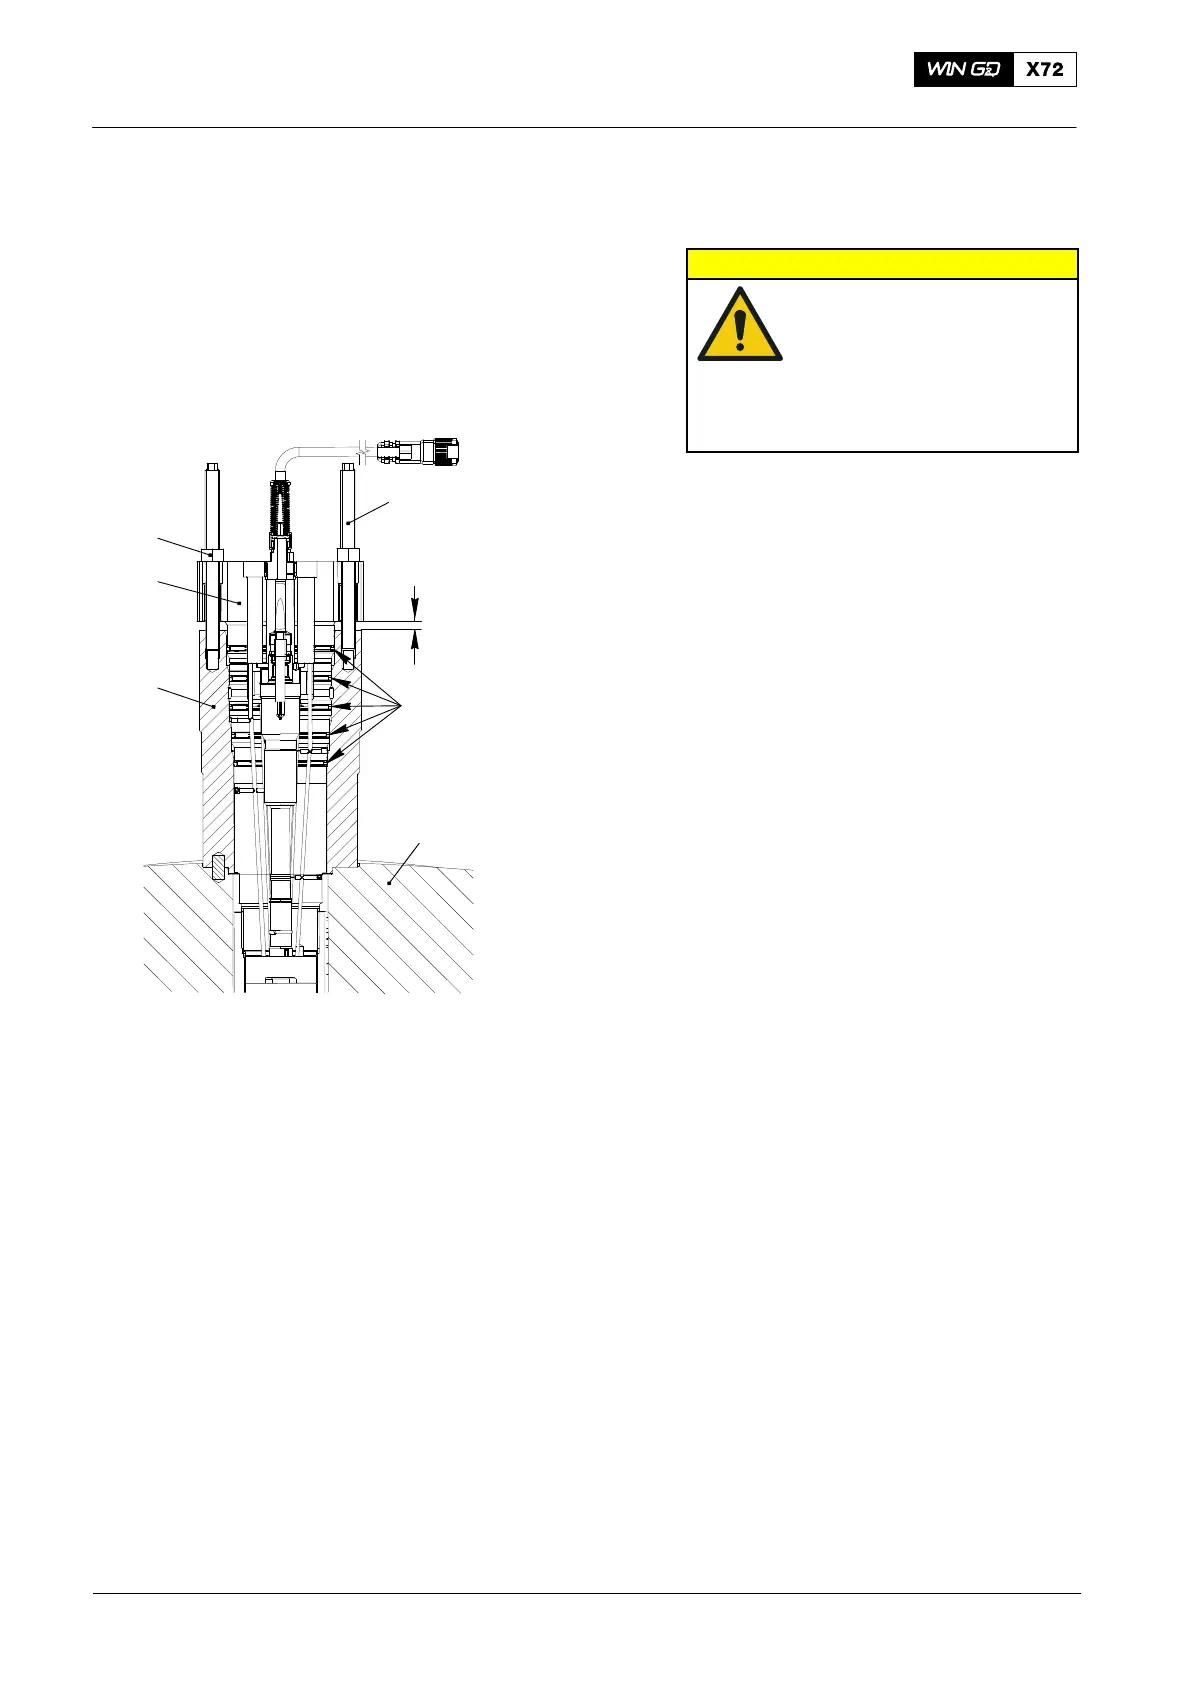
1) If applicable, remove the new injection
valve from the package.
2) Use white spirit e.g. Shellsol TD,
Shellsol T or Solvent FP68 to clean and
remove grease from the injection valve.
3) Do a check of the condition of the
sealing face in the cylinder cover (2,
Fig. 2). If necessary, re-grind the
sealing face, refer to 2708−3.
4) Put oil on the five new O-rings (1).
Note: The five O-rings (1) are included in
the spare parts set for the injection
valve.
5) Put the five O-rings (1) in their correct
positions on the injection valve (4).
6) Carefully put the injection valve (4) into
the valve bush (3).
7) Turn the two stud bolts (94270D) into
the valve bush (3) as shown in Fig. 2.
8) Turn equally the two nuts (7) to push
the injection valve into the valve bush
(3).
Note: A relatively high force is needed to
overcome the resistance of the five
O-rings. When the O-Rings are
compressed it will become easier
to push the injector in.
Note: The injection valve is fully in when
the nozzle body of the injector is
sealing with the cylinder cover (2).
This will be recognized by a
suddenly increasing force.
Theoretically the distance between
the injection valve and the valve
bush is approx. 7mm.
9) Remove the two stud bolts (94270D).
2015
94270D
1
WCH02390
Fig. 2
2
approx. 7 mm
4
3
7

 Loading...


