Maintenance
2751−3/A1
Winterthur Gas & Diesel Ltd.
3/ 5
5) Turn equally the three jack screws (4,
Fig. 2) until the valve seat (1) falls out
of the valve cage (2).
6) Lift and move the valve cage (2) away
from the valve seat (1).
7) Remove and discard the O-ring (3).
8) Remove the tool (94261).
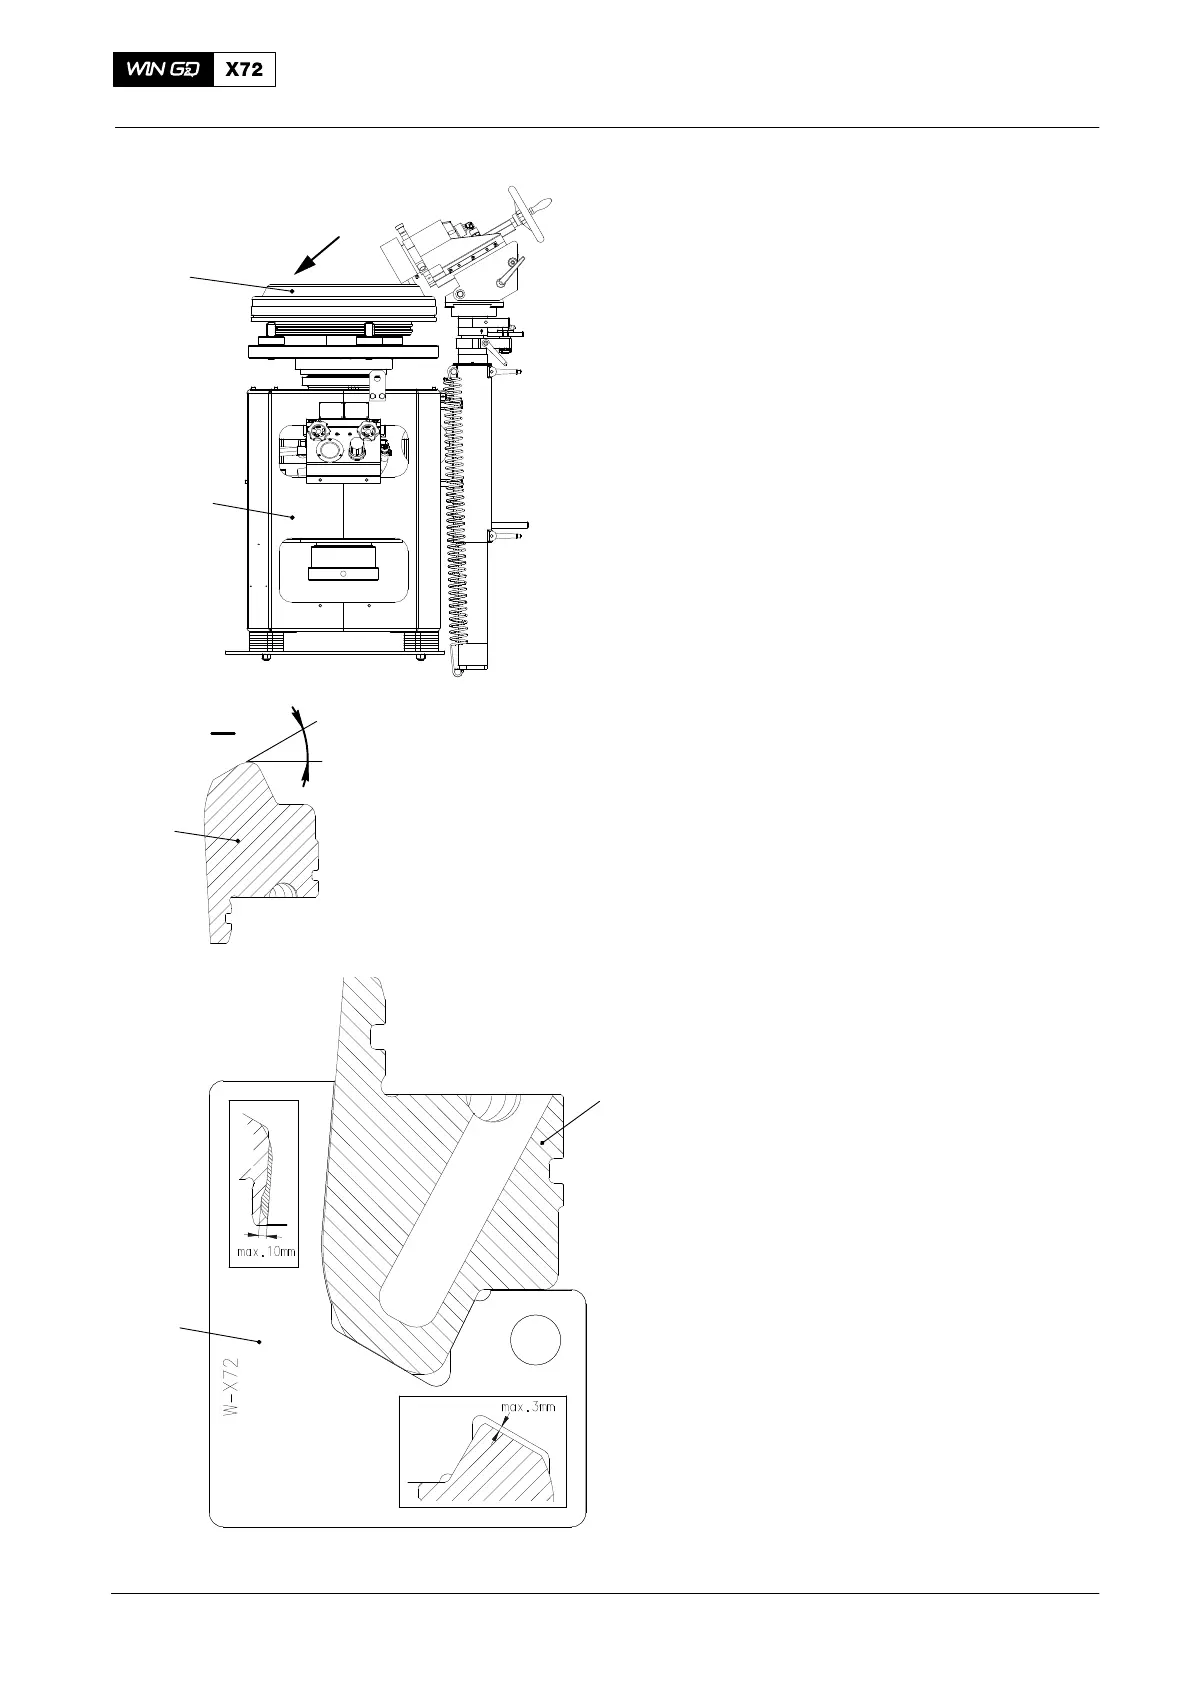
4. Valve Seat − Grinding
Use only the grinding tool (94291, Fig. 3) to
grind the valve seats.
1) Read the data in the manufacturer’s
manual for the grinding tool (94291).
2) Put the valve seat (1) in the correct
position on the grinding tool (94291).
3) Put the gauge (94279, Fig 4) on the
valve seat.
Note: The data on the gauge (94279)
shows the maximum permitted
limits for the valve seat (1).
4) Use the feeler gage (94122) to
measure the values.
5) If the measured values are more than
the limits given on the gauge (94122),
you must replace the valve seat (1).
6) If the values are less than the limits
given, do step a) and step b):
a) Use the tool 94291 to grind the
sealing face of the valve seat (1).
Make sure that you get a smooth
and flat surface.
b) Keep the valve seat angle to
between 30°0' and 30° 2’.
2015
Valve Seat − Replace / Grind
94291
1
WCH02361
94279
WCH02361
1
1
Between:
30°0' and 30°2’
II
I
Fig. 3
Fig. 4